Every woman should be able to apply makeup. To make it high-quality and beautiful, you need to do everything in stages. There are many tutorials and descriptions for beginners to learn how to apply makeup correctly.
Basic makeup rules
Makeup allows you to highlight the advantages and hide the flaws. It can enlarge the eyes and lips, make the nose smaller, highlight the cheekbones and make the face more expressive.
You need to follow the basic make-up rules:
- even tone of the face;
- the obligatory use of powder to combine oily and dry textures;
- when doing daytime makeup, you do not need to highlight the eyes with bright and black tones;
- you need to remember about blush and eyeliner, which seem to be a trifle, but make the makeup complete.
It is important to take care of your skin before applying decorative cosmetics. Fatty should be dried with a tonic, dry - moistened, on mature - apply a tightening lifting complex.
Face preparation
Applying makeup in stages for beginners should begin with preparing the skin of the face and will depend on the woman's age and skin type:
| Procedure | Recommendations |
| Cleansing and washing | To improve your complexion, it is recommended to wash your face with cool water, you can use mineral |
| Applying a toner or moisturizer, depending on your skin type | Alcohol-based toners can be used for teens to prevent acne. |
| Moisturizing | It is recommended to use creams based on hyaluronic acid, as it is able to provide a deep level of hydration at the cellular level. |
Cleansing
To cleanse your face, you can use several types of cosmetics:
- Makeup remover cream, cleansing milk or micellar water is used if there is already makeup on the face and needs to be removed. With the help of a special tool and a cotton pad, rub the skin along the massage lines.
- Scrub or exfoliation not used daily, but 1-2 times a week, depending on the condition of the skin. Instead of a purchased scrub, the product can be prepared at home using a wash gel and any abrasive product (ground coffee, salt, sugar, crushed walnut shells).
- Foam for cleansing applies to delicate skin. For example, such a product is recommended for girls under 18. It is also used for the skin around the eyes, where scrubs cannot be rubbed.
Toning
Tonics help to narrow the pores, due to which the water-fat balance of the upper layer of the epidermis is normalized. They also enhance the effects of nourishing and moisturizing creams. For oily skin, alcohol-based toners are recommended, which have a slight drying effect and an antiseptic effect.
For normal skin, it is enough to use means for refreshing and fortifying. Instead of purchased products, you can tone the skin with aloe, cucumber juice or frozen ice cubes made from a decoction of herbs (chamomile, calendula, string).
Moisturizing
You can use any day cream, fluid, or serum to moisturize. Also suitable for this purpose is a cream base for makeup, which has a moisturizing effect and evens out skin tone before applying foundation or correctors.
Even out the tone of the face
One of the main stages of make-up is to level the tone of the face, which takes place in several steps:
- correction of problem areas - acne, inflammation, scars;
- applying a tonal foundation and evenly distributing it over the face with a sponge (beauty blender) or a brush;
- covering the face with powder (can be transparent mineral or matched to the skin tone).
Face reshaping
Facial contouring, or face shaping, involves the play of light and shadow on the face, which allows you to highlight your strengths and hide flaws, such as a double chin, a high forehead or a wide nose. Correction is carried out with a dark foundation.
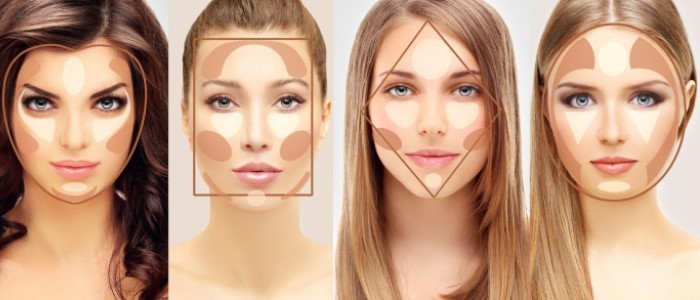
It is applied to those areas that need to be reduced - the lateral edges of the nose, the area of the lower jaw, the forehead at the root of the hair. It is important to thoroughly shade the makeup so that all colors smoothly pass into each other, only then the makeup will be of high quality.
Eyebrow shaping
Applying make-up implies a gradual shaping of the eyebrows. If earlier thin thread-like eyebrows were considered classics, then today the canon of world fashion is wide fleecy, which not every woman has.

For beginners, the algorithm of actions will be as follows:
- With an eyebrow brush, you need to comb the hairs according to their growth in order to evaluate their shape.
- For decoration, you can use eye shadow, pencil or special eyebrow wax (not recommended for beginners).
- We need to draw the shape.
- When using a pencil, individual hairs are drawn.
- If shadows are applied to the eyebrows, then the shape drawn earlier is drawn with an oblique brush.
Eye makeup
There are many techniques for applying eye shadow. The most widespread type of make-up, which has already become a classic, is “smoky eyes”, and its versatility lies in the fact that this technique can be used for both daily nude makeup and a bright evening version.
Smokey ice consists in long-term and high-quality shading of color, which creates a shadow from a moving eyelid to a fixed one. To do this, it is best to use the "barrel" brush, which will quickly and efficiently help to arrange the color on the eyelid, even for a beginner.
Drawing arrows and eye contours
Sequencing:
- Before applying color to the eyelid, you need to apply a base or concealer, shade and cover with powder to dry the skin. Dry components cannot be applied to creamy oily ones.
- An arrow is drawn over the growth of the eyelashes using a bold black or brown pencil. It is not necessary to make it even, as it will be shaded with the "barrel" brush.
- For shading, the color must be stretched evenly from the lash line to the extreme line of the movable eyelid. This will be the backing, that is, the layout of the future makeup.
- With shading, you can correct the shape of the eyes. For example, if the color is pulled towards the temples, you can get a slanting "feline" look. Without making arrows, you can visually reduce the eyes.
Applying shadows
First you need to decide on the color of the shadows. You need to build on the mood, clothes and natural eye color:
- for green-eyed shades of pink, blue, brown, terracotta are suitable;
- bright shadows of orange, pink or blue shades look spectacular under blue eyes;
- it is better for gray-eyed people to use black and white makeup, blue, pink shades;
- brown eyes are universal, any type of makeup and color scheme will suit them.
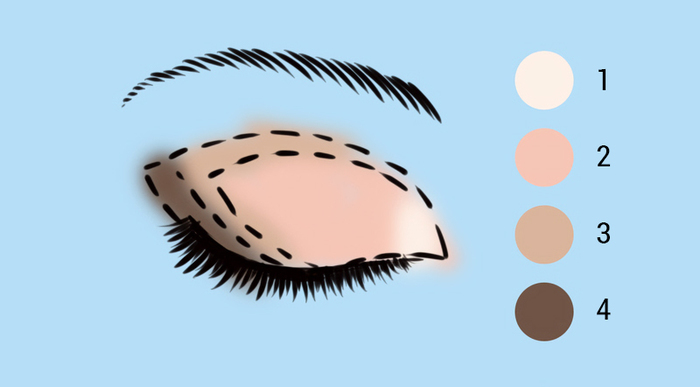
Shadows need to be applied in 2 stages:
- Closer to the outer corner, you need to put a darker color on the eyelid (on the already shaded substrate). Then a fluffy brush is taken, placed in the middle on the line between the movable and motionless eyelids and arched movements, the color spreads over the eyelids, leaving a shadow. It is important not to press the brush, the easier it touches the skin, the more beautiful the result will be.
- Further, with the same "barrel" brush only of a smaller diameter, you need to shade the shadow under the lower eyelid. From the outer corner is wider, to the inner corner - to nullify.
- After that, a light or mother-of-pearl shadow is applied to the inner corner of the movable eyelid and fading along with the dark color. It is important to apply shadows with a flat brush, patting movements, so they will not fall on the face.
- It is important to highlight the inner corner and the area under the eyebrow. To do this, you can use light shadows or a highlighter, a drop of which is applied in the middle under the eyebrow and shaded in both directions with an arched movement.
- When the shadows are applied, you can, if you wish, draw an arrow with eyeliner or make a kayal with a bold pencil (kayal is a technique for staining the mucous membrane of the eyelid).
If you don't have experience with eyeliner, it's best not to risk it, because you can ruin all your makeup.
How to dye eyelashes
In order to highlight the lashes, mascara is used. There is a huge selection of colors and shapes of brushes that add length, volume, "fox" look and more.
If the eyelashes are extended, you do not need to paint them. If during the dyeing of the eyelashes the eyelid is accidentally smeared, you need to wait until the mascara is dry and wipe it with a cotton swab.
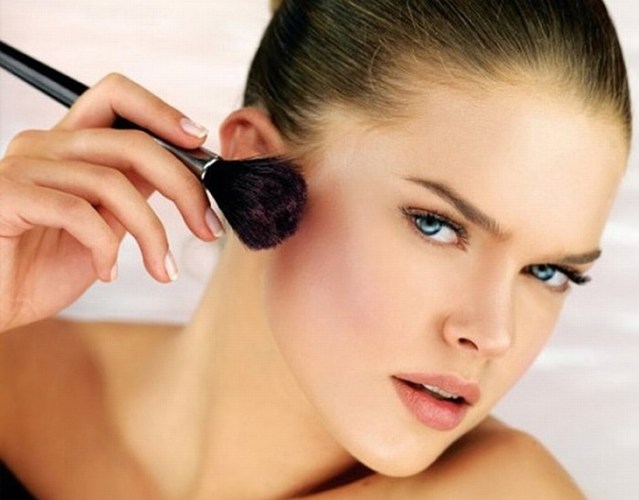
Applying blush
Step-by-step instructions for applying blush:
- Highlight the area under the cheekbone from the chin to the temple.
- Blush is drawn on a wide fluffy brush.
- The product must be shaded to such an extent that there are no clear edges.

Applying blush
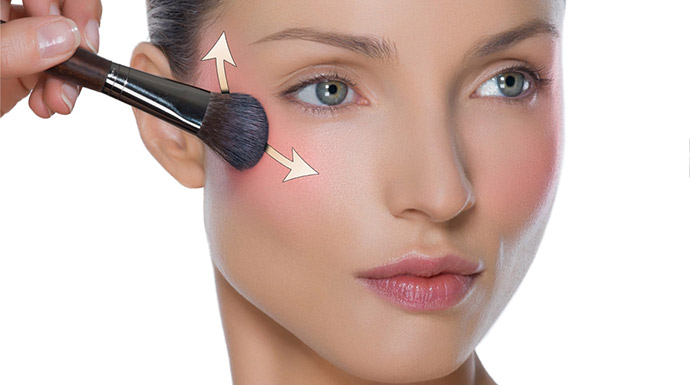
It is very important that the blush is very slightly different from the skin tone. It is unwise to apply red or brown stripes on the cheekbones, which clearly stand out. The blush gives the skin a healthy complexion and emphasizes the sparkle in the eyes, so there is no need to exaggerate with its amount.
Lip makeup
Applying makeup in stages for beginners also means proper lip coloring.
Lip makeup is a separate science, but for beginners, you can use the standard scheme:
- First, a moisturizer is applied to the lips, but it should not be oily.
- The base (foundation) is applied on top.
- The contour is drawn and shaded until the dense clear edge disappears.
- The lips are painted with lipstick (in order for it to last longer, you can powder it on top and apply another layer).
- Shine is applied if desired.
Drawing the contours of the lips
The lip contour is drawn only if lipstick is used. If a transparent shine or nude is used, then the contour can be omitted. For this, lipstick or pencil is used. With this technique, you can shrink, enlarge or straighten your lips.
If correction is not needed, the contouring is applied on the lip border with a thin line and shaded towards the middle. It is recommended to match the pencil to the color of the lipstick. Different shades of lips and contours are the fashion of the last century and today such lip makeup is considered bad form.
Choosing and applying lipstick
Lips can be covered in several ways:
- Apply lipstick to the entire surface, shade with a lip brush and compare with the contour.
- 2 colors of lipstick are applied, closer to the corners - darker, and towards the middle - the color is lighter (this method allows you to visually make your lips plump).
- On top of the lipstick, you can apply a transparent colored or shimmery gloss to add plumpness and gloss to your lips.
It is worth remembering that lipsticks can be matte and glossy. The former look dimmer, but tend to stay on the lips longer, unlike glossy, shiny and liquid products last 1-2 hours.
Finishing touches
Makeup application step by step for beginners is complete.
You can add a few more notes:
- An illuminator or highlighter is applied to the cheekbone over the blush. These are shiny pearlescent products that give your face a healthy glow. They can also highlight the bow above the upper lip and the tip of the nose, which will visually make it thinner. Both products can be creamy or dry.In winter, it is recommended to use liquid and oily consistencies, and in summer, when it is hot, dry.
- To fix the makeup on your face, you can use thermal water, which will create an invisible mask over the makeup and protect it from moisture. This product can be purchased at any beauty boutique.
It is important to observe all the step-by-step points in applying makeup in order to achieve the beauty and quality of make-up. For beginners, you can purchase all sorts of brushes and stencils that will help you evenly shape your eyebrows, lips, eyelid arrows or contouring the face as a whole.
Makeup video
A detailed tutorial on applying makeup: