"Everything is in your hands, so they should be in perfect order." - pointed out Coco Chanel when asked about the main secrets of her beauty. It is important to monitor the condition of the skin of the hands and nails not only in terms of preventing possible diseases, but also because the hands are one of the important parts of the body. The interlocutor pays attention to them immediately after the appearance and face.
Manicure designs in dark shades are gaining popularity this season as a change from natural pastels, delicate and nude shades in the previous one. But in order to make a beautiful and original manicure, it is important not only to choose a fashionable color, but also to know stylish techniques in order to be in trend.
It is especially difficult to make a beautiful manicure with black varnish for short nails, because the black color symbolizes severity and classic staple, and the nail bed does not have enough space to implement the ideas of the played out fantasy.
Moon manicure
In the classic moonlit style, a manicure with dark varnish is suitable for women of all ages. Lunar manicure dates back to 1920, 20 years after the popularity did not subside. In this design, the base either stands out with color or remains unpainted, creating a variety of shapes on short nails.
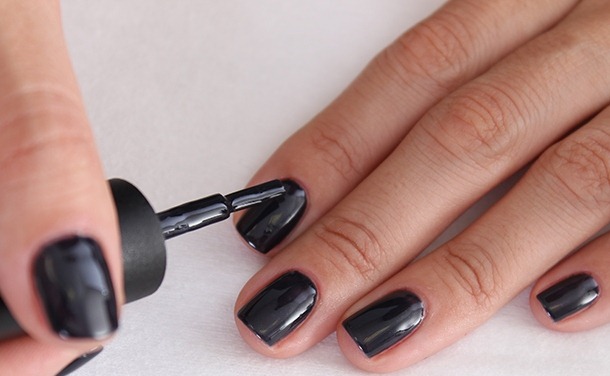
- Prepare the nail plate after degreasing with a special agent.
- Apply and dry the base.
- Then apply black varnish to form a "hole" at the base of the nail. It is advisable to cover with 2 layers of varnish, remembering to pause for 40-60 seconds after each staining.
- Then the nail is covered with a fixing varnish.
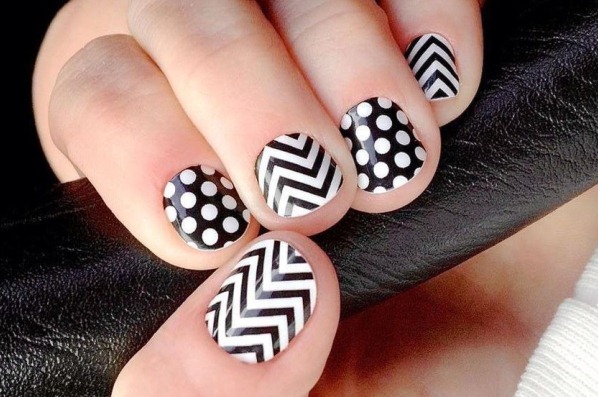
Geometric patterns with black tones
Spectacular appearance and ease of application - these are the trump cards of geometry in nail design. Armed with stencils, nail tape and imagination, an elegant black manicure is created. If there are no special devices, it is possible to use household items that are at home (standard tape, threads, your own stencils, stickers, etc.).
- The nail must be degreased and a base applied to it.
- Patterns are applied to the colored layer of varnish, they are manually made with a thin brush or a toothpick.
- After complete drawing, the layers are covered with a fixer.
Black jacket
French classics have their roots in the eighties and are still popular with women today. Base in the "smile line" at the edge of the nail. There are many variations of this design, from ombre to strict lines.
- The base is applied to the clean surface of the nail.
- Pre-prepared stencils are applied to the edge so that the remaining area remains exactly under the black varnish.
- At the tip of the nail, the varnish should lie in two layers, so the color will be richer, and the surface is resistant. For long-term wear, it is recommended to fix the result with transparent varnish.
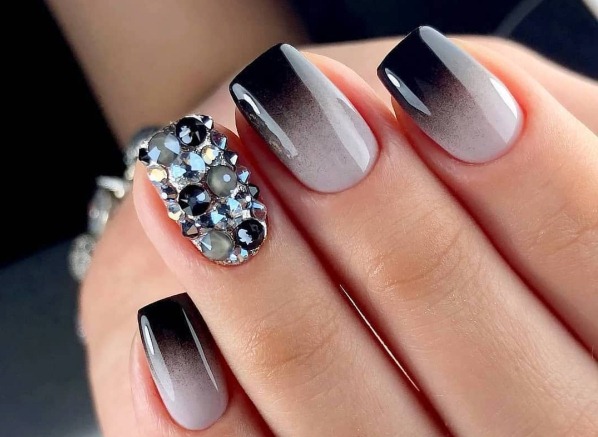
Ombre and gradient manicure
A manicure based on a gradient, a gradual change in color shades. There is an opinion that ombre is the same as a gradient, this is partly true, but ombre is distinguished by a smooth color transition, while the black varnish will remain in the same shade.
There are 3 types of gradient: horizontal, vertical, and transition. All will suit short nails.
Gradient with transition
- The first layer will be the base.
- Then white and black shades are taken. Gradually moving from one finger to another, black is added to the white varnish so that each finger is a shade darker.
- Secure.
Horizontal and vertical gradient
- The staining area is covered with a base.
- Here both contrasting and similar colors are taken. They are applied either with a special roller or with a melamine sponge. In a horizontal transition, the shade changes from the cuticle to the end of the nail, and in a vertical gradient it changes from one side to the other. A variation of several varnishes looks original.
- Fixed by the base.
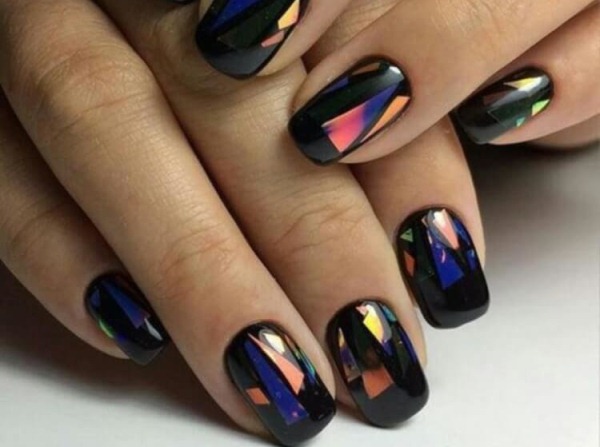
Broken glass manicure
This look came to the world straight from South Korea, which is the main trendsetter. You don't need glass to create an original design; holographic foil is used for this effect.
Instead of special foil, you can use homemade foil or mica. The shape of the material is different, it is recommended to apply it on a transparent or pastel base. Also, a manicure with broken glass is combined with other types of design.
- Having previously degreased, a base with a sticky layer is applied to the nails, then dried in a special lamp.
- Coating with colored varnish in 2 layers. In this case, do not dry the second layer.
- The pre-cut foil is glued to the nail and already dried in UV.
- At the end, a top is applied, and also dried under a lamp.
Black matte manicure
Manicure (with black varnish) for short nails with a matte surface is a classic option, suitable for the office.
He has been holding positions in trends for a long time. For staining, you need a matte finish, or you can use improvised means.
Standard application
- The nails are degreased, after which the base is applied.
- It is recommended to apply the colored coating in 2 layers.
- The result is fixed with a matte top.
"Flour" way
- The flour is carefully sifted so that there are no lumps (the rest are crumbled with a stick).
- A base and colored varnish are applied to the nail plate.

- With a soft bristle brush, make each nail separately and gently apply flour.
- After a few seconds, the flour is removed, the remains are washed out with a brush and water.
With steam
- While the water in the container is heated on fire, a base and colored varnish are applied to the nail plate.
- Next, the brushes are positioned over the steam for a couple of seconds to hit both the lateral and central parts of the nail.
Glossy finish
The girls have a basic set for manicure, consisting of glossy varnishes. First appeared in Greece, slaves smeared the nail plate with a mixture of fat and animal blood. In Egypt henna was used. But already in the XX century, girls began to add powder to the cream, to make the nails shine. Today in the world there are many methods of application, variations in the shape and color of the glossy coating.
- The old varnish is removed. It is recommended to rub the nail plate lightly with nail polish remover, because over time, the upper layers are damaged. For the desired result, you need to hold the moistened cotton pad for 3-5 seconds and remove the remnants in one motion.
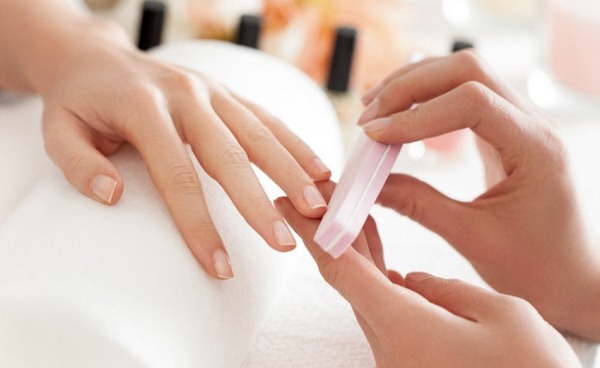
- Too long nails are trimmed, then sawn from the side to the middle in a dry state (otherwise delamination will begin).
- The nails are polished, and only after that the base is applied.

- You can use thermal varnish, the color of which depends on body temperature and the environment. To make the layer even, without bubbles, the bottle rolls between the palms. Having stepped back from the cuticle 5 mm, starting from the middle, varnish is applied, and so 2 layers.
- The result is fixed with the last layer of clear varnish. Removal of blots is carried out using cotton swabs and nail polish remover.
Black marble manicure
Manicure with black varnish for short nails using the marble technique has held its positions in the fashion world for a long time. This nail design is inspired by nature, so women love it.There are many ways to apply.
Method "with package"
- The base is drying.
- A small piece of plastic bag wrinkles in hand.
- The first colored coating is dried.
- Then, not completely drying the second layer, with sharp movements a piece of the bag touches the nail, creating an imitation of marble.
- Secure with varnish.
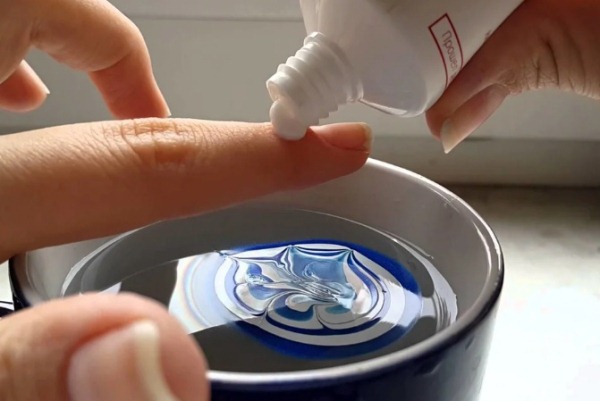
"Water" way
- A base is applied to the nails with a small layer.
- A fat cream is applied to the fingers without touching the nail plate so that the varnish can be easily removed from the skin.
- In a container with water, drops of varnish of the selected shade are smeared with a toothpick, creating a pattern.

- A finger is immersed in the film with varnish.
- The skin around the nail is cleaned with a cotton pad dipped in nail polish remover.
- Fixed with transparent varnish.
Sequins and rhinestones
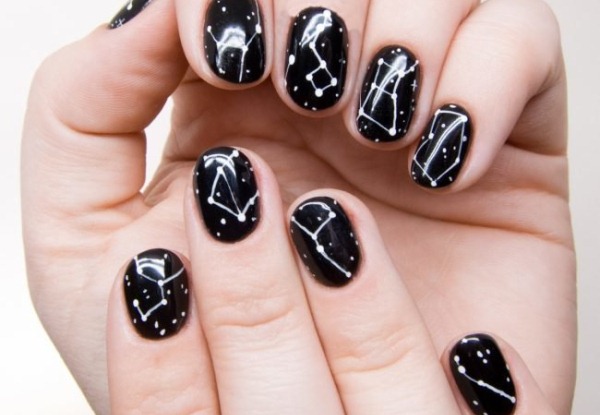
Rhinestones and sequins are better suited for durability and strength. There are many variations of this decor, the nails are decorated both completely, covering with sparkles, and partially highlighting individual parts. It is useful for manicure, applying glitter near the hole, when the nail has already grown from the cuticle. And on black varnish, depict the starry sky or even the northern lights.
Small rhinestones or sequins
- After hygienic procedures, a base is applied, then a colored coating.
- Small rhinestones are applied to the not yet dried varnish, dipping and pressing them slightly until the coating dries.
- Fixed with varnish.
Large rhinestones
- The base and color coat are dried.
- At the attachment point, you need to drip transparent varnish or special glue.
- With the help of a wet toothpick, the rhinestone is taken and pressed in place of the drop.
- The result is fixed by no more than one coat of varnish.
Black varnish and rub
Manicure with black varnish for short nails can be varied with a metallic and mirror effect. At the beginning of 2017, a metallic design created with rubbing began to appear on the nails. This new material behaves differently on all types of base and fixer, so there are many variations with it.
- Degrease nails with primer and apply a thin layer of base.
- The nail plate is covered with pigmented gel polish.
- The top is applied without a sticky layer.
- The powder is gently rubbed into the nail plate with a brush or applicator.
- Excess powder is removed with a clean brush.
- A finishing fixer (matte or glossy) is applied.
Cat's eye
Due to its deep color and shine, "cat's eye" has become popular. It is suitable for office and evening manicure.
The effect is reminiscent of a chrysoberyl stone. It is provided by metal particles in the varnish, which are concentrated in the place of application of the magnet that comes in the set. Oval and almond nails look longer, so it's best to choose these shapes.
- The nail plate must be filed and degreased.
- The base varnish dries in a special lamp.
- After a layer of gel polish, you need to carefully bring the magnet, at a distance of 2-3 mm, so as not to spoil the manicure.
- After the glare has formed, the varnish is dried in a lamp.
- The top is applied at will, some craftsmen believe that it distorts the design.
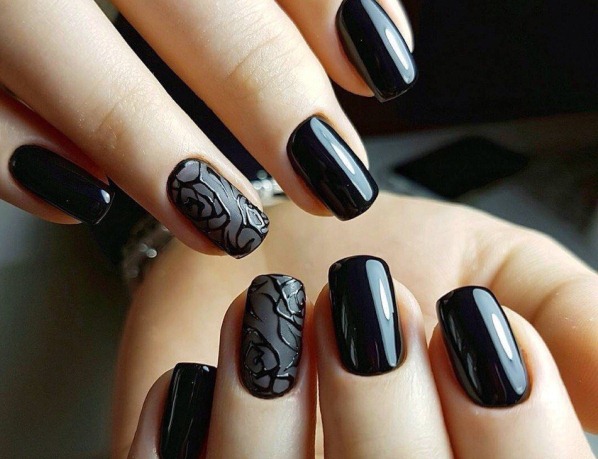
With drawing
Manicure with drawings and dark varnish will complement different images. Since ancient times, women have decorated their nails, nail art was still in Ancient Egypt. New ideas appear every year. Drawing is a way to diversify the usual manicure on short nails and give personality and originality.
| Picture | Features: |
| Lace | Delicate patterns are made with a thin brush |
| Ethnic motives | This pattern will look good in the summer. It is simple to execute, drawing circles and lines with a small brush, connecting them together |
| Graphic patterns | Austere lines, crisp silhouettes and laconicism are the basis of graphic designs for confident and elegant personalities. They can be made using ordinary tape, thread and a brush. |
| Volumetric drawings | Vivid 3D prints will refresh solid nails, but it is recommended to apply them only on one nail |
| Children's drawings | Such drawings are easy to perform |
| Flowers | Such a manicure is complemented by sequins, for the illusion of dew on flower petals |
The slightest detail can change the image for the better or worse, so it is important that the nails are harmonious. Do not forget about their fragility, taking care of them daily.
Video about nail design options with black varnish
What kind of manicure in black can be done on short nails: