It can be difficult for novice manicure masters to create drawings on nails on their own, since modern design is not limited to patterns and allows you to embody interesting and stylish ideas using improvised means. To master the technique, you need to constantly train, study photos of finished works of masters and develop your imagination.
General guidelines for beginners
Before starting a manicure, you need to study its types:
- Edged (classic)... It is characterized by the fact that the cuticle is removed before the manicure. This option is suitable for owners of coarse and thick cuticles. Among the advantages of a trim manicure are: quick and easy execution, a minimum of tools is needed, even the most neglected nails are tidied up. The main disadvantage of this technique is its high injury rate. Without proper experience in manicure, it is possible to damage the skin, cut off excess cuticles and infect an infection.
- Unedged... This option eliminates the use of sharp and cutting tools, which reduces the risk of injury. To remove the cuticle, special products based on lactic and fruit acids are used. Unedged manicure is performed faster than a classic one, but is not suitable for owners of sensitive skin prone to allergic reactions.
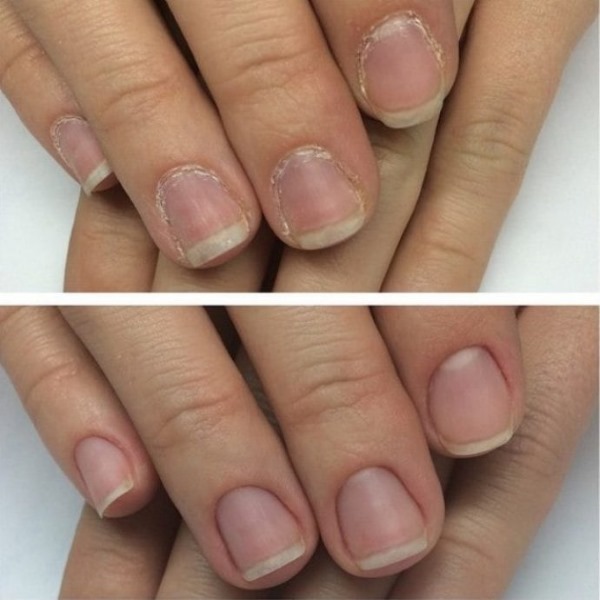
Technique for performing a trim manicure:
- The key to a neat manicure lies in getting the same shape and length. Therefore, the first step is to shape the future shape. Scissors, wire cutters and nail file are suitable as tools.
- Hand bath. This step is the main base of a trim manicure. To make it easier to remove the cuticle, it must first be softened in water. You can add sea salt, soap or essential oils to the bath. It is necessary to process each finger within 5 minutes.
- Use a pusher or an orange stick to push back the cuticle. This should be done carefully so as not to harm the nail plate. It is not recommended to place the instrument at a large angle; ideally, the stick should lie on the nail.
- Cuticle removal takes place with the help of rounded scissors or nippers, along the entire perimeter of the nail.
- After removing the cuticle, experts recommend applying oil to the nails.
Technique for unedged manicure:
- The nails are given the desired shape with a file. If the nail plate is uneven, it should be polished with a buff.
- A special gel is applied to the cuticle. It softens the skin in 2-3 minutes.
- Remove the gel with a napkin. Then the cuticle is removed with a wooden stick, pushing it back.
- Finally, a cream is applied to the nail plate to moisturize and nourish the skin.
One of the most difficult tasks for novice craftsmen is choosing a color.
Experts identify a number of basic shades that the master should first of all have:
- white (often used for a jacket or moon manicure);
- the black;
- red;
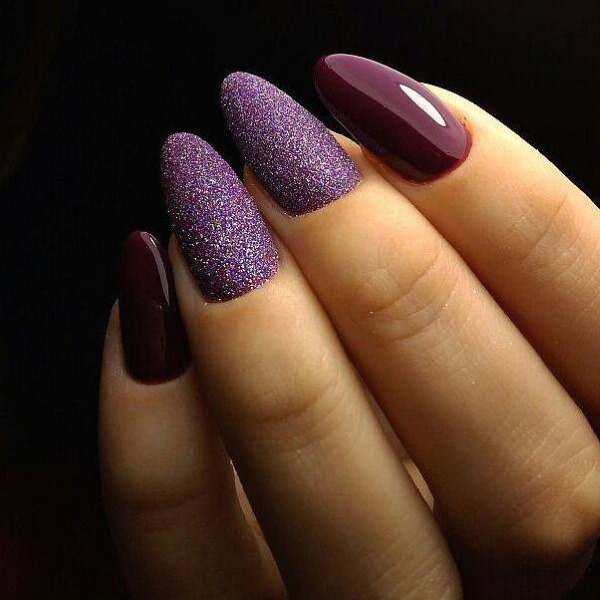
- burgundy;
- pink (preferably warm and cold shade);
- beige;
- silver or gold sequins.
Patterns and decor of nails can be done with improvised means and purchased materials. For beginners, glitter, stickers, dots, brushes, a needle and toothpicks, as well as scotch tape are suitable.
Techniques and methods of manicure for beginners
Nail designs for beginners (photos and best ideas are presented below) are performed with the following tools:
- toothpicks and hairpins will replace the dots, with their help you can easily implement the dot design;
- for an ombre manicure, you need a sponge or a makeup brush;
- using scotch tape, you can get a geometric design or create a French manicure;
- marker for design, with such a tool it is convenient to draw patterns with small details;
- manicure brushes are designed to create patterns on nails, they have different thicknesses, which allows you to embody ideas even with thin lines;
- a stamping tool, which consists of a stamp with an applied pattern, in order to transfer the image to the nail, you must attach the stamp to the selected place;
- stencils are used to make both a jacket and original drawings; a wide range of blanks includes: geometric shapes, arches, crescents, images of animals, fruits and plants.


Examples of simple but original techniques:
- Flower drawings using a hairpin, toothpick or dots.
- Neon manicure. Principle of implementation: apply a base varnish, and on top draw dots of various colors and sizes. This option will be an excellent solution for the summer.
- Plain jacket or with the addition of patterns.
- Using scotch tape, you can create a discreet and stylish manicure with stripes... This design is suitable for both everyday life and work.
- Using a sponge to make a gradient... The color scheme allows the use of any suitable shades.
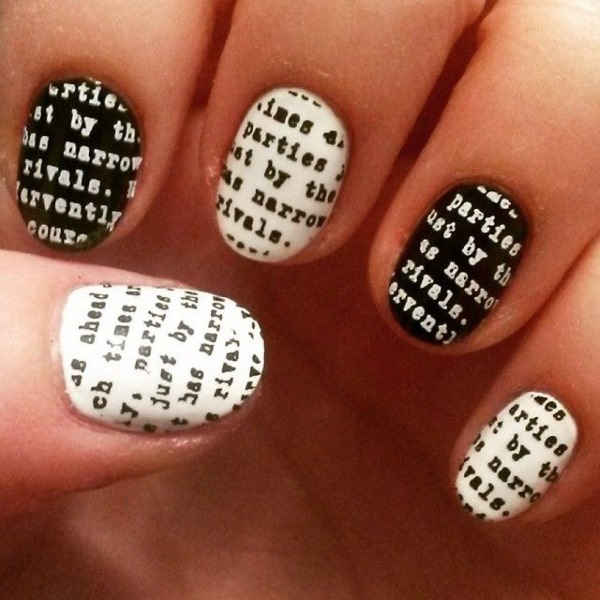
- Newspaper print... For such a manicure, you need to cut pieces of text in the newspaper. The paper is pre-moistened in alcohol and then applied to the nails. Any plain varnish is suitable as a base.
Tips for choosing a varnish:
| Feature | Selection advice |
| Pale skin | pink, silver, green, purple |
| Dark skin | beige, red, yellow, gold |
| Wide and short nails | can be visually lengthened with dark shades of varnish using vertical stripes in the design. |
| Narrow nail plate | bright varnishes applied to the entire surface will help expand. |
| Matte finish | will be an excellent solution for office work and business style. The brilliant design is suitable for holidays and parties, experts recommend completely abandoning the pearl coating. Basic shades that suit any clothing and occasion are beige and cream. |
| Red manicure | for a red tint, you must carefully select the whole image. This coating is ideal for going to a restaurant, a festive party or business events. Red nails go well with clothes in grays and blacks. |
| Dark shades | the choice of dark colors is not limited, as these colors are universal. However, do not combine dark varnish with brown clothing. |
Manicure options with simple patterns and designs
Experts recommend that beginners start with simple and light drawings that will look stylish and effective. Patterns can be placed on any finger depending on personal preference.
On a plain manicure
You don't have to buy special equipment to get a beautiful and original nail design. There are ways for beginners to help master the technique of drawing with the help of improvised means, as well as photo and video lessons.
For instance:
- Toothpick drawing... This technique allows you to make simple and original patterns. According to the method of application, the method of obtaining a design with a toothpick is similar to a needle. However, the toothpick has a thick tip, making it harder to draw fine details.At the same time, it is easier to damage the base coat with a needle. The simplest version of the drawing with a toothpick-heart. To complete it, you need to cover your nails with the selected varnish and wait until it dries completely. Then dip the toothpick into the pink coating and put 2 points on the surface of the nail, which are then stretched and connected into a heart. This option is suitable for everyday manicure.

- Drawing with a brush... For a manicure, a thin and not too hard polish brush or a regular watercolor brush is suitable. It is used according to the principle of a toothpick, but in this case the pattern will be smoothed and even. You can draw a pattern according to the selected scheme or at random.
- Drawing in the style of the letter "V"... This option is similar in appearance to a French manicure. You can use it both in everyday life and for a holiday. First, you need to cover your nails with a monochromatic varnish of any shade and dry it. It is advisable to use stencils to form a V-shape. The tip of the nail should be coated with a color that matches the base shade.
- Simple patterns on a plain surface can be obtained using dots... This tool is used for nail design using dots. Dots has different attachments, with the help of which the desired pattern is obtained. Despite the simple implementation, this design looks elegant on nails of any length.
- Using pieces of tulle... This design allows you to create a delicate and unusual look. Manicure can be done in any color.
 First you need to cover your nails with base and base. Without drying the top layer, attach a piece of tulle to the nail and press down. After waiting a few seconds, the tulle can be removed. Finally, a fixer must be applied.
On a multi-colored manicure
In order for a manicure to look appropriate and not look flashy, it is necessary to combine the colors correctly: pastel and calm tones are suitable for an elegant look.
Contrasting colors are chosen for decorating nails in a festive style:
- Rainbow drawings... To get such a manicure, you need to take pink, orange, yellow, green, blue and red varnish. Each color is applied to the nail alternately in stripes. All or several nails can be decorated with a rainbow.
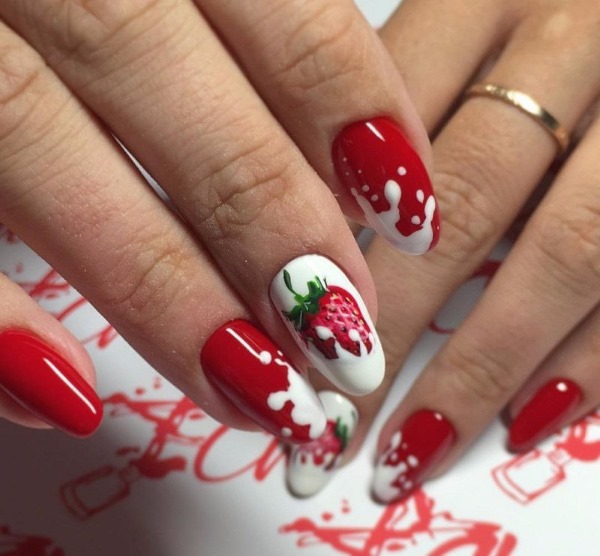
- Option for summer - drawing fruit... A stylish and simple solution would be to draw a watermelon. It requires red, black and green varnish. The drawing is best placed on the middle and ring fingers, all others are covered with a solid red varnish. To draw a watermelon, you need to highlight the nail hole in green and the rest in red. After the varnish dries, small black seeds are drawn in black.

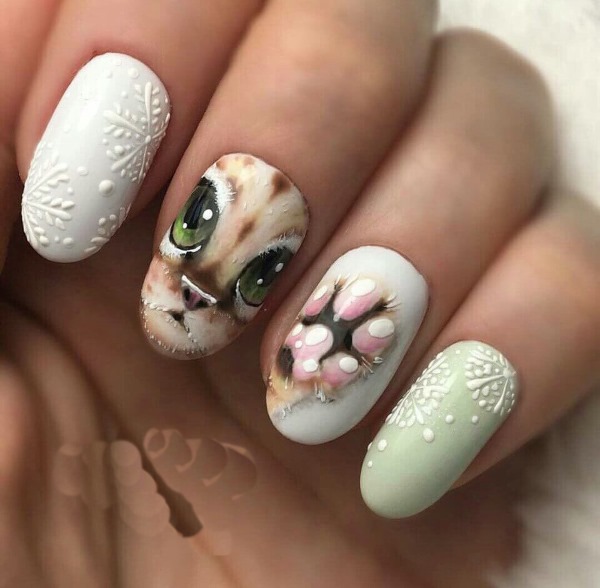
- Animal print... It is best performed on the ring finger, all others are covered with a solid color. The color range is not limited and is chosen depending on the purpose of the manicure. Execution option: you need to take pink, white and black varnish. The pattern can be applied with a toothpick. To begin with, the nail where the print will be located is covered with white varnish. Pink dots are applied to the surface, which, after drying, are arbitrarily outlined with black varnish. Another option is the zebra print. White varnish is suitable as a base, on which black stripes are drawn.
On a matte manicure
Matte manicure is gaining more and more popularity due to its spectacular and sophisticated look.
Among the popular shades for a matte finish are:
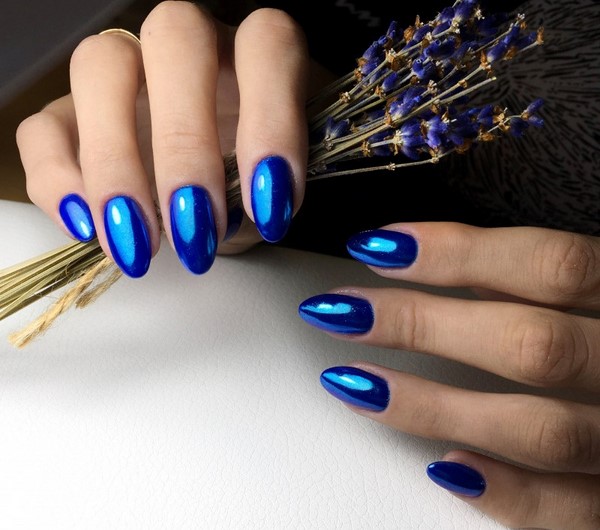
- blue;
- red;
- the black;
- peach;
- pink;
- yellow and orange.
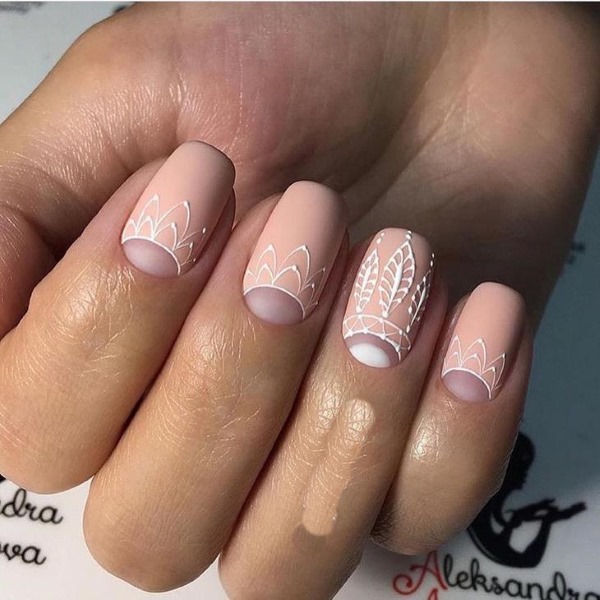
Nail designs for beginners (the photo serves as a clear example of implementation) in a matte version are decorated in this way:
- Matte manicure with a glossy jacket... This classic option will be a great addition to your everyday look. To perform such a manicure, it is enough to have two varnishes - matte black and glossy.
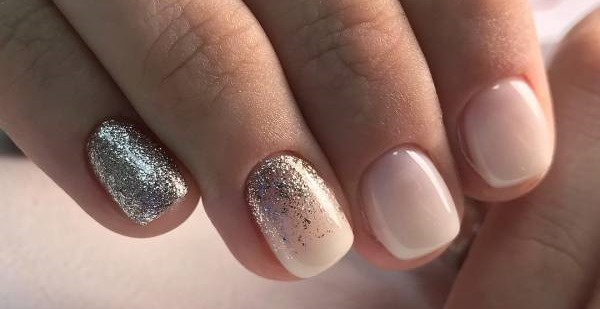
- Moon manicure... This option is often used in design due to its simple execution and spectacular appearance. The well can be covered with glossy varnish or glitter. As an addition, all kinds of patterns are drawn on the nails.

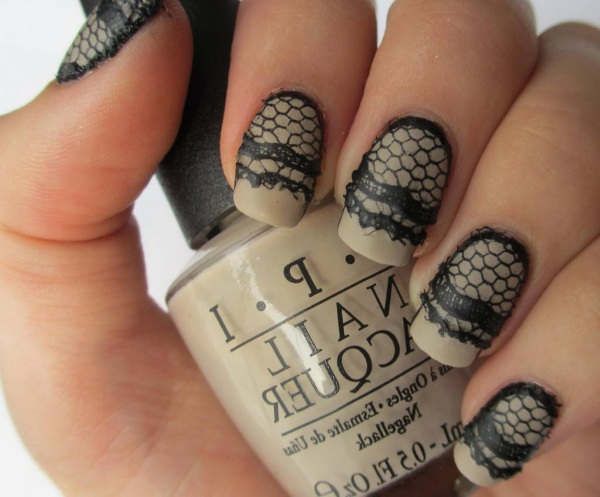
- Lace... You can add tenderness and sophistication to the image using the technique of applying lace. Various patterns are created by drawing lines and dots, which are then connected together to form the desired pattern.
Simple decor on manicure
In addition to ordinary patterns, nails are decorated with decorative elements: rhinestones, powder, foil, stickers, glitter. Jewelry is selected individually depending on the style and occasion for which the manicure is being done.
On a plain manicure
- Decor with adhesive strips... Using such a tool, you can easily and quickly make a striped manicure. The strips are available in different colors and sizes. Before use, you need to cover your nails with base varnish, and then apply the strips to the intended area with tweezers. To smooth out irregularities, use a toothpick or needle.
- With the help of glitter, you can decorate a monophonic manicure... These varnishes come in various sizes and colors of glitter. Glitter is produced in liquid and friable form. It is recommended to use the supplement with gel polish, as the sparkles hardened under the lamp will last much longer. As a decoration, glitter is often used for drawing patterns, in French manicure, combined with transparent varnish, and also in the ombre style.

- One of the popular decor options is rhinestones.... On sale you can find all kinds of jewelry, different sizes, shapes and colors. Such decorations are attached using special glue or top. Rhinestones allow you to create both bright and discreet images.
On a multi-colored manicure
Nail designs for beginners (the photo helps to embody the idea) on multi-colored manicure have many variations and allow a combination of the most daring and vibrant shades.
For instance:
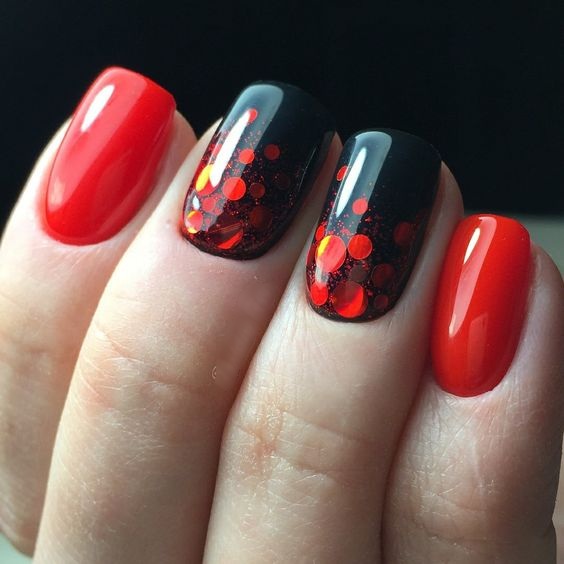
- With the help of beads of different diameters, a beginner can create a stylish nail design in a short time. It is recommended to perform such a manicure for special occasions, parties or weddings, as in everyday life, beads will cling to clothes and hair.
- Sugar for nails looks no less stylish. Due to its unusual and bright appearance, this option will be an excellent solution for everyday life.
- Sequins for nails go well with other decor options and do not make a manicure look vulgar. They look appropriate on any surface and allow you to experiment with patterns and placement on your nails. The confetti is very thin, which allows you to make the manicure smooth and without bulges.
On a matte manicure
Popular decor options:
- For going to a party or a gala evening, you can get a manicure with rhinestones. Suitable as the main color: black, pink, dark blue, burgundy. They usually lay out a pattern with rhinestones, decorate only a hole, or stick one pebble on each nail.
- A monochromatic manicure can be complemented with sparkles. Glitter elements or confetti will brighten up the manicure and add zest.
- To get nails with a mirror effect, use rubbing. It comes in different shades, so it will fit any coating.

- An unusual solution would be a matte manicure with a glossy pattern. To do this, you need to take two varnishes in the same shade (matte and regular). Mostly vertical stripes, flowers, drops and geometric patterns are drawn.
Fashion trends of simple manicure in 2019
Experts say that there is no specific nail shape that everyone should adhere to. However, you should not be limited to just the standard rectangular, almond and square shape. In 2019, more daring options remain fashionable: sharp nails and a "ballerina" shape.
Popular colors:
- Gray;
- yellow;
- Orange;
- green;
- silver and gold.
Fashion Techniques 2019:
- Bold French... In addition to the usual white tip, you can decorate a manicure in any shades, as well as safely add drawings and patterns.
- Animal print... Designers recommend choosing unusual shades, for example, depicting a zebra print in a green and black palette.

- Geometric patterns are at their peak.... Thanks to the stickers and stencils, beginners can easily replicate this design.
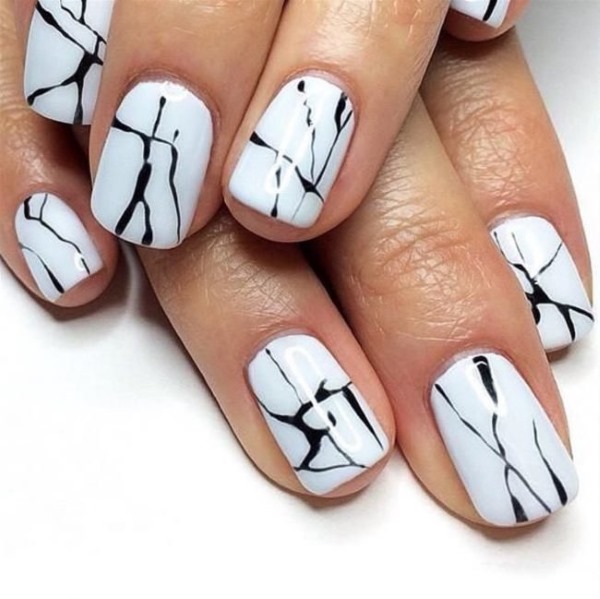
- Blots... In this case, the main thing is to correctly apply the first layer of white varnish so that the coating is easy evenly without gaps. Then drops are placed with a toothpick or needle and smeared a little.
- Cat-eye or metallic for the summer, a manicure will be an excellent option.
You don't have to be able to paint and buy expensive tools to get a beautiful and original nail design.
Simple designs and patterns allow beginners to experiment with manicure using a variety of techniques and decor options. For inspiration, it is recommended to look at fashion magazines, photographs of finished works and study step-by-step instructions, which describe each step in completing a particular drawing.
Article design: Anna Vinnitskaya
Video about simple nail designs for beginners
Simple and quick nail design for beginners: