The image of a beautiful well-groomed woman consists of many components: hair, clothes, shoes, face. It often happens that the nails are somewhere at the end of the list - which is wrong.
A neat manicure, sleek hands are the calling card of any woman. Peeling nail polish looks just awful, and there is simply no time to refresh it. Today this problem is solved quite simply: Shellac has become the most popular treatment in nail salons.
But what if you don't have enough time or money to go to the salon? There is, of course, a way out - to make shellac at home. For beginners, we give step by step instructions for this popular manicure.
A beautiful word, by the way, is not fraught with anything mysterious. Shellac is a waste (in other words, excrement) of insect worms that feed on tree sap. This digested resinous substance is collected, dried and crushed, then the varnish mass is melted and cast into molds. The end result is a great manicure product.
Shellac - features, timing and principles
Manicure has never been a special procedure, but the use of shellac has its own distinctive features. First, the need for nail extension disappears; secondly, the coating is quite durable and lasts much longer; thirdly, chic appearance and rich colors.
The life of a manicure, no matter how sophisticated it may be, is very short. Housework is the responsibility of any woman; very few domestic helpers have. Daily cooking, washing dishes, washing, cleaning - all this leads to the fact that the varnish on the nails quickly fades, cracks and loses its appearance.
Shellac is a different matter: a symbiosis of gel and varnish (even made at home by beginners in accordance with step-by-step instructions) lasts a long enough time, and during this period it becomes possible to additionally strengthen the nail plate.
Shellac advantages and disadvantages
Shellac has many advantages:
- Shellac manicure looks great on any nails: both long and short. At the same time, the method of painting gives a chance to grow nails to the desired length.
- Since shellac is a natural remedy, it can strengthen thin and breakable nails.
- Shellac stays on nails for a long time: some fashionistas manage to keep a manicure for up to three weeks.
- To erase shellac from nails, special means are needed, which means that household chemicals are not terrible for him.
- Shellac gives nails a dazzling shine that lasts an incredibly long time and does not fade.
- Manufacturers are closely following the fashion and the shellac color palette is constantly expanding. On sale you can find not only classic tones for manicure, but also bright avant-garde paints.
- Perhaps the most important advantage of shellac is that it is completely harmless. Dangerous formaldehydes are not included in its composition, therefore, women prone to allergies and pregnant women can safely do shellac manicure.
If for some reason the coverage suddenly gets bored, then shellac can be removed at home... To do this, you need to buy special products, liquid and film in the salon, carefully study the step-by-step instructions for beginners and clean the nail plates yourself.
Everything in the world has its downside - and shellac is no exception:
- First of all, this concerns the high price of the procedure itself, and if there is a need for correction, then this is also quite expensive. So if your nails grow too quickly, you will have to come to terms with the additional costs.
- The second negative factor is more significant. Shellac, as the manufacturer assures, is indeed a very resistant coating. But nails tend to expand under the influence of high temperatures, and then shrink again, taking on their original dimensions. So washing dishes in hot water or bathing too warm will deform the nail and cause microscopic cracks in the coating.
Through these microscopic holes under the varnish layer, dirt can enter, and the dirt creates greenhouse conditions for many bacteria and microorganisms. Shellac lasts a long time, which means the bacilli have enough time to damage the nail. So the fungus is not the most dangerous disease yet.
To avoid the sad consequences, it is better to do all the dirty homework with gloves.
What tools and tools will be required
Shellac is a very complex procedure, and it is best to do it in the salon, by an experienced master. But after all, "it is not the gods who burn pots," so if you have certain skills, you can do it yourself at home. To do this, you need to know the step-by-step instructions for beginners and have special tools and UV lamp for drying manicure.
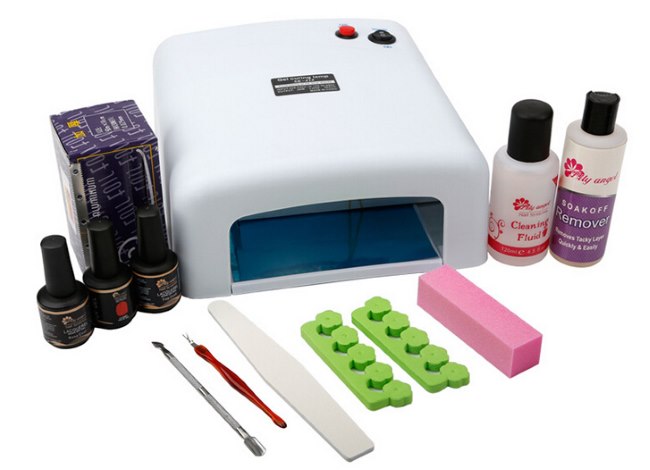
First of all you will need: base coat, shellac and fixer... Professionals recommend using a base coat and base coat from the same shellac category, preferably from the same manufacturer. Otherwise, there is a risk that the desired result will not be achieved.
In addition, you must have:
- antibacterial agent;
- an orange tree spatula or stick;
- a nail file;
- scissors for manicure;
- Bondex, an agent for improved adhesion;
- cuticle cleaner;
- a sanding file.
How to choose a base?
Review of bases for gel polish. Which is better: Kodi, Beautix, Shellac, Klio and others.
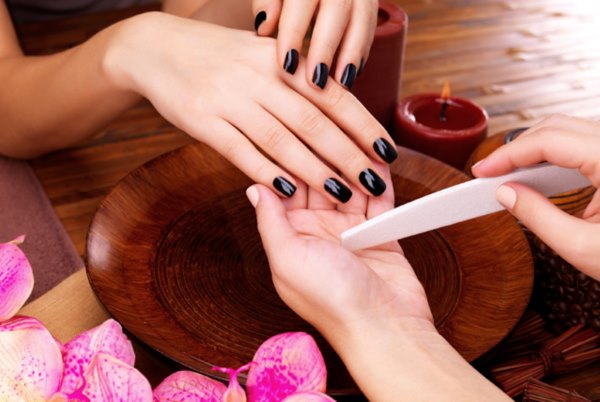
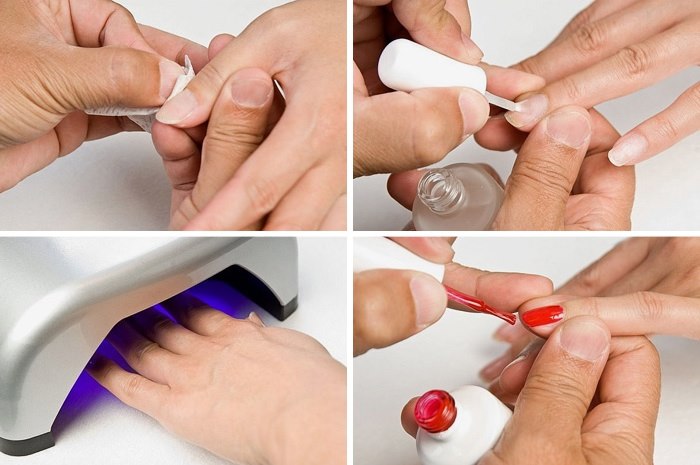
Preparing nails for shellac
So, having all the necessary tools for shellac at home (read about step-by-step application for beginners below), you can start preparing your nails.
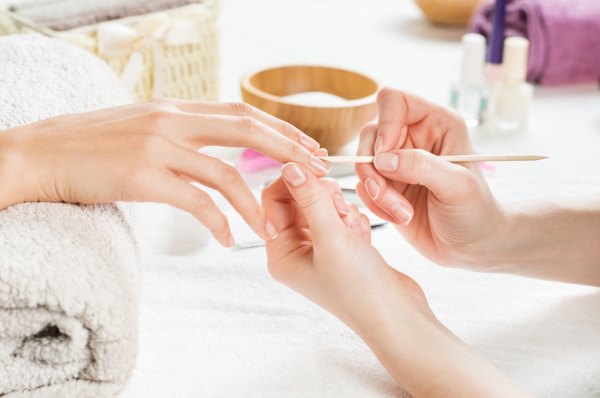
The preliminary operation includes:
- cuticle treatment and formation of the nail plate;
- polishing is a mandatory procedure that improves the adhesion of shellac directly to the nail;
- disinfection with an antibacterial liquid, which additionally degreases the nail and provides an even coating;
- applying a base coat;
- warming up with an ultraviolet lamp to fix the gel, at least 25-30 seconds for each nail.
How to make shellac at home. Step-by-step instructions for beginners
Now that the nails are ready, you can proceed to direct shellac application:
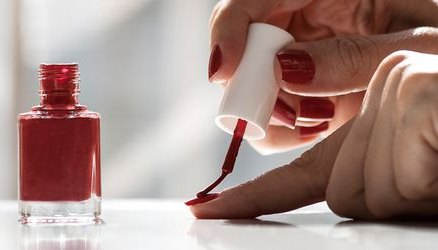
- First, the basic tone is applied with a thin layer, very carefully, carefully squeezing the brush. The entire nail plate is covered in tone, while the end of the nail should be sealed. In the professional slang of manicurists, this means that the tone is lightly applied under the nail itself.

- This is followed by drying in a lamp, about one and a half minutes.
- The second layer should be denser, but unnecessary zeal.
- Lamp dry and top coat in one coat.
- Dry the nail within two minutes and remove the remaining sticky layer with a special tool.
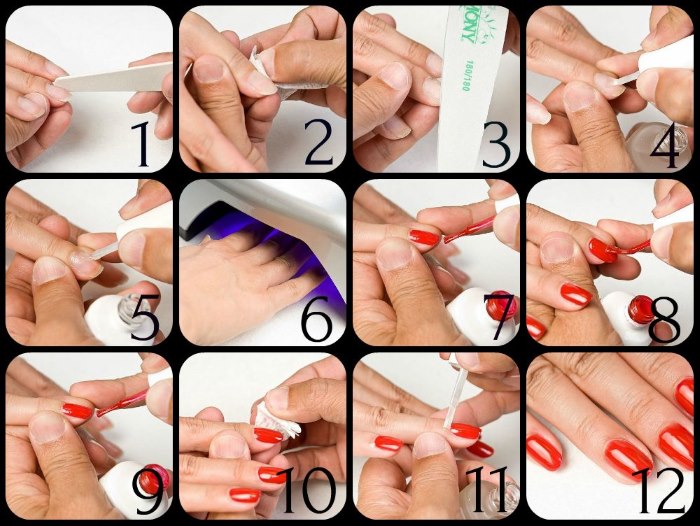
 When making shellac at home according to the step-by-step instructions for beginners on your own, you should know that it is not necessary to remove the sticky layer after the first and base coat, as this will increase adhesion.
What will happen to nails after applying shellac
No matter how safe the shellac procedure is for nails, restorative measures are still necessary. In the end, after all, everyone changes linen daily, and the nail remains in a kind of shell for a long time. So, if yellowish spots appear on the surface of the nail plate or the nail is somewhat deformed, then urgent measures should be taken.
You can revive the nail in the salon of the master or use home remedies, which is generally preferable as they are inexpensive and available:
- Use hot olive oil for a week. The nails will receive additional nutrition and moisture, which means they will maintain a healthy appearance.
- A slice of lemon that should be wiped down on the surface of the nail every day can work wonders. Essential oils and vitamin C will restore shine and relieve delamination and breakage.
- A sea salt bath will relieve a possible fungal infection. It is advisable to do the procedure every day, within 10-15 minutes.
Secrets of applying shellac at home
Making shellac at home on your own, following the step-by-step application technology for beginners, you can save a little. So, what means and tools can be replaced and what:
- Manicurists use special tools to remove the cuticle, which are quite expensive. But if the cuticle is not too noticeable, then in this case, you can use the orange stick to simply push it back.
- The grinder completely replaces the usual polishing file: the end result will be the same.
- A small bottle of salon disinfectant, which can cost around a thousand, is easily replaced with nail polish remover or acetone.
- The base coat cannot be replaced, but in cosmetics stores you can find a suitable product that, among other things, also has a healing effect.
Take on a couple more secrets of applying shellac at home.
Helpful tips from professionals:
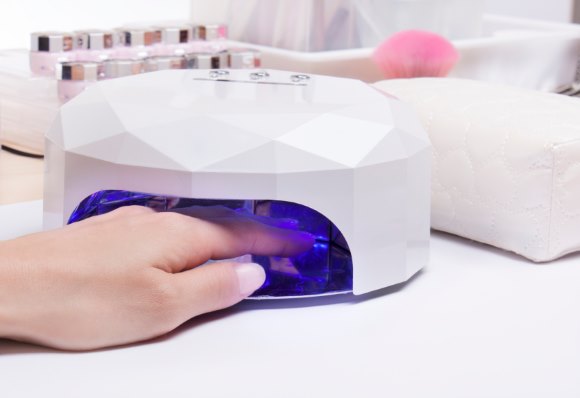
- When purchasing an ultraviolet lamp, you should pay attention to its power, the most optimal result is achieved when using a 36-watt lamp. In this case, the coating dries out rather quickly.
- Before you start your manicure, roll the coated jar in your hands. This little trick will significantly improve the properties of the varnish, which will lie flat without much effort.
- To prevent thickening of shellac, it should be stored at room temperature, carefully closing the bottle after each use.
- Any corrective treatment should be carried out only under the obligatory condition: the nail must be dry. No soft nail file will protect the wet nail plate from damage.
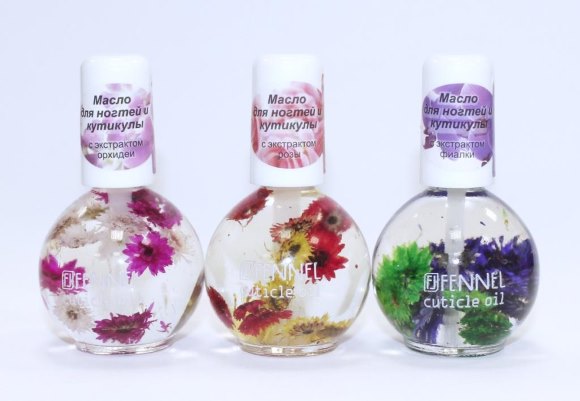
- Use cuticle oil daily: morning and evening. Only in this case can you avoid the appearance of sloppy burrs.
- Before you go to the salon for the beauty of your hands, you should treat your nails, if necessary. Shellac can only aggravate the problem of fragility and delamination of the nail plate.
- Do not apply hand cream just before shellac manicure.
How to remove shellac gel correctly
To remove the shellac manicure yourself at home (for beginners, step-by-step application is described above), you need to prepare:
- cotton pads or special sponges;
- 10 pieces of foil so you can wrap your fingers;
- isopropyl alcohol or a special shellac dissolver.
Before removing shellac, wash your hands with warm water and soap and dry thoroughly.
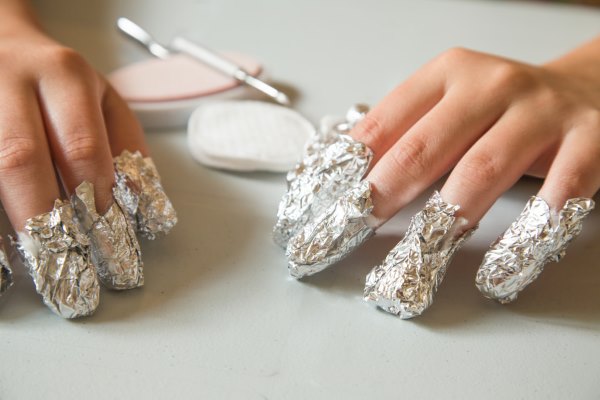
Now you can start removing shellac:
- Cut the cotton pads in half.
- Soak a piece of the disc in alcohol and attach it to the nail, fix it with metal foil. Try to avoid getting alcohol on your skin to avoid irritation. The foil is used so that the alcohol does not evaporate too quickly. You will have to wait about 15 minutes for the result, at which time you can lightly massage your fingertips for better penetration of alcohol.
- In some cases, the shellac is removed with a film, if this does not work, then it can be removed with an ordinary plastic spatula. It happens that, due to inexperience, the coating was applied too thick and the shellac does not come off. This means that the procedure will have to be repeated with alcohol, or simply cut off the shellac.
- Finally, lubricate the nail with cuticle oil to avoid overdrying the skin and nail surface.
Shellac is a wonderful tool for manicure both in the salon and at home (you have already read the step-by-step instructions for beginners), nails look neat, elegant and, importantly, natural.
Over time, experience and proper skill will come and the whole procedure will not take too long. As a result, your hands will look very attractive and your nails will receive additional protection.
Shellac "Cat's Eye"
Cat eye nail art is very popular and looks very impressive. Using gel polish in your work, with the addition of a metal base and a magnet, you can get a pattern that really looks like a cat's eye.
For this design, you need to prepare green gel polish and a special magnet... However, if there is no special one, then any, the most ordinary, will do.
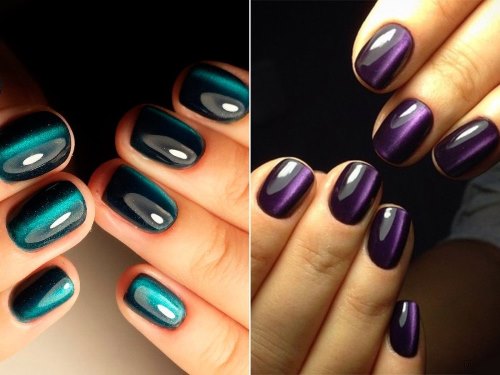
First, a base coat is applied to the nails.to be dried in an ultraviolet lamp. The next layer is green, which is also dried. The magnet is not used yet.
And now a magnetic plate is brought to the second coating: metal particles of varnish are folded into an elegant pattern. If the magnet is brought up with an edge, then a strip will form on the nails; but if you scroll it over the surface of the nail, the image will come out intricate, similar to the drawing of a cat's eye. Now all that remains is to complete the usual procedure.
It is not at all necessary to use only a green color palette: after all, a cat's eyes can be yellow or even blue.
If you like the cat design, then you should purchase a special magnet, with which you can get a spectacular pattern.
As you can see, shellac at home (for beginners, see step-by-step execution above) is quite feasible. The main thing is to follow the instructions and not be afraid to fantasize.
Reviews
A video with a detailed description of each stage of applying shellac at home:
A video that reveals the secrets of applying long-term and high-quality shellac manicure:
And another video, which gives a master class on applying shellac at home: