Gel polish manicure is particularly durable, but few people know that with this tool you can make beautiful drawings that will decorate the manicure as long as the base coat. There are many methods for creating drawings on nails with gel polish: from the simplest to the most complex.
Drawing tools
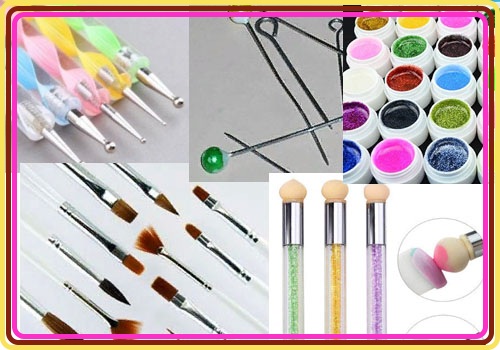
Drawings on nails with gel polish are created using the following tools and materials:
- brushes - to save money, they can be purchased at an art store with a set of several brushes: thin short, thin long, flat, with a rounded tip;
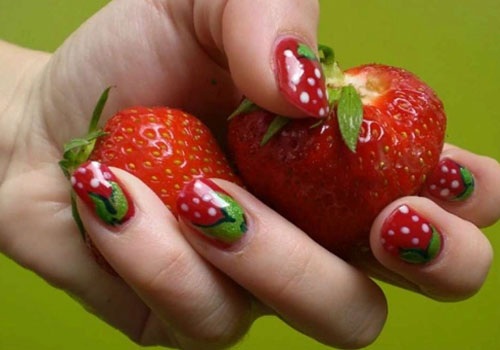
- dots - a stick with a rounded end, it can be used to make polka dots, leopard print, monograms, flowers;
- palette - what you can mix varnishes on - it can be a special palette or just a plate;
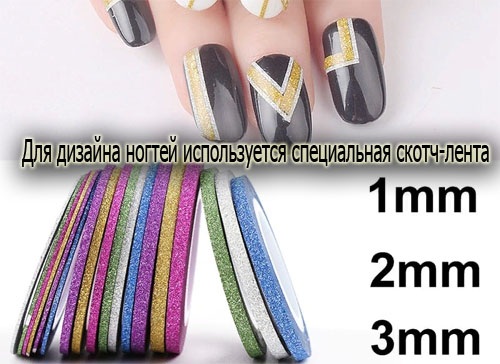
- scotch tape and scotch tape - attached to the nail, and then removed, serve as a stencil;
- needles and toothpicks - used to stretch varnish and create an interesting flowing effect of colors;
- sponge or sponge - are used to feather the color and create a gradient effect;
- tweezers - to remove auxiliary materials.
In addition to the above accessories, you will need a basic set for gel polish manicure.
Next, we will consider the technical aspects of using these tools and materials, as well as step-by-step instructions for creating individual designs.
How to draw flowers
A simple translucent flower.
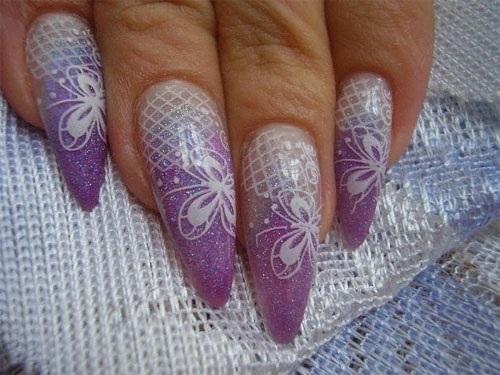
To make a flower, you need a thin brush, dots, as well as a base, top, gel polish for the background and multi-colored varnishes to complete the design. The drawing is created according to the following instructions, using plum, black, pink gel polishes.
- On a substrate, connect a dark plum with a drop of top to make the final color translucent.
- The base tone - pink - is applied in two layers and dried.
- With a brush, they draw the petals with a diluted plum top: the first is completely removed and dried, and the rest, on the sides, are positioned as if they are behind the first, then dried.
- Saturated plum is displayed with barely noticeable features, slightly touching the borders, contour and filling the intersecting areas. This technique helps to make the flowers airy and natural.
- To add artistry, add a couple of strips to the center of the petal and hold it in the LED lamp for a few seconds.
- At the base of the petals with dots, a dot is drawn with black gel polish and a stem is drawn with a wave in one movement to make the drawing elegant.
- Intersecting lines will complement the design, but before applying other lines on top of those already applied, the first must be dried so that they do not smudge.
- After drawing the stems, cover the nail with a top and dry for 60 seconds. Remove stickiness.
Drawings on nails with gel polish in this style can be supplemented with unopened buds. First, a separate petal is created with a diluted top of gel polish, and then, with an undiluted tone of varnish, cover the first petal with the second.
Twigs with buds.
You will need gel polish for the main coat, black gel polish, top. This option uses beige, black, light green, white, dark green.
- Beige is applied twice and each layer is dried in a lamp.
- With a brush, draw two branches of different lengths: one from the edge of the nail and almost to the base, the other adjacent to it.They draw smaller ones from them and dry them.
- On all branches, buds are painted with light green gel polish. They should be spread evenly over the nail and dried.
- Next, the edges are brought in in a dark green color: for those buds that are larger, on both sides, for those that are smaller, it is enough to bring one side and dry.
- They connect the bud with the branches in black and darken the base of the bud, dry it.
- White denotes the tip of the bud and cures the design in a lamp.
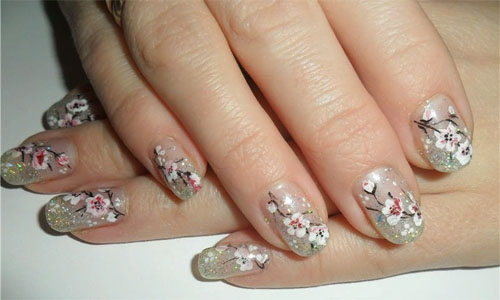
The design is covered with a top and placed in the lamp for 60 seconds. Remove stickiness.
Stencil rose.
To create a stencil rose, you need any light gel polish and a thin brush.
- The nail is covered with a base tone twice. Each layer is polymerized in a lamp. Then cover with a fixer.
- Roses are painted with black gel paint with a brush. They begin to draw the design from the center, making a half ring. Then it is surrounded by petals, making each new petal larger than the previous one.
- Another rose is drawn just below. It is necessary to leave gaps between the details of the drawing so that they do not merge. If the gel paint is liquid, you can dry the drawing in a lamp.
- Then the leaves are drawn in free areas.
- After drying the pattern, cover it with a top and remove the sticky layer.
This is the lightest version of the rose. If you wish, you can master other techniques, for example, a rose on wet gel polish.
Geometric design
Dots and stripes.
The design looks interesting when its own version of the pattern is performed on individual nails. The easiest way to do this is in a geometric style. You will need: dots, a thin brush, a palette, base and top, three shades of gel polish, such as white, black and blue.
- A base coat is applied to the nail plates and placed in a lamp. Remove stickiness.
- Cover the ring and thumb in black, the index finger in blue, and the middle and ring fingers in white. Place your hand on the lamp. If required, then apply a second, third layer. Each of them is dried separately.
- On the little finger, thin stripes are drawn along the nail with black gel polish.
- On the middle finger, using dots, dots of black and blue colors of different sizes are put.
- On the other hand, the arrangement of the drawings is changed.
- The coating is dried individually or all nails together.
At the end, the nail plates are covered with a top and placed in a lamp. Remove stickiness.
Scotch tape design
Using scotch tape, you can make perfectly smooth borders of gel polishes of different shades.
- The nail is completely covered with the main shade.
- Cut off a piece of tape. Glue it to your palm to remove excess stickiness.
- Cut out any pattern. You can fold the tape in half for convenience, right side in.
- Stick the tape onto the plate and paint the selected area in the desired color.
- The coating is polymerized.
- Gently peel off the tape by picking it up by the tip with tweezers.
- Cover the nail with a top, polymerize and remove the stickiness.
Drawings on nails with gel polish are also created using scotch tape.
- The nail is covered with the color of the substrate and dried in a lamp.
- Stick the scotch tape in the desired order, creating the desired pattern.
- Cover the nail plate completely with varnish of a contrasting shade.
- Polymerize the gel polish in a lamp.
- Gently pry the tape with tweezers, remove it and apply the top.
In this way, you can make a manicure in a nautical style using white and blue gel polish, a design with transparent stripes, if the first layer is transparent varnish, and the second is colored.
Stamping
You can also make a drawing using the stamping technique with gel polish. However, working with it is somewhat more difficult than with traditional varnish, because it spreads slightly on the nails.
Video about what is needed for nail stamping and how to do it correctly:
Working process:
- Apply a base, polymerize in a lamp, remove the stickiness with lint-free wipes.
- They take gel polish of a contrasting shade and apply 1-2 drops to the stamp, remove the excess with a regular plastic card.
- With a rolling motion, paint is transferred to the stamp.
- Dry the varnish on a stamp in a lamp for 1-2 seconds. If this is not done, then when transferring the pattern to the nail, it will smear.
- Then the stamp is removed from the lamp and the pattern is imprinted on the nail.
- Then they cover the nail with a top coat.
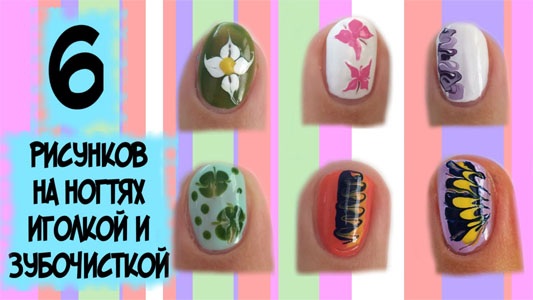
Needle Drawings
To make a beautiful design with a needle, you need to prepare gel polishes of several shades, needles with a ball at the end or for a sewing machine. Needles of different sizes may be required. It is convenient to draw flower petals with large ones, and with thin ones, draw the smallest details.
To begin with, you should completely prepare the nail for drawing: apply the basic tone and dry it completely so that the needle does not get stuck in it.
And then you can act in several ways, depending on what kind of drawing you want to make:
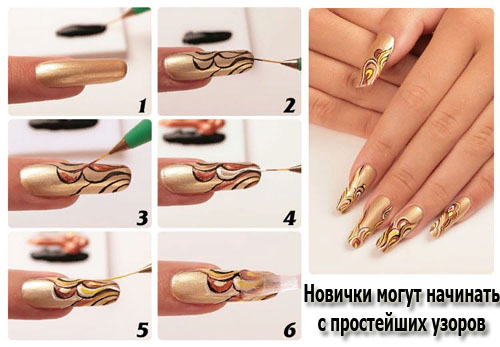
- Three colored strips of gel polish are applied side by side along the nail and the colors are stretched with a needle, performing zigzag movements across the nail.
- A drop of gel polish is dripped into the center of the nail, and another drop on top of it is smaller. With a needle, the colors are stretched from the center in the form of rays.
- Make several successive drops of gel polish, and then connect them with a needle.
How to paint with a toothpick
A toothpick has a duller tip compared to a needle, which means that it will not be able to draw fine details, but otherwise it is also functional. You can paint a beautiful leopard print with a toothpick or make a rainbow design.
Leopard print.
- Gel polish of a suitable shade (golden, yellow, brown), typing it on a toothpick, paint small spots.
- Dip a toothpick in black gel polish and trace each spot with an uneven line, without closing the contour to the end.
Rainbow design.
Like a needle, a toothpick is used to stretch the color.
One of the options:
- A bold point is placed closer to the lateral edge of the nail.
- They surround it with varnish of a different color.
- And that line is varnished in a new color. You can make more lines, follow the principle of ordering colors, like in a rainbow, or alternate colors arbitrarily.
- Then with a toothpick from the drawn first point, the color is stretched, making several rays. From above, the pattern is covered with a top coating.
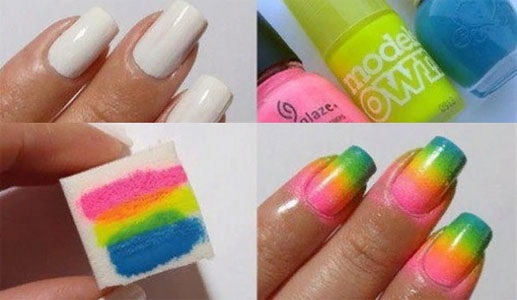
Sponge drawing
You will need two colors of gel polish. Colors can be contrasting or different shades of the same tone. You also need a piece of a sponge for washing dishes, which will be the same width as the width of the nail plate.
- The nail is painted in one color and placed in a lamp.
- A different color of gel polish is applied to the tip of the nail.
- Press the sponge to the nail where the border of shades is located and with hammering movements achieve a smooth transition of colors.
- The coating is cured.
- Top cover the gel polish on top.
You can use more shades of varnishes, make a gradient not across, but along the nail, but the principle remains the same.
To make a "random" gradient, you need to paint the nail with the main color of the varnish and dry it well, and then make several blots with gel varnishes of different shades and shade the transitions with a sponge. Further, the scheme of actions, as in the first case. Gel polish drawings on nails using the gradient technique can serve as a basis for other manicure design techniques.
For example, you can paint something on top with a brush or dots: flowers, black silhouettes of trees, a landscape.
It is easy to create an original space design with a sponge:
- The nail is covered with black gel polish and the coating is dried.
- A drop of pink varnish is applied to the sponge and shaded in the central part of the nail.
- Then a drop of white varnish is dripped onto the sponge and shaded again.
- You can also add a blue shade of varnish.
- This design looks beautiful if you stick 2-3 small kamifubuki sparkles on the nail in a chaotic manner. Do this before sending your nails to dry in a lamp.
- The last step is to secure the coverage with the top.
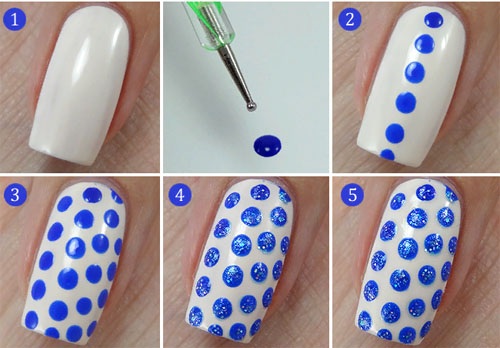
Dots drawing
Dots are used as the main design tool, creating drawings in dot technique - these are beautiful patterns from dots of different colors and sizes.
Basic dot design options:
- semicircular dotted lines of different colors, located in the area of the nail hole;
- lines rays from dots, diverging from the center;
- staggered peas;
- multicolored polka dots of different shades and sizes, arranged in random order.
Besides, dots, you can draw patterns that resemble lace, which look especially beautiful in black and white, or make smaller dots on the dots with gel polish in a contrasting color.
- Several varnishes are poured onto the palette. It is convenient to use a palette with indentations so that the dots ball is completely immersed in the paint.
- Having typed the paint, they put down points on the nail. The first point can turn out to be larger than the subsequent ones, due to the large volume of paint on the dot.
- Experts advise drying the drawing in a lamp several times during the drawing process.
With tulle
Beginners can use a piece of tulle as a stencil. You need to pick up a material with a small pattern and cut strips from it of such a size that you can wrap your finger with them and hold the fabric by the edges. A new strip of tissue is used for each nail.
- Nails are covered with a base, and then with the main tone of varnish. Each layer is dried.
- Apply the fabric to the nail plate and tack the edges.
- Cover with varnish.
- The fabric is very carefully separated and the gel polish is polymerized.
At the end, secure with a top and dry again.
French design ideas
The lightest version of the jacket, which even a beginner can easily master, is performed with a sponge. It does not look exactly like a traditional jacket, as there is no clearly drawn "smile". This design is done with a sponge.
- The nail is covered with a base coat and a flesh colored base coat. The layers are dried.
- A strip of white varnish is applied to the smile zone - evenness does not matter.
- Take a sponge and blend the varnish over the tip of the nail.
- Fix the varnish with a top.
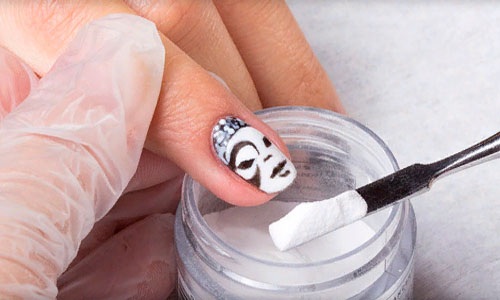
Another easy option is done using acrylic powder:
- The nail is covered with the chosen color of gel polish, but the layer is not dried in the lamp.
- The tip of the nail is immersed in a jar of acrylic powder. A certain amount of powder sticks to wet gel polish.
- Then the coating is polymerized.
- Excess acrylic powder is shaken off with a brush.
- Then they cover the nail with a top and separately add a drop of top to the border of acrylic powder and gel polish, let it spread so that the coating evens out.
Step-by-step instructions for performing a variation on a French theme:
- The nail is covered with base and base color.
- Draw part of the "smile" in white. This part will look like a triangle, the longest side of which is located on the side of the nail, and one of the corners of the triangle is located on an imaginary line dividing the nail lengthwise into two equal halves.
- Then the second part of the "smile" is painted with black gel polish. The triangle will turn out to be larger, it will be partially adjacent to the white one with one longest side.
- After polymerization, remove the shine and draw the outline of the longest side of the black triangle with the top. Cure top 5 seconds in the lamp.
Then sprinkle the top with sparkles, press them with your fingers and place in the lamp. Shake off excess sparkles.
Beautiful designs on the nails are also done by beginners. Gel polish dries only in a lamp, therefore, when performing a design on a nail, you can take your time and experiment. Step-by-step instructions for creating drawings and professional recommendations will help you make the design you like the first time.
Author: Irina T.
Article design:E. Chaikina
Useful video clip about drawings on nails
The video presents six ideas for wet gel polish drawings:
I don't use any dots - I have a match in my hands - I turned it to the required size - and go! Which I advise everyone.