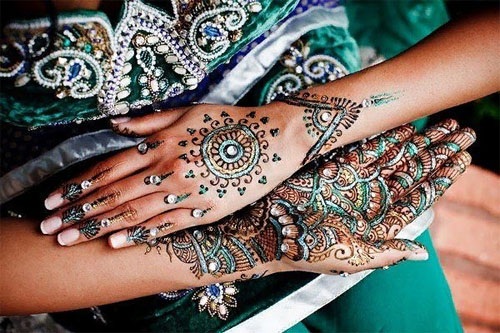
Man began to decorate himself with drawings from ancient times. Henna has been used as a tattoo material since the days of Ancient Egypt. Modern fashion welcomes the interpenetration of different cultures. And even novice masters of body painting are able to decorate themselves with the flavor of eastern peoples on their own.
What you need to paint with henna on the body
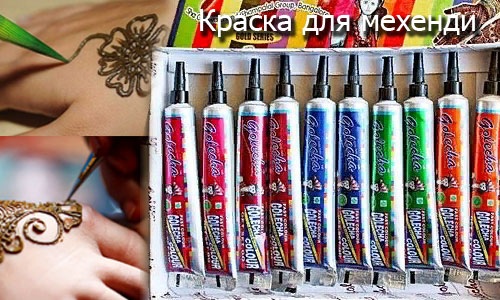
Specialized stores, online sites offer a wide selection of goods for creating biotatu. The mixture is available in a package that allows you to immediately apply a picture from it. Stores offer different shades and colors of paint. The combination of contrasting pastes, the use of several colors in one ornament makes the decoration more interesting.
In specialized Indian stores, they buy stencils for mehendi and oil, which allows you to maintain the brightness of the picture for a long time. You can make the paste yourself. The recipe requires henna powder, lemon juice, tea (coffee), sugar and vegetable oil.
You will also need cotton pads, cotton swabs and a liquid to degrease the skin (salicylic alcohol 1-2% or alcohol-containing lotion is suitable). The master chooses the tool for work individually. Most often they paint with a paste from cones; more experienced artists use brushes or wooden sticks.
Features of the choice of dye
To perform mehendi, cosmetic henna is used. A finely ground powder is released so that large particles do not spoil the ornament. Traditional patterns use natural henna paste, which has a reddish tint, depending on concentration, from light to dark brown.
Such a composition, with rare exceptions, does not cause allergies.
Color pastes for drawing have a natural base, but the color is achieved by the addition of chemical dyes. This can cause unwanted skin reactions. Out of caution, it is better to test the paint in advance on the elbow bend of the hand, this should be done 12 hours before applying the pattern.
The main components of the paste:
- henna;
- lemon juice;
- sugar.
Henna for making pasta should be purchased sealed. This powder keeps the pattern on the skin longer, and the pattern looks brighter.
Rules for applying mehendi
Henna drawings for novice mehendi masters will not be difficult if you perform the operations in stages:
- Choose a drawing and place of application, prepare paste and tools.
- Skin preparation:
- the day before applying the biotat, you should not take a tan;
- the hairline must be removed from the drawing area;
- wash the skin thoroughly (it is better to use a scrub);
- before drawing, steam the place of the future pattern, wipe it with eucalyptus oil.
- Application of an ornament:
- first you should draw the main lines, then decorate with smaller patterns;
- it is recommended to first draw a tattoo with a felt-tip pen, then circle with henna;
- it is better to start the drawing from the edge so as not to disturb the lines already drawn;
- the layer of paste on the skin should be about 2 mm;
- if a mistake is made, carefully remove the excess with cotton swabs dipped in alcohol or oil.
- Drying mehendi.
Video about the sequence of applying mehendi:
At the final stage, the paste is removed from the skin
How long does henna take
The applied drawing dries up within 1-2 hours. In some cases, if the applied layer is too dense, it will take up to 12 hours for the paste to completely dry. To speed up the process, you can expose the mehendi to the sun, after covering the drawing with a film, or dry it with a hairdryer.
The brightness of the image directly depends on the duration of the stay of the paste on the skin. If the drawing is applied in the evening, it is recommended to wrap it with a film before going to bed. and fix so that neither the film itself, nor the bedding will damage the lines.
Some masters advise to wait until the henna falls off by itself.
There is a little trick to keep the drawing for a long time: after the first drying of the paste, moisten the paint with a napkin soaked in sweetened lemon juice (1: 1), then repeat the procedure again.
How to remove henna from skin
After the mehendi has dried, you can remove the paste with a blunt knife or other scraper. After that, you should moisten the drawing with a cotton pad soaked in lemon juice. To fix the drawing, grease with eucalyptus oil. Bath and water procedures within 8-12 hours after drying are contraindicated in the pattern.
How many days does the drawing last
The lifespan of mehendi on the skin depends on many factors:
- individual characteristics of a person;
- the frequency of contact of the pattern with water;
- method of application;
- paint composition;
- care for biotat.
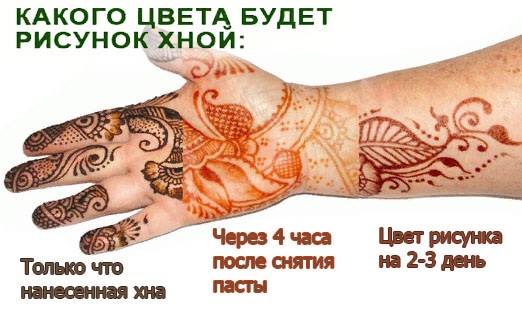
Immediately after removing the paint from the skin, the drawing will have a pale orange color, in 2-3 days henna “gains strength” and the ornament turns dark brown. On average, the pattern lasts from 1 to 2 weeks. With proper care, you can go with the decoration for up to 1 month.
How to care for mehendi
Biotatu will retain its color longer if you follow simple rules:
- less often contact with water;
- do not peel;
- grease the pattern with oil before washing;
- avoid contact with clothing or jewelry.
You can remove a picture that has lost its appearance using lemon juice and soda. A pasty mixture is made from these components, applied to the skin and left for 10-15 minutes. Then you need to rinse everything off with hot water and scrub the surface.
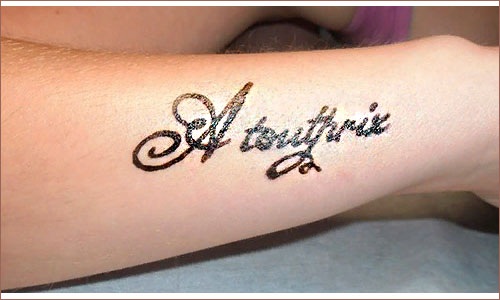
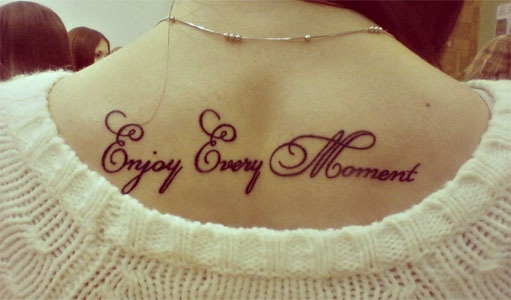
Henna lettering
Henna lettering is one of the options for body painting. They help to reflect the mood, tell about an event, a life milestone. Unlike permanent tattoos, such an inscription will not last long, so you can safely write about what is in your soul in the current period of time.
Most often, words in a foreign language are chosen, they look more intriguing and make you want to ask the owner what this means.
Quite often there are sayings written in hieroglyphs. Men prefer crisp geometric fonts. When choosing a phrase, they stop at slogans (although there are very cute inscriptions). The letters in women are distinguished by grace, an abundance of all kinds of curls, such are most often written romantic phrases.
When choosing the place of the inscription, you should take into account the number of words of the selected dictum. Small (in a few words) quotes are placed on the back of the wrist. There they are not striking, and you can write about something intimate. In this case, it is also advised to choose the area of the neck that is hidden under the hair or shirt collar.
If you want to write a quatrain or a long saying, it is better to choose your back, stomach or part of the body under the chest.
Many people prefer inscriptions in Latin, mainly philosophical sayings:
- “Non omnis error stultitia est” (not every delusion is stupidity).
- There are often words of love such as “Amor vincit omnia” (love wins over all).
- Phrases about fate look intriguing: "Fortunam suam quisque parat" (everyone finds his own fate). These sayings are placed on the arm, neck or chest.
Words in English are no less popular, many understand it, so often no translation is required.These can be lines from popular songs, films. Words are dedicated to relatives and loved ones. The English language is mobile and lively, which allows you to show your imagination.
Examples for hand execution
Henna drawings for beginners are usually easy to complete. They are easiest to do on the palm of your left hand (if the master is right-handed). This place is also suitable for those with a strict dress code at work, as the palm is easy to hide.
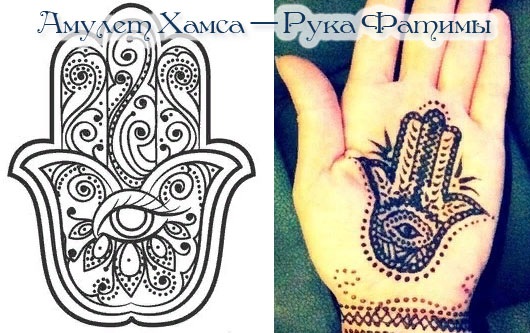
Image options:
- The symbol "Indian cucumber" is often placed in the center of the pattern, in another way it is also called "Tear of Allah". The teardrop pattern carries deep meaning. Now it is interpreted as a wish for wealth and fertility. It is advised to apply the drawing to young girls and women seeking to find a family and have children. Indian cucumber is painted both on the back and on the outside of the palm. It is framed with small curls and leaves.
- Another popular symbol is the sacred Om. This intricate curl means the infinity of the universe and everything divine. Om is placed in the center of a flower or circle. He is recommended to be portrayed when you need to find spiritual harmony, to find an answer to any question. Drawn more often on the inside of the hand.
- Muslim girls and women apply "Hamsa" on their palms, in other words "Palm of Fatma". The symbol looks like an upside-down palm with an eye in the middle. This is a powerful talisman against dark forces and the evil eye. Keeps harmony and love in the family, protects future offspring.
Easy sketches on the wrist
Henna drawing can be done even by novice craftswomen:
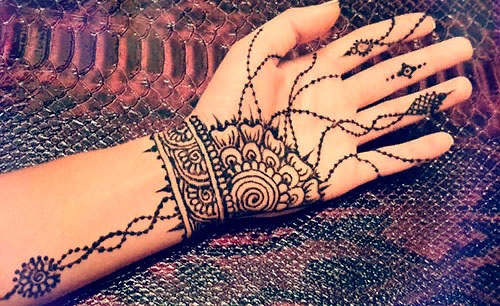
- For family events and holidays, wrists are decorated with mehendi in the form of bracelets. It is enough to draw several straight parallel lines and connect them together with geometric patterns, curls, or simply put dots between them. Bracelets can adorn both the hands of women and men. In the male version, the pattern is more laconic and strict.
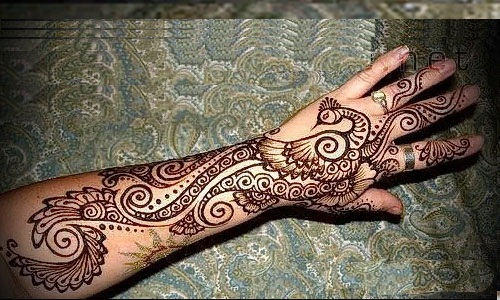
- The pattern that goes around the wrist and continues to the outer part of the palm and fingers looks more pretentious and elegant. Floral designs are used here, decorated with leaves and curled tendrils of plants. The symbolism uses Indian cucumber, lotus flower, spirals, feathers and everything that allows you to fulfill fantasy and skill.
- The painting looks luxurious, "dressing" the hand like a glove. It is painted for weddings (white painting is gaining popularity, although there is no henna at the base of this paint), ethnic parties and other similar events.
The main thing is that the drawing is combined with the inner mood and complements the image of a woman.
Forearm Drawings
A very convenient place for drawing mehendi is the hand from the wrist to the elbow. If you paint there, without transferring the pattern to a brush, you can easily hide it with a long sleeve, and at work they will not notice a deviation from the dress code.
- On the forearms, animals, birds, flower ornaments are depicted. A good sign will direct the owner's hand to good deeds, give strength and energy. Every flower, animal or bird carries a hidden meaning. If the tattoo is not chosen from traditional oriental motives, the main thing is the meaning introduced by the artist.
- The dreamcatcher looks beautiful - the amulet of the Indians, a similar amulet is found among Siberian shamans. It is a circle braided with a web with a hole in the middle, feathers of birds are suspended from below.
The sign is designed to protect the owner's sleep, drive away bad dreams and miss good ones.
Leg patterns
Henna drawings (experienced craftsmen give advice for beginners) will add zest to your look. In ancient times, both legs were painted to find harmony. It was believed that the right leg is decorated in order to know oneself, to find harmony with the Universe.
The patterns on the left leg are in common with the external material world and its benefits. It had to do with the feet. The shin, ankle and thigh do not carry such a deep meaning, so you can draw on them whatever the artist wants to express.
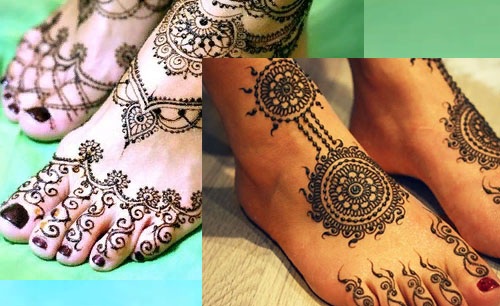
- The drawing of the sun looks original, subtle and inconspicuous, decorating the side of the leg at the heel. It is a sign of the energy of life and is placed on both the inside and outside of the ankle. Drawings of feline representatives are often placed there to give a soft gait.
- The upper sides of the feet, symmetrically painted with floral ornaments, will complement the beauty of their owner. If you extend the pattern on the shins, you can create the illusion of boots. A successful drawing will not only emphasize the slenderness of the legs, but will also allow you to correct some imperfections, if any.
- The drawing on the hip will add sexuality to the image of the girl. If it is done around the thigh, it will set off the delicate skin, complement it with a short dress or shorts.
- It is customary to draw animals and birds on the calves. The main thing is to choose what you want to convey to the world around you.
- Mehendi in the form of an anklet is no less popular. Floral and geometric ornaments look beautiful. Rhombuses symbolize sensuality and emotionality, triangles will tell about a person's purposefulness.
Mehendi sketches on the back
The back represents a wide field of activity for mehendi. Large drawings are placed here. Often, women with a pattern emphasize the beautiful neckline of the dress, play up the position of the straps of a sundress or swimsuit. The drawing of a vine running down the spine looks elegant. Grapes symbolize loyalty to the chosen one.
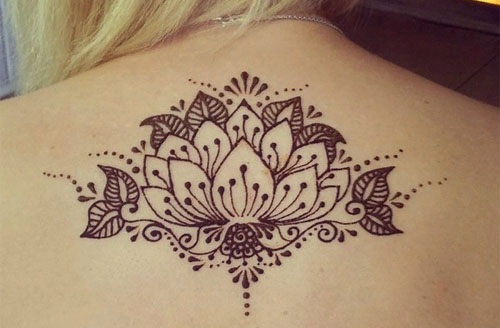
You can beautifully place a lotus flower between the shoulder blades - a sign of purity, an appeal to God.
Animals are drawn on the shoulder blade:
- peacock - creativity, joy;
- dragon - a symbol of power, a magical beast;
- owl - wisdom and knowledge;
- the turtle is the progenitor of all living things.
You can paint the entire back or a small area, the correct combination of painting elements can not only decorate the body, but also call on luck and well-being.
On the belly
The abdomen is of particular importance for mehendi application. It is associated with health, childbirth, so the symbol should be chosen more carefully. The same signs are applied here as on the back of the hand. to gain peace and balance and protection from evil spirits.
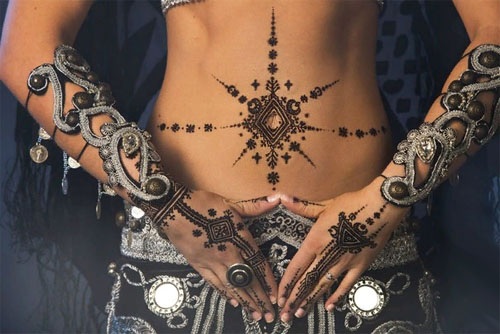
These signs include:
- Ohm symbol;
- spirals (development, sign of the infinity of the Universe);
- anchovy;
- Indian cucumber;
- Shri Ganesha (well-being and intuition).
For pregnant women, flower ornaments, signs of the sun and stars are painted, a rainbow (a symbol of hope and joy) looks good.
On the chest
You can decorate the piquant neckline with beautiful patterns. Here mehendi are made in the image of a necklace.
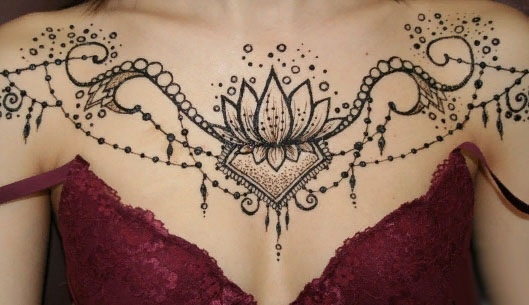
- Floral motives are widespread. A lotus flower and roses are woven into the drawing. The lotus on the girl's chest suggests that she is ready to reveal secrets and desires only to her chosen one. The rose symbolizes innocence and modesty.
- The image of the wings under the collarbone looks original and elegant. This sign demonstrates to others the strength of spirit, freedom of thought, generosity of the soul. It is designed to protect from evil spirits and protect from the evil eye.
- In the east, beautiful girls were called moon-faced, the moon or crescent moon on the chest is a symbol of female beauty. The crescent, framed by eight-pointed stars, is a reliable protection from any evil spirits.
- A trident woven into the ornament is drawn for women planning the birth of a child. It is believed that this is a powerful amulet of the feminine principle.
- A butterfly on the girl's chest speaks of readiness for rebirth. She is depicted as women taking a new path in life. The change will be easy without causing difficulties.
Flowers
Henna drawings (for beginners to comprehend the skill of mehendi is more convenient in stages) are made in parts: initially they draw the main lines, then add decorations. New ideas come along the way, so the pattern may differ from what was originally conceived.
The lotus flower is drawn like this:
- Mark the bottom of the drawing with a dot exactly in the middle.
- Draw 2 petals symmetrically from a point to the sides.
- In the middle, depict the central petal, looking out from under the two already drawn.
- Add 2 more petals along the edges (5 elements turned out).
- Draw 2 petals between the central and the first two elements.
- Connect them with the upper center petal.
- Draw another petal over the first two elements (10 petals in total).
- The base needs to be supplemented with smooth lines, decorated with curls and dots.
The order of the image of the Indian cucumber:
- The basis of the picture is a drop. It is better to twist the tip slightly.
- From the inside, repeat the contours of the element.
- Draw a circle on the wide side of the drop (you can put Om inside).
- Put dots or small circles between the two contours.
- Decorate the outer contour with "lace" and curls.
A phased plan for drawing a rosebud:
- Draw 2 smooth lines from the conditional center (like the sides of a wide vase).
- Make one petal wider by drawing a line from the top of the left to almost the base of the right side.
- From the top of the right line, draw a strip approximately to the middle of the left petal.
- In the center over the two resulting lower petals, draw an arc (an oval unfinished from below).
- Draw a horizontal oval at the top of the bud.
- Supplement the base with petals, decorate with leaves.
Animals
Drawing animals is a little more difficult than drawing plants. If you perform the operations in turn, you get a perfectly acceptable drawing.
The easiest animal to depict is a turtle:
- Draw a horizontal oval, gently tapered to the sides.
- Draw 2 parallel lines repeating the bottom outline.
- Divide with vertical lines to draw the carapace.
- Add the head to the side.
- Draw the legs below.
- Decoration of the picture to the taste of the master.
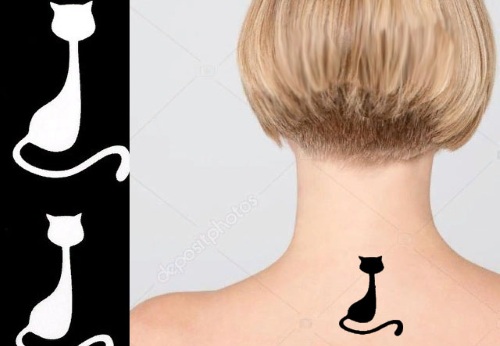
Image of a sitting cat:
- The cat's muzzle is a circle or horizontal oval.
- Draw an oval downwards from it, expanding towards the base.
- Draw the ears on top.
- At the base of the body, draw 2 small horizontal ovals (paw pads).
- Draw side lines connecting the pads to the upper body.
- Draw the tail.
- Mask the lines with wool.
Phased drawing of the dragon:
- Draw the top line defining the curve of the dragon's neck, back and tail.
- Draw the muzzle - like a horizontal petal.
- Draw a bottom line defining the neck, belly and tail.
- Draw ears, comb or wings on top.
- Decorate the tail with a comb, a thorn.
- Draw the paws below.
- Mask the lines with scales.
Birds
An owl is a symbol of wisdom and knowledge. Even inexperienced masters can draw it.

Drawing steps:
- The owl's head is a circle.
- Draw an oval downwards from it, expanding slightly towards the base.
- Draw sharp ears on top.
- Draw 2 small horizontal ovals (legs) at the base of the body.
- Draw the lines of the wings on the sides.
- Draw large round eyes on the head.
- The owl can be planted on a horizontal branch.
Peacock is a symbol of creativity and free thinking.
A phased plan for the image of a peacock:
- Draw an elongated oval in the middle - the body of the bird.
- From above, at some distance, depict a circle - a head.
- Draw neck lines.
- Draw an eye on the head and a beak on the side.
- Draw tail feathers from the bottom from left to right.
- Decorate the top with circles and curls.
- Draw the legs below.
Mehendi beginners will help to apply a henna stencil drawing. You can make it yourself or use a ready-made sample from a store where everything for this technique is sold.
Article design:E. Chaikina
Useful video clip about henna drawings
The plot of how to draw henna rose:
Beautiful ... and most importantly, not forever, then you can draw something else ... I'll have to try