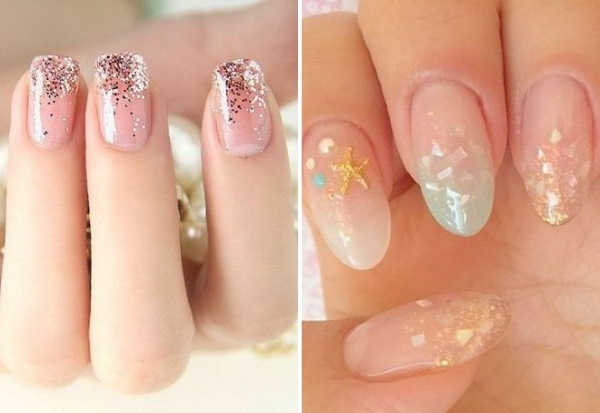
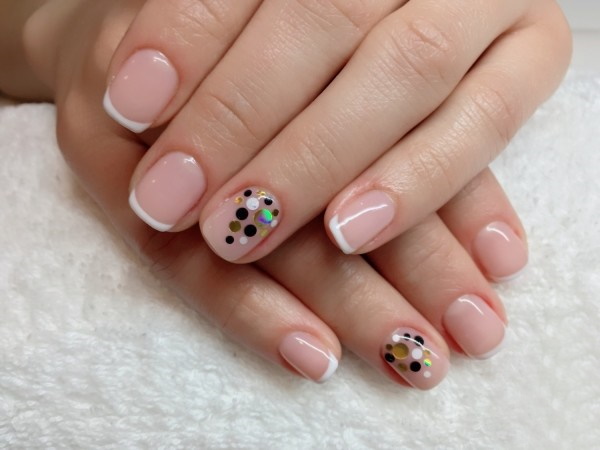
Today, transparent manicure from the 80s has been replaced by designs with a camouflage base or extensions with transparent construction materials. The manicure is decorated with glitter different colors or stylish decor - kamifubiki (shiny confetti).
The combination of transparent areas with patterns and glitter allows you to create delicate and romantic designs that are appropriate at any time of the year.
General recommendations
A transparent glitter manicure can be done independently. Beautiful and elegant designs are obtained using clear nail extension gels. They allow you to create the effects of completely transparent glass and provide hardness to the weakened nail plate.
If there is a transparent gel in the master's collection of working materials, you can make aquarium designs with glitters or build up any length of a transparent free edge. As a rule, such techniques are used by lovers of long nails of the "ballerina" or "stiletto" shape.
The trend of 2019-20 it is considered the use of long nails in the "modern almond" shape (a narrowed free edge, which is obtained by sawdust from the classic almond shape).
For delicate transparent manicures, modern masters use unpigmented camouflage bases with glitters.
Manufacturers produce such materials in different pastel shades. They also mix independently at home.
To do this, you need to choose a dense transparent base and your favorite glitter.
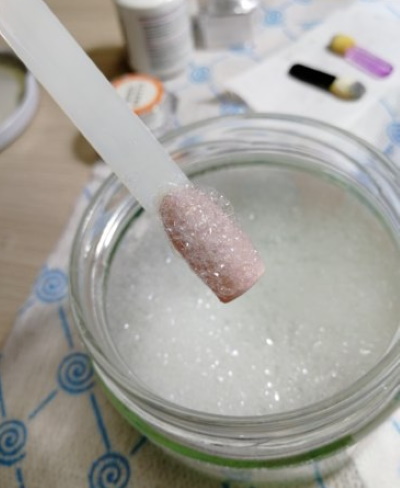
Kneading is done on a palette or in a shallow container (when a shiny coating is applied to all fingers).
Homemade materials require longer drying in an ICE lamp - 60 sec. Store well in a closed container, without light, until the next use.
When using glitter of any size over the base coat, you will need to align the nail with two coats of top coat.
In such options, the masters recommend, after the first application of the top and drying, to treat the nail with a soft buff (remove the protruding ribs from some glitter). Then cover the design with a second layer of the top. This technique, in addition to its beautiful appearance, provides long-term wear without detachment.
Techniques and methods
To create a design, you need to choose a general color scheme for the manicure. What color will the nails be covered without decor (it can be several colors). Then build a scheme of layered design execution. For complex decorative compositions, several techniques are used simultaneously.
What techniques are used to create designs on your own:
| Name | Description | Tools and materials |
| Baby boommer style French manicure | On a transparent or light layer of the coating, using an airbrush or aeroufing brush, a dense color gel polish with a soft gradient transition is applied to the free edge of the nail. | Airbrushing device or special brush (foam rubber ball on a long handle), colored gel polishes, transparent or camouflage base. |
| Aquarium design | According to the design intent, glitters are laid out on a monochromatic pastel-colored coating and overlaid on top with a layer of a thick base or a construction gel (it is convenient to use the upper molds to overlap the shiny layer). | Solid color gel polish, decor, rubber base or builder gel for building, top forms, flat brush for laying out the material. |
| Stretching with sequins | A thin coating of the base is applied on a monochromatic layer of color, and glitters are laid out “wet”, which are stretched with a thin brush to the free edge. | Glitter, color gel polish, fine paint brush, base and top gel. |
| Foam design | On a nail covered with varnish and sequins, a bubble-shaped relief is created using soap suds. | Monochrome gel polish, lather, buff, base and finishing gel. |
| Monogram | On a transparent surface, with a thin brush, monogram designs are drawn at the hole of the nail or in a strip at the side edge. | White gel paint, color gel varnish, thin brush with artificial bristles for monograms. |
Some of the techniques are used to create the background. For example, a baby boom-style gradient is decorated with monograms or stamping on top.
Ideas for a solid color manicure
A transparent glitter manicure is done on a solid color finish. To preserve the effect of transparency, it is recommended to choose unpigmented camouflage bases in light pastel colors.
Options for using a transparent layer in solid color designs:
- apply a colored coating to the nail, decorate it with glitter and cover it with 2 finishing layers;
- on a nail treated with a primer, lay out a layer of a decorative base with glitters and top with a finishing layer;
- put glitter on a natural nail, on a transparent base layer and cover with a layer of colorless constructing gel on top;
- create a transparent layer (without decoration) using the upper forms - "glass effect".
How to create a glitter aquarium design:
- After manicure, the nail is coated with a light colored gel polish.
- After drying the colored coating, a layer of transparent base is applied, on which glitter, kamifubuki, Yucca flakes are laid out. After the completion of the calculation, the nail is dried in a lamp, 60 sec.
- Above, in the apex zone, a drop of thick polymer material (rubber base or construction gel) is installed, which is spread with a thin brush over the sparkles. The drop spreads into a thick layer, the task of which is to cover the entire glitter. A kind of "glass showcase" is created, under which there are sparkles. Such designs are characterized by good durability and practicality.
In order for the multilayer structure to hold well, it is recommended to dry the upper layers for 120 seconds (for lamps with a power of less than 48 W).
Masters recommend that the surface of the nail is smooth and does not require filed processing, use the upper forms for aquarium design. In this case, sawdust is carried out only in the area of the cuticle and lateral ridges. The use of top molds will provide a secure coating for a thick layer of glitter and the necessary transparency to admire the shine.
If you make the upper transparent layer with a thin brush, you need to lay out a thicker layer of polymer material, counting on further filing. At the end of the design creation, the nail is treated with a soft buff over the entire plane.
Options in different shades
Transparent glitter manicure is often performed on a multi-colored background.
There are several techniques for creating such designs:
- a colored abstraction with sparkles is created on a natural nail, a dense layer of transparent construction gel is applied on top, on which colored elements are drawn with art pastes;
- a multi-colored background is made on the surface of the nail, on top of which glitters and a layer of rubber top are applied.

Master class on creating a transparent design with French elements:
- On the nail, after manicure and primer, a base coat is applied in a thin layer. The base can be transparent rubber or colored camouflage. It is necessary to dry in an ICE lamp for 30 sec.
- A geometric smile is drawn on the free edge of the nail in the selected color.For example, a beveled triangular "smile line" is drawn in white.
- Dip a thin brush for painting into a drop of top and lower it into a container with glitter. Glitter will stick to the brush, and it will be convenient to distribute them over the nail in the right place.
- Sequins are located in the area that is defined for them by design. Then the composition is dried in a lamp for 60 sec.
- The first layer of the top is applied to the nail with the design, which is dried for 30 seconds. in the lamp.
- To provide the final result with a smooth outer surface, you need to walk a soft buff (240-280 grit) over the nail, sanding the protruding edges of the glitter. The end of the nail is especially carefully processed (when the sequins are located at the free edge, they should not be on the end, otherwise this will lead to chips).
- It is necessary to apply a second layer of the finishing gel, with drying in a lamp for 30 seconds.
In designs with a geometric jacket on a transparent background, craftsmen often use art pastes over the topcoat. This material does not require subsequent overlap and provides three-dimensional patterns. Most often, monograms and floristry are drawn.
Another popular design is the imitation of the stone structure. It can be done with translucent pastel gel varnishes, as a background for applying glitter or kamifubiks.
Simple patterns and designs
A transparent coating with a printed pattern is the trend of the 2019-2020 season. Drawings are made in a minimalist style. The painting tool is a thin artificial bristle brush.
For drawings, use gel paint without residual stickiness or thick art pastes. Drawings made with these materials do not need a finish. They must be dried in a lamp for at least 60 seconds so that the pigmented paint layer dries out to its full depth.
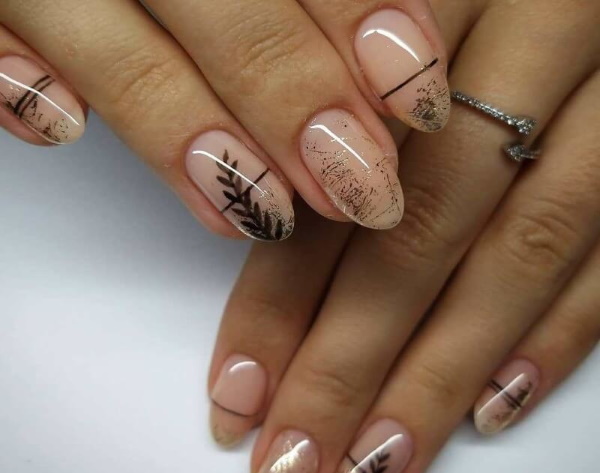
Popular patterns in thin lines for sheer designs:
- geometric compositions;
- floristry - flowers or leaves;
- parallel lines with dots, which are performed by dots;
- monogram designs;
- snowflakes in the New Year theme.
Translucent pastel gel polishes can be used as a background coating. Drawings in black and white look contrasting on them. If you do not have skills in drawing thin lines, you can use special solid color sliders. Flowers or geometry are printed on a cardboard base in thin black or white lines.
After soaking the pattern in water, it is transferred with tweezers to the nail. Masters recommend that the slider hold well by walking along the edge of the film with a pattern on the nail with a primer. After it dries, the nail is covered with 2 layers of top.
Decor ideas for beginners
Transparent glitter manicure looks gentle and solemn. This design is suitable both for holidays and as an office manicure. The difference in designs lies in the abundance of sequins and drawings.
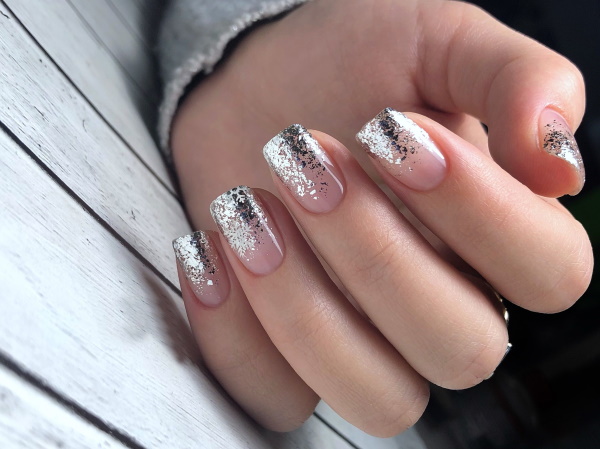
Shiny decor options:
- fine, colored powder glitterpacked in small bags or plastic jars;
- kamifubiki - shiny confetti of a round or polygonal shape, different colors or holographic;
- yucca flakes - applied as fine mica or rubbed with a sponge like a metal rub;
- foil for printing - by applying and abruptly tearing it off the sticky layer of the nail, you can get shiny prints in the form of a cloud of sparkles.
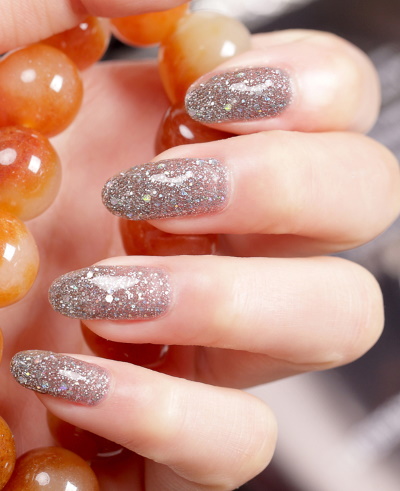
Popular designs of the 2019-2020 season. it is considered to decorate nails with a gradient of sequins or kamifubiki.
How to make a gradient transition with sparkles from the end to the nail hole:
- After manicure, a layer of camouflage base is applied to the nail, and dried in a lamp for 30 seconds.
- Put a drop of thick top on the palette, into which glitter intervenes. With a thin brush, the glitter is transferred to the surface of the nail.
- The glitter top is applied to the free edge of the nail in a thick layer. The brush is wiped on a napkin with a degreaser and dry nap, the glitter is distributed to the cuticle.
- It is necessary to strive for a smooth distribution of glitter, when the highest density is located at the edge of the nail, and individual sparkles reach the cuticle.
- When the look of the brilliant gradient satisfies the client, the craftsman sends his hand with the design into the lamp for 30 seconds.
- The design is then overlaid with two layers of top, each of which is dried separately. Allocate for drying for 30 seconds.
Confetti of different diameters is chosen for decoration with shiny kamifubiki. They are located at the nail hole or along the lateral edge. Kamifubiki can be attached randomly or line up in a geometric shape. Installed on a wet base or top layer, dried together, about 30 sec.
Fashion trends in 2019-2020
At the end of 2019, the "foam design" emerged. It is at its peak of popularity and is moving into trends for the next year. Practicing masters make their own adjustments to its performance, so there are variations of the "foam design" with sparkles or rubbing.
How to make such a decor yourself:
- Prepare the nail for applying a colored coating using a manicure (the technique is described above in the article).
- It is necessary to cover the nail with a base coat. Dry it in a lamp for 30 sec.
- At this stage, apply color gel polish. It should be remembered that on very light and darkest shades the "foam design" blends into the background and gives only texture to the coating, without a visible pattern. This can already serve as an independent design, especially when covered with a matte top. However, in order for the appearance of the "foam bubbles" to be clearly visible, it is recommended to use pastel colors with warm and cold undertone. For example, blue, coffee, olive, lemon color. Dry the color layer in the lamp for 30 sec.
- A top coat is required (it doesn't matter if the material is sticky or not). You don't need to dry the design.
- First, beat the foam in a wide container and transfer part of it with a fan brush to the undried layer of the top. Immediately send your hand into the lamp for 30 seconds.
- While the nail has not cooled down after polymerization, wipe it with a lint-free cloth dipped in a cleanser (any alcohol-containing liquid).
- If the pattern of bubbles turned out to be too embossed, with sharp edges - process on top with a soft buff to smooth out the roughness, but not destroy the texture of the picture.
- When covering with a top, they choose between two options: to level the surface with a thick top (hide the pattern "under glass") or to cover with a thin layer of the finish, while maintaining the relief. Dry in a lamp for 60 sec.
For the preparation of foam, any foaming products are suitable - washing gel, shampoo, dishwashing detergent.
The more intensively the product is shaken (diluted with water 1: 1), the smaller the diameter of the bubbles will be on the surface of the nail. For whipping, you can use a shallow wide container (it is convenient to get the foam out of it) or a small soft plastic bottle (squeeze the foam out of it directly onto the nail).
To add variety and shine to the design, you can first put glitter on the place where the foam is applied and dry it. Then the bubbles on top of it will shine in different colors, and the picture will become clearer and brighter.
"Foam design" is carried out over the entire plane of the nail or only on its part (it is convenient to combine with geometric patterns and designs in the "stained glass" style). This design attracts attention with restrained elegance and unusualness. It is performed both on all fingers of the hand, and selectively.
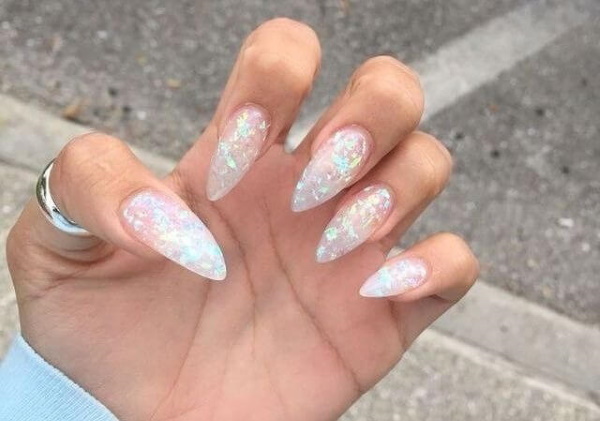
Avant-garde and daring design is considered a design in which there is no color - the extension of a transparent nail plate on a natural nail. As a rule, this design option is performed for a nail length of 1-3 cm.
Master class on building transparent nails with upper forms:
- Using a manicure, clean the nail from the pterygium at the cuticle and under the lateral ridges. Cut off the free edge of the nail, making a soft oval.
- Degrease the nail with a cleanser or any alcohol-containing liquid.
- At this stage, a primer is applied, which is allowed to air dry for 1-2 minutes.
- Pick up the upper forms for all fingers in such a way that the entire nail plate overlaps the width of the nail. Forms are immediately selected for all fingers of the hand.
- Before work, plastic molds are wiped with a lint-free cloth dipped in an alcohol-containing liquid. To remove debris and disinfect the instrument.
- With a flat, wide brush, the gel is laid out in the depression of the upper form. The material is distributed evenly, the required length is built. Be sure to apply the gel to the lateral parts of the mold (in a very thin layer).
- The form is turned over and pressed against the nail. The pressure should be soft so as not to squeeze the gel out of the mold, not to form ugly nodules under the side rollers.
- The form is pressed and moved to the cuticle. There should be a gap (1 mm) between the skin and the mold. Do not push the material under the skin roll. this eliminates the possibility of filing and guarantees detachment.
- The finger goes into the lamp for 30 sec. If long nails are lined up, then after 10 seconds, the finger must be pulled out and pressed over the form with a clamp to form an arch. Return the finger to the dryer (together with the mold and clip) for 20 seconds.
- After curing, remove the clamp and mold. The plastic form can be easily removed after swinging it from side to side at the free edge of the nail.
- After removing the form, carry out secondary sawing (180 grit file). The area at the cuticle, on the sides, is necessarily processed. In these areas, it is necessary to reduce the extended nail to a natural look with a smooth transition. To do this, you can use an electric router (select a router with a red notch).
For this design, not acrylates are used, but transparent construction gels. Acrigel will not give the necessary transparency (imitation of glass). The upper forms provide hardness to the extended nail and make its surface smooth without additional processing.
Simple and beautiful nail designs are done independently using modern polymer materials (photos of possible options are given above in the article). They are practical in everyday life and allow you to create a feminine look for any style of clothing.
Video about transparent glitter manicure
How to stretch sequins: