The headbands combine practicality and style. Despite the fact that this accessory is quite popular, hats use it less often. Therefore, the bandage allows the girl to become more visible.
Types and patterns of knitted headbands
The headband has many advantages over other headgear. Hair does not lose its appearance, as after a hat. Also, the bandage allows you to remove strands from the face if it is used as a hair hoop. This accessory is indispensable in the off-season when the weather is unstable and it is easy to catch cold.
The range of knitted headbands is wide enough:
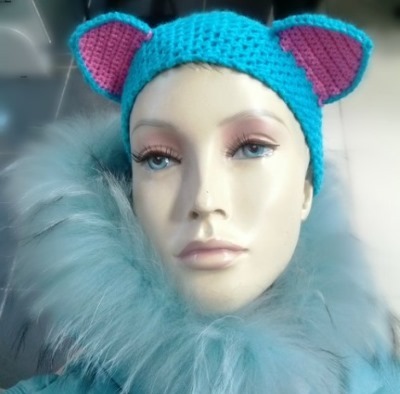
- Young people prefer the "animal" theme, when the bandage is knitted with ears or muzzle.
- Oversized models are obtained by weaving several knitted fabrics into one whole.
- A bandage made with a regular English elastic band.
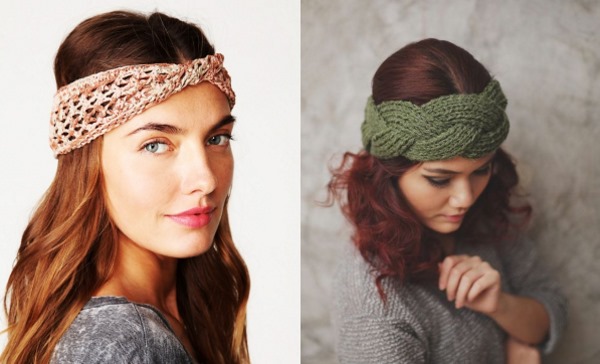
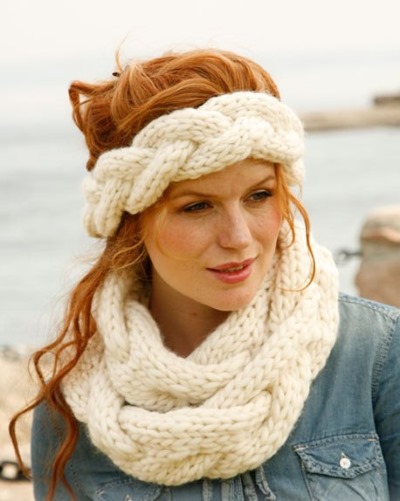
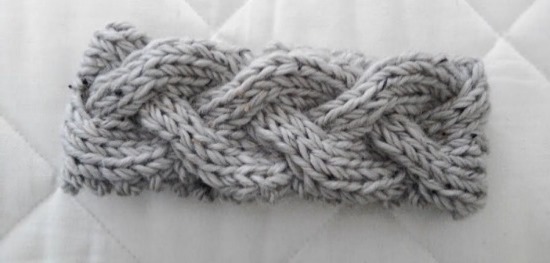
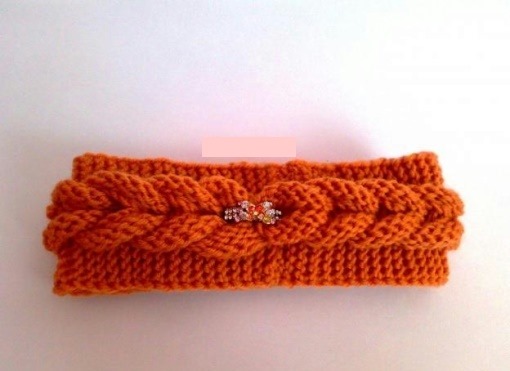
- Headband with a braid pattern.
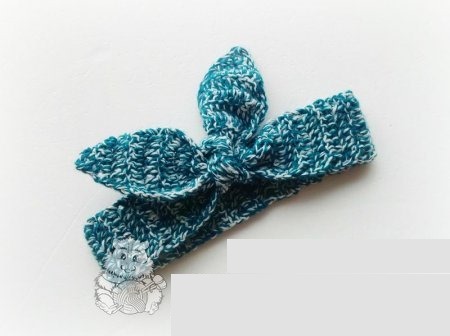
- "Solokha", when the two ends of the bandage are tied in a knot in front of the head. The ties can be real ends of the knitted fabric, or false.
- Summer version with an openwork pattern. Usually knitted from cotton threads.
- "Turban". The appearance of such a headband resembles an oriental headdress. A turban decorated with bright decorations, for example, a brooch, looks especially effective.
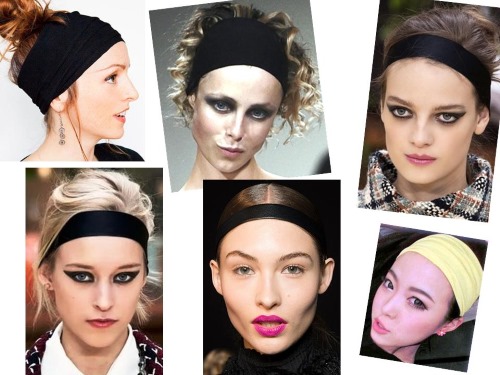
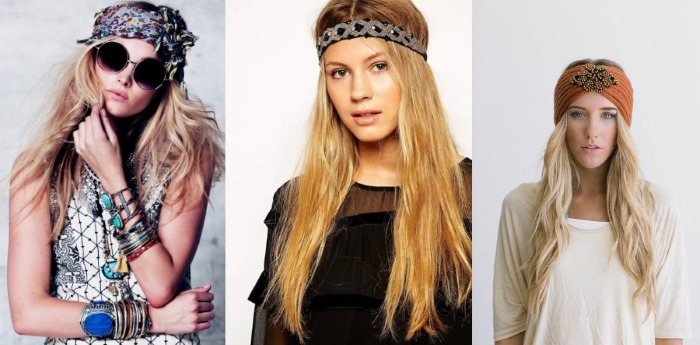
Styles
A headband can complement any look.Thin headbands made of braid, knitted with an openwork pattern with knitting needles or a cross, with or without decorative elements, as well as the simplest headbands, are suitable for a bohemian style of dress.
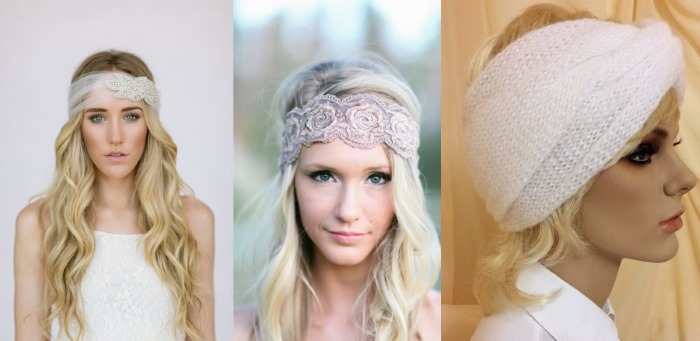
Bridal fashion also did not stay away from fashionable headbands.
Office style requires a woman to be always in a business form. Therefore, dressings should not contain frivolous details.
For a rustic style of clothing, most of the known types of head stripes will work.
The emphasis should be on the color of the yarn. Natural shades of brown, gray, blue and green will look good.
Fashion trends
The relevance of headbands for several fashionable seasons is primarily due to the versatility of this accessory, its all-season nature. The headband can complement any style of dress.
The headbands, bows, lace and classic monochromatic headbands without decorative elements are especially loved by designers.
The accessory can have floral or geometric prints. Black and white remain in vogue, both together in two-tone headbands and in single-color accessories.
Color selection
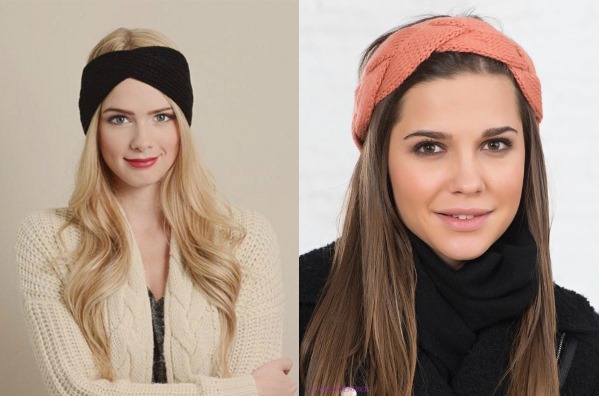
A knitted headband is an accessory that does not take much time to make. Therefore, it can be associated with each image or along with any desired colors. However, if such a task is not worth it, then white and beige are colors that will suit 90% of clothes.
For children, preference should be given to pastel colors.: peach, coral, sky, pink, violet, as these colors are most often present in children's clothes. Adult women can afford rich colors: purple, blue, burgundy.
For young girls, bright or pastel colors are suitable. Choosing a bright yarn - red, green - you should understand what kind of clothes this accessory will wear.
How to choose a pattern for girls, girls, women
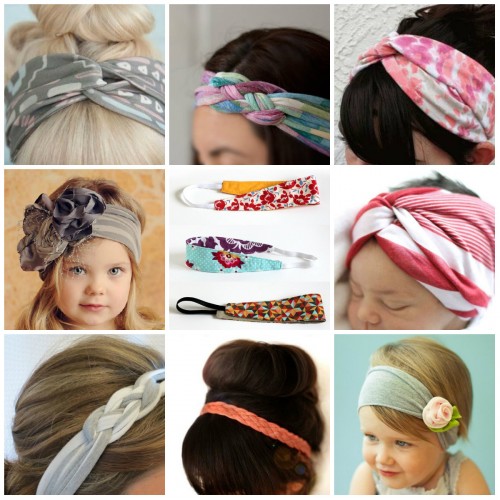
Baby headbands are an actual accessory that mothers wear with pleasure on their daughters, starting from infancy. At the initial stages, this is a thin knitted strip with decor up to 2 cm wide. For children, the width of the garment will depend on the intended purpose of the dressing.
For beauty or summer version, you can make up to 3 cm wide. For cool weather, the width reaches 6 cm. Sometimes it is convenient to make a product of maximum width when there is only a small hole for the hair at the crown.
The patterns on children's things are simple. It is recommended to use a garter stitch, a simple elastic band with alternating front and back loops, or openwork patterns.
It is important to make sure that the headband is not very tight or tight.
It is better to achieve a decorative bandage not by complicating the pattern, but by using additional elements: bows, flowers, jewelry made of rhinestones, beads, felt, ribbons of different widths and densities.
Special attention should be paid to threads. Ideally, use cotton. It is permissible that the threads contain synthetic fibers, but not more than 20%. If you need to knit a warm bandage, then you should take alpaca or merino yarn. It has the softness necessary for baby skin, while the product will be warm.
You need to be very careful when choosing woolen yarn. For use in baby clothes, it has many disadvantages. The most important thing is that it is an allergen. In addition, it can be injected. It is better to exclude such yarn altogether, especially since the stores offer a wide selection of special children's yarn. To create a man-made masterpiece, one skein is enough for a child's head.
For young girls, it is better to choose simple patterns so that they do not distract the eyes from the face - simple braids, garter stitch or elastic.
Bright decorative details look very advantageous on girls. They can be shiny, voluminous, or very bright. This will make the image lively and memorable.
Women can afford to experiment with texture and colors. The only thing to avoid is over-decor. For example, sequins are best left for young girls. But on the other hand, a headband with a veil is something that is especially suitable for women over the age of 40.
The patterns themselves can be large and catchy, using textured or melange yarn. The main motto for such models is courage. Braids or a simple shawl pattern, but knitted from thick yarn, will look great. Also, for adult women, headbands with complex patterns, which are available for experienced craftswomen, are suitable - jacquard, spiral.
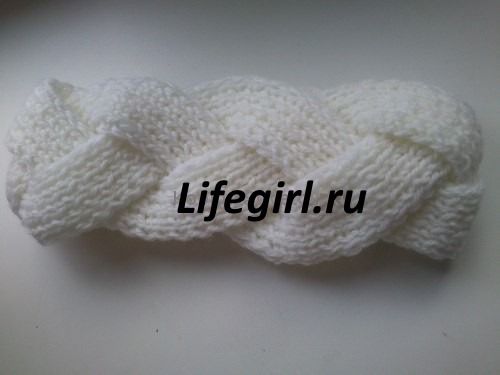
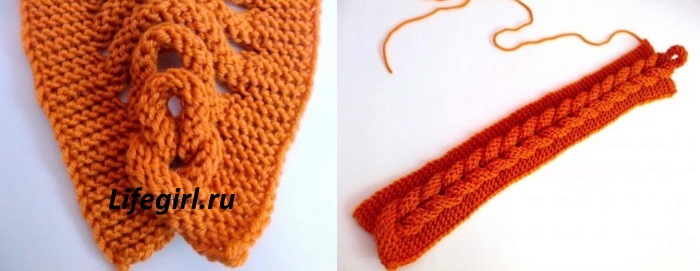
Knitted braid: step-by-step instructions with knitting needles
There are several ways to make a braid bandage with knitting needles. The accessory turns out to be voluminous. This should be taken into account when choosing the yarn thickness.
Method 1
Even a novice craftswoman can knit a headband in 1 evening. You need to take a skein of thread, although less is required for the work, or the rest of the yarn, if desired, of different colors.
To knit a product you will need:
- Yarn - 1 skein.
- A pair of needles, 20 cm long.
- A needle with a thick eye.
- Pins - 2 pcs.
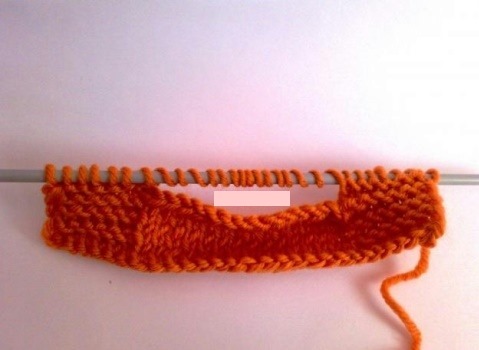
Procedure:
- Need to cast on 27 stitches.
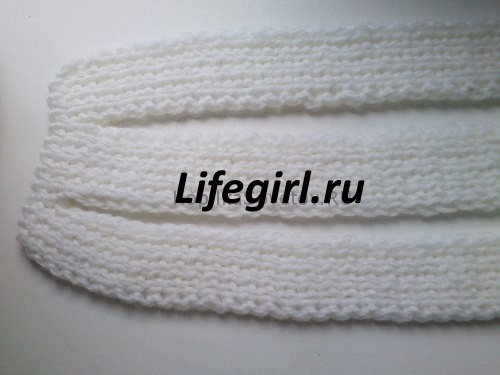
- In the 1st row, you need to knit an elastic band, alternating faces. and out. loops If the product does not seem wide enough, then loops should be added, while the number of additional loops should be made in multiples of three.
- Rows 2-4 should be performed by analogy with the 1st row.

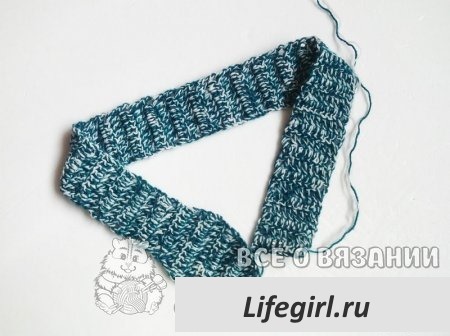
- On the 5th p. you need to knit with an elastic band 9 p. Remove the remaining 18 p. and fasten on 2 pins, each with 9 p.
- The first strip is knitted in length with an elastic pattern. The length of the products is calculated individually. For a head circumference of 55 cm, knit 120 rows.
- After completing the first strip, you need to tie the second and third strips separately. Pinning each one at the end.
- The next step is to weave a braid from the finished strips.In this case, it is important not to tighten the stripes and make sure that the weave is beautiful.
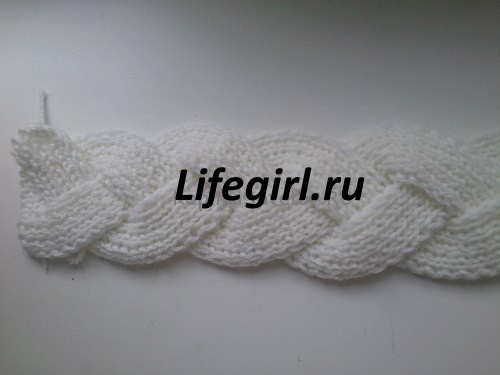
- All loops must be removed from the pins and transferred to 1 knitting needle.
- After knitting the last 4 rows, the loops should be closed.
- At the final stage, you need to carefully sew the product with a needle and the same thread that was used for knitting.
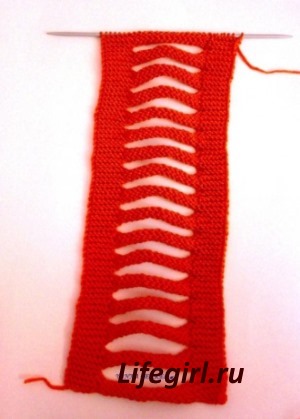
Method 2
In the second method, the bandage is performed with a single cloth.
For work you will need:
- Yarn - 1 skein.
- A pair of needles, 20 cm long.
- A needle with a thick eye.
- Additional spoke - 1 pc.
Stages of work on the bandage:
- 15 loops are typed on the knitting needle, as much as possible, the main thing is that it is a multiple of 3.
- The 1st row should be knitted only with front loops.
- In the 2nd row, all loops must be purl.
- In the 3rd row, the first 5 loops are transferred to additional. knitting needle. The next 5 stitches are knit. Next, you need to return to the transferred loops on the additional knitting needle and knit them with the front ones. The row ends with knitting the front loops on the remaining loops.
- In the 4th row, the loops are knitted with purl.
- In the 5th row we knit front loops.
- The 6th row repeats the 4th row.
- 7th p. 5 loops need to be knitted with the front ones. The next 5 are carried over to add. knitting needle to be placed behind the product. From the 11th to the 15th loops, you need to knit. Finishing the row, knit loops with additional knitting needles.
- The 8th row consists of purl loops.
- This pattern is repeated as many times until the required length of the product is reached.
- At the end of the work, the loops are closed and the product is sewn.
Headband with ears, crochet
A headpiece with playful cat ears is a fashionable accessory that will suit everyone under the age of 25.
For work you will need:
- Threads - for contrast, it is better to take yarn of different colors. Enough for 1 skein.
- Hook.
Stages of work:
- For the dressing, you need to dial 20 air. P.
- In the 1st row, 1 pillar is knitted. without a crochet (on the first air item), then 1 air. n., and 1 pillar. without a crochet (knits over the second air item). We repeat the pattern for the entire row.
- Row 2 starts with 1 lifting loop. Then the pillar is executed without a crochet with air. loop. The next pillar. without crochet is performed in the second loop of the 1st row. It is necessary to repeat the specified pattern for the entire row.
- Continue knitting by alternating the patterns of the previous two rows.
- After reaching the knitted strip of the desired length, knitting should be finished, fasten the thread and sew the ends of the bandage.
Stages of work on the ears:
- For the 1st row, you need to dial 1 loop.
- In the 2nd row, you first need to tie 1 air. A loop, then 3 single crochets using the second loop of the bottom row.
- In the next five rows, it is necessary to increase the number of loops by one on each side. To do this, in the first and last loop of the bottom row, you need to make 2 loops without a crochet, in the rest one.
- In the 8th row, reduce the loop from the sides.
Thus, one ear detail is obtained. There should be 4 of them in total. It is better to make the outer pair of ear details in a different color than the bandage.
2 multi-colored ear details are sewn around the perimeter with single crochet columns with threads of the main color. At the end of the work, you should sew the finished ears to the bandage.
Soloha bandage
The headband has a playful look and is usually made of fabric, but you can also crochet and knit it. Any yarn color is suitable for this headdress, but it is better to give preference to bright colors.
To crochet solokh you will need:
- Yarn - 1 skein.
- Hook.
Completing of the work:
- In the 1st row, you need to dial 3 loops and a double crochet, which is performed in the first loop.
- 2nd row consists of 3 air. lifting loops. In the loop of the column of the bottom row, you need to make 2 of the same columns.
- Next, you should knit 5 rows in the same way as the previous row, while at the beginning and end you should add one by one. In the beginning it will be a chain of 3 air. loops, and at the end - a column.
- In the 8th row, all available loops are knitted.
- The next 2 rows are knitted with a decrease in 2 loops on both sides.
Continue knitting the bandage should be crocheted to the required length of the product.To correctly determine the length, it should be applied to the head during knitting. Without the tips of the bows, it should match the circumference of the head. When the required length is reached, knit the second bow tip.
The knitting pattern matches the previous description, but is performed in the opposite direction. In the first two rows, 2 loops are added. In the next row, we knit a double crochet. over the existing number of loops. In the remaining 7 rows, you need to knit with a decrease in each row, 2 loops.
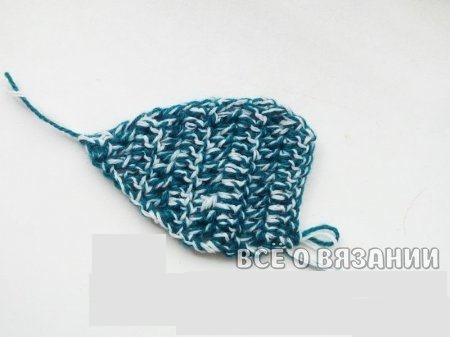
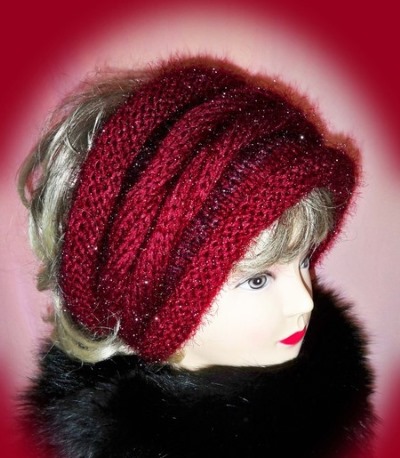
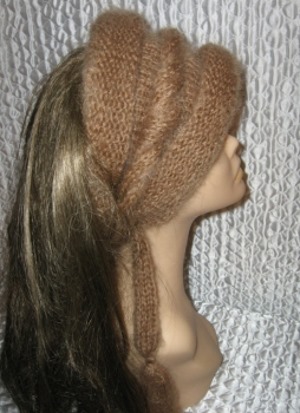
Knitted turban band
The oriental style in the headbands is reflected in the turban and turban knits. These hats are similar to each other. Historically, the differences were in the amount of fabric used to make a headdress. A turban requires a length of fabric. There is also a difference in the type of tying with a cloth. The turban covers the ears, but leaves the forehead open, sometimes hair is visible.
These two accessories in knitted headbands have little differences due to the specifics of their manufacture. Conventionally, for knitted products, the difference is in the width of the bandage. The turban covers the head more, and the turban is noticeably narrower.
It is possible to knit a turban bandage with knitting needles in 1 evening.
For the bandage you will need:
- Yarn - 1-2 skeins.
- Knitting needles - 2 pcs + 1 extra.
- A needle with a wide eye.
 Stages of work:
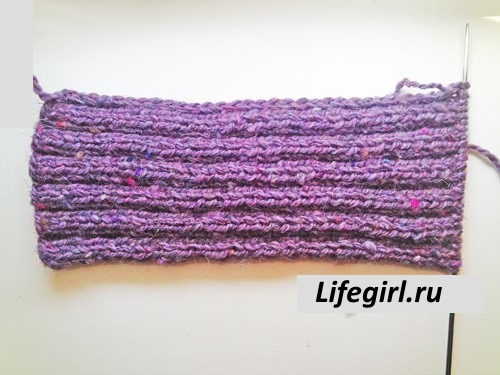
- On the needles, you need to dial 26 loops.
- The 1st row should be knitted with an elastic band, alternating 2 persons. and out. loops. We simply remove the first loop. We knit the last one out. P.
- We knit a strip 20 cm long in this way.
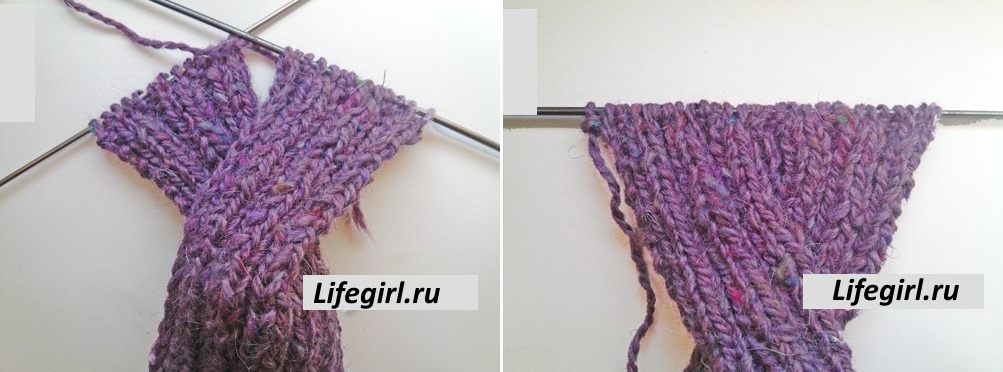
- To get an overlap in the middle of the bandage, the fabric of the product should be divided into 2 strips, which will be performed separately. To do this, at the beginning of the row, you need to remove the chrome. p, and knit the next 12 loops with the main pattern. Having reached the middle, you need to unfold the work, and continue to knit the next 19 rows using an additional knitting needle.
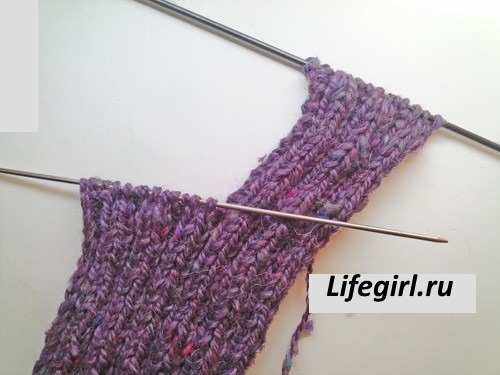
- We repeat knitting the pattern with the remaining strip. Moreover, its length should correspond to 20 rows.
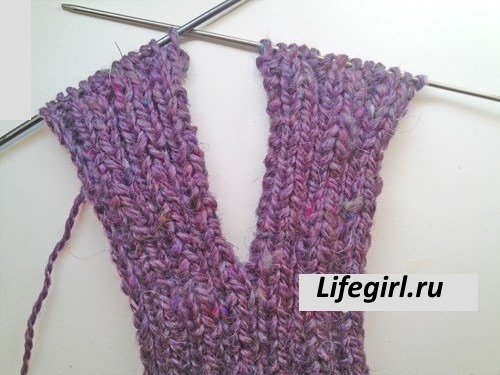
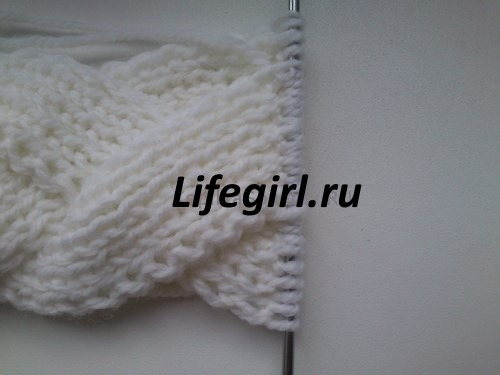
- In the middle of the bandage, you need to make a crosshair of the stripes. And using the third knitting needle, knit a common row according to the main pattern, connecting 2 strips.
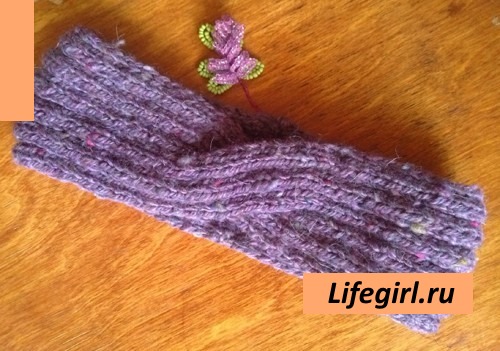
- Next, you need to knit another 20 cm of the canvas, after which the last row needs to be closed, and the product must be sewn.
Knitted turban headband: knitting pattern
To complete the knitting, you will need 1-2 skeins of yarn. Such models look good, knitted from warm threads with decorative effects, such as mohair, melange thread, lurex yarn.
Turban work can be divided into 4 stages:
- It is necessary to dial 8 sts and knit with stockings (persons knit from the face, and on the wrong side - purl) a rectangle. It is necessary to correctly determine the length of the side length of the strip. If you stretch it, then it should correspond to the girth of the head.
- Further, the bandage needs to be increased in width. In this case, the connected rectangle will be the basis for the lateral expansion of the product.
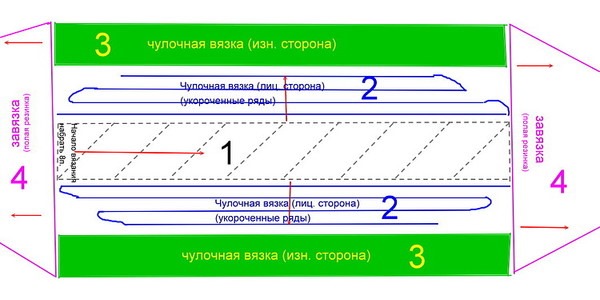
To tie the side part, you need to make 2 front loops for each base loop. Next, 4 rows are knitted, while at each turn to a new row, the number of loops should be reduced by 5.
- After that, the remaining 12 rows are knitted.
Repeat step 2 for the other side of the base.
- At the final stage, strings are knitted. To do this, cast on the loops on the narrow side of the product and continue knitting to the desired length of the tie. It is also repeated on the opposite side of the product. If the strings are too wide, then at the beginning of their knitting, 1 or more loops should be reduced on both sides.
Bulky knitted headband
To make a bandage you will need:
- Yarn - 1 skein. It is recommended to choose bright colors and a thread with a clear structure. Then the volumetric pattern will look more expressive.
- Knitting needles - 2 pcs.
Stages of work:
- You need to cast on 29 loops.
- In the 1st row, knitting is done with knitting. Here and further chrome. the item will need to be removed, and the last loop should be knitted with a purl.
- In the 2nd row, knit according to the pattern: 6 persons.loops, then out 15 sts and again 6 persons.
- In the 3rd row, you only need to do the facial ones.
- In the 4th and 6th row, the scheme of the second row should be repeated, and in the 5th of the third.

- In the 7th row after 6 persons. etc., the next 15 loops must be closed, the remaining loops are knitted.
- In the 8th row, the first 6 loops are knit, then you should dial 15 loops, making the required number of turns on the knitting needle, make the rest of the loops knit.
- Continuing to knit the bandage, follow, repeating the pattern of the previous eight rows. We check the length of the product by applying it to the head and slightly stretching it.
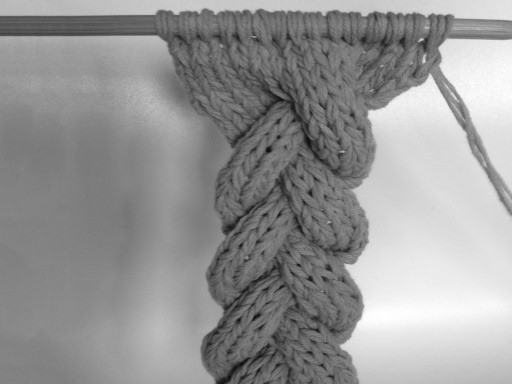
- In order for a pigtail to appear on the product, a loop must be made from the first transverse strip.

- The next strip is pulled through this loop. This action must be repeated with all strips. Next, you need to measure the strip. If it turns out to be large or small, then this can still be corrected.
Finishing work, you need to close the loops and sew the bandage.
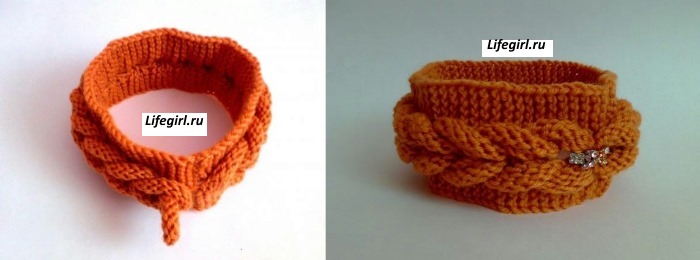
The last loop is neatly sewn to the bandage or decorated with a button or brooch.
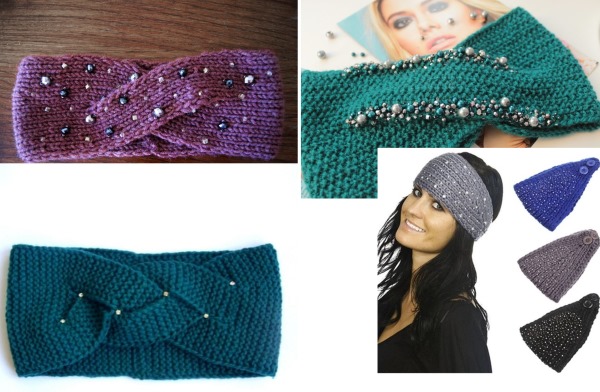
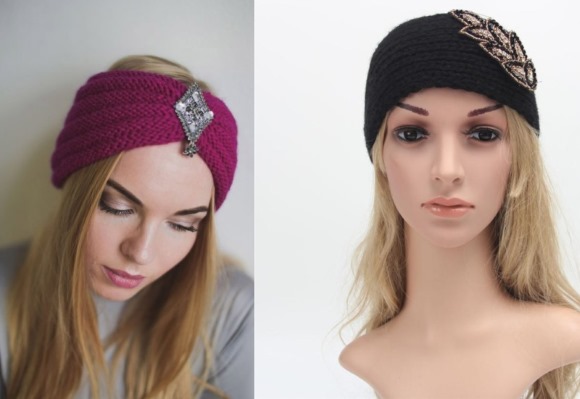
Headbands with rhinestones
Rhinestones and other decorative elements allow you to give an elegant look to the bandage. They also help update an outdated or boring model.
You can sew rhinestones on the bandage, observing the selected pattern, or without planning a special pattern, but symmetry should be observed. Here are some ideas for decorating knitted headbands.
You can also make a brooch for a bandage from rhinestones, beads or beads.
To make jewelry you will need:
- Felt or other thick fabric.
- Artificial leather.
- Rhinestones, beads, beads.
- Thread, needle, scissors, glue.
Stages of work:
- Transfer the selected pattern for the brooch onto a piece of felt.
- The perimeter of the pattern along the contour should be trimmed with beads.
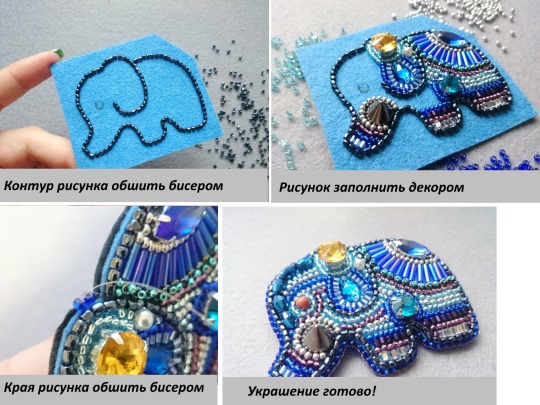
- Further, the entire area of the drawing is filled with the available decorative elements.
- A piece of leather cut out in the shape of the decoration should be glued to the wrong side. The edge of the product, where the parts are glued, must be closed by sewing it with stitches with beads.
- It remains to sew the finished decoration on the bandage.
How to wear a knitted headband
A headband is a versatile headgear option. It will suit owners of short hair or long hair. Looks good when the hair is pulled back and when it is loose.
Regardless of the chosen style, the bandage can be worn over the hair, or the hair can be released up the bandage. If the bandage acts as a hoop, then the released bangs look spectacular. When the hair is tied up in a ponytail or a bun at the back of the head, the bangs do not need to be released.
The "Turban" and "Turban" styles suggest wearing an accessory over loose hair, or hair should be tucked under the accessory.
Original ideas for knitted headbands
A headband in an unusual design allows you to emphasize individuality and non-standard approach to fashion.
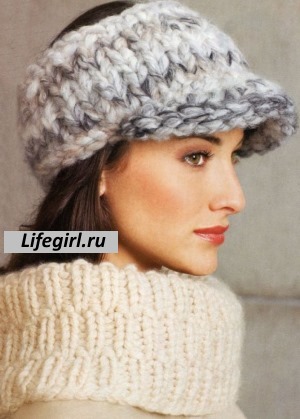
A bold option for cold weather. A thick, warm yarn has been chosen for this model. Moreover, most of the surface of the head is covered with a headdress. A knitted visor will protect your face from the cold wind and possible precipitation in the autumn-winter season.
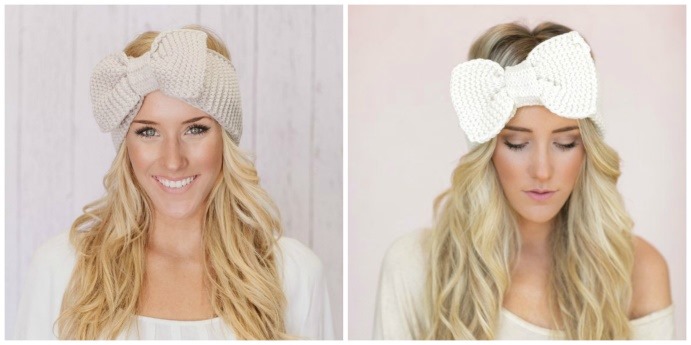
A headband with a large decorative bow looks very festive. It will go well with the dress. If you knit such a bandage made of cotton threads, it will become a wonderful accessory for the summer.
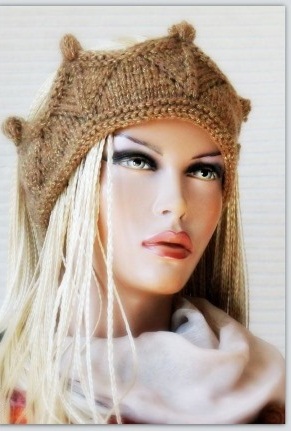
The headband-crown is suitable for owners of long hair.
Even the classic model of the headband can be made original by decorating with unusual elements. A headband is an accessory that is equally suitable for newborns and adult women. The main thing is to choose the right color and style of this headdress.
Author: Vorobieva Nadezhda
Article design:Natalie Podolskaya
Video about headbands
Video about a headband - knitting pattern:
very interesting article, it turns out there are so many beautiful and interesting headbands, and it's great that you can knit or sew them yourself