A manicure is not just a sign of a girl's grooming, but also an expression of her mood or inner feelings. Simple and beautiful nail painting designs have long supplanted intricate pictures that take more than an hour to complete.
Knowing the fashion trends of the current year, imagining the future design, the girl will be able to significantly facilitate the work of a professional nail service and reduce the time of her stay at his session.
Simple manicure: popular techniques 2019-2020 for short nails
A manicure, simple and beautiful, should correspond to the popular trends of the current years. Despite the fact that the vast majority of masters master modern nail service techniques in a timely manner in order to be able to actively practice them in their work, the client's knowledge of common nail design options simplifies the choice of the direction of the procedure.
For 2019-2020 typical manicure performed:
- with giving elongated nails an oval or round shape;
- using mother-of-pearl rub;
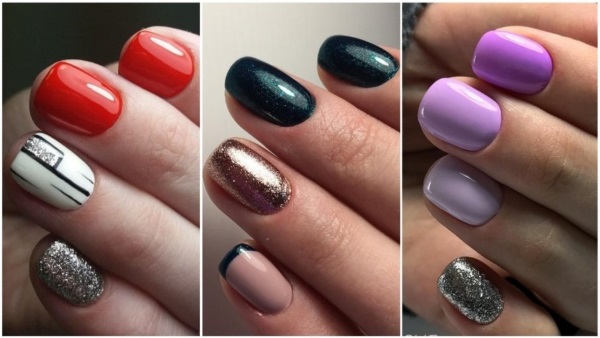
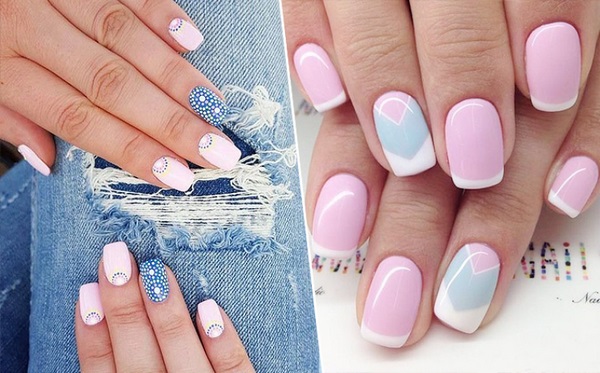
- in the "New York" style (4 nails are covered with a monochromatic varnish, and a contrasting shade is chosen for the fifth);
- in the style of "French" and "lunar".
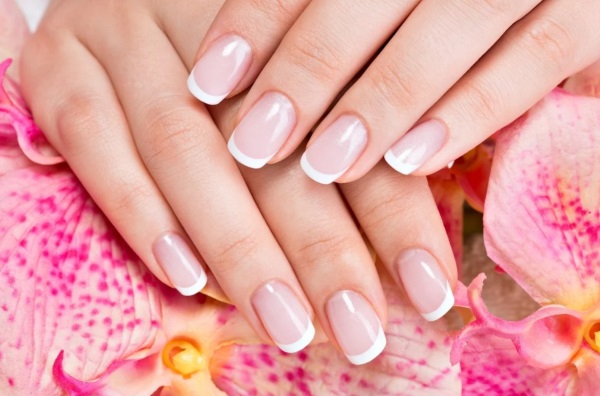
Regardless of the length of "native" nails, a girl following the 2019-2020 manicure fashion can choose the classic version of a monochromatic coating with bright patterns on one or each finger.
Refuse during this period should be from a manicure with rhinestones, sparkles and stones. Such designs are becoming a thing of the past, having begun to be associated with neglect and an excessive desire of their owner to attract the attention of others.
An essential tool for a manicure at home
In order for a manicure performed at home to be as close as possible to a salon procedure, the master will need a set of basic tools.
| Manicure tool | Short description |
| Scissors or tongs | With the help of them, the masters remove the cuticle (coarse skin located at the base of the nail plate). When creating an unedged manicure, scissors or forceps will be needed to align the shape of the nail and remove the burrs that cause discomfort to their owner. |
| Orange stick | It is used by the master to push back the cuticle after its preliminary softening (necessary for unedged manicure). |
| Bath | It is a small deep container in which with the help of a soap solution before the manicure the masters soften the client's cuticle. |
| File | Used to create a shape. It is recommended to purchase several files of different hardness in order to be able to work with nails in any condition. To avoid delamination of the nail, it must be sawed in one direction, avoiding chaotic movements. |
| Buff | It is a block of soft material with an abrasive surface. Used in manicure for polishing the nail plate. |
| Lint-free wipes | Recommended to be used as an alternative to cotton pads.This will help to avoid the appearance of irregularities when applying varnish due to the fluff left after wiping the nail with cotton. |
Cosmetics for manicure
A manicure, simple and beautiful, can only be performed if you have professional premium cosmetics. Not only the result of the master's work depends on the quality of the compositions used, but also the period of its preservation in its original form.

The standard set of tools consists of:
| Cosmetic for manicure | Short description |
| Nail polish remover | Acetone-free products are preferred. They are most gentle on the nail plate. Such products are used not only to remove varnish, but also as a degreaser (in the absence of a professional primer). |
| Primer | It is a degreasing coating that is applied to the cleaned nail plate. It removes impurities and improves the adhesion of the varnish to the nail. |
| Base for varnish | It is applied in the first layer on a degreased nail plate. |
| Colored varnish or gel varnish | Apply with a middle layer between base and top. In the design of the nail, varnishes of several shades can be present. |
| Top | It is applied with a top layer on the varnish. Protects manicure from chips, and nails from the negative effects of environmental factors. |
| Drying agent | Composition that increases the drying speed of the varnish. |
| Cuticle oil or cream | Moisturizes the cuticle, which significantly slows down its growth. |
Preparing nails for manicure
Preparation of nails for manicure, regardless of the conditions in which it is done, takes place in compliance with main stages, recommended by professional nail masters:
- Remove polish or gel polish from the nail plates.
- Polish the surface of the nail with a buff.
- Form the desired length and shape of the nails using files, scissors, and tongs.
- Re-polish the nail plate with a buff. It is strictly forbidden to use nail files for polishing.
- Soften cuticles with oil.
- Pull back the cuticle with an orange stick or trim it with scissors (a specific option is selected based on the type of manicure - edged or unedged).
- Treat the nails with a degreaser applied to the nail plate using lint-free wipes.
After completing the main stages of preparation, it is recommended to remove all unnecessary items from the workplace and prepare varnishes, a lamp, brushes or other tools that are planned to be used in the near future to create a nail design.
Technique for correct varnish application
Manicure, simple and beautiful, should be done according to the classical technique.

This will not only ensure a longer wear of the coating, but also minimizes the negative effect of the chemical composition on the nail plate:
- In case of insufficient degreasing of the nail with a primer (the nail should become matte), reapply the concentrated nail polish remover.
- With a thin layer, avoiding smudges in the cuticle area, cover the nail plate with a base.
- Allow to dry. If manicure is performed using gel polish, the base should be dried in a UV lamp. The drying time is determined individually for each case, based on the power of the apparatus and the chemical composition of the base.
- Apply base polish or gel polish. If the coating is planned to be monochromatic, then the first layer should be translucent. If the design of a manicure involves the use of several shades, then the drawing is recommended to be done after the first layer of varnish dries.
- Allow to dry.
- Complete the coating with the necessary strokes (apply the 2nd and 3rd layers of varnish or create the desired pattern, drying the background layer as necessary).
- Allow to dry.
- Apply a thin layer of top coat.
- Let dry.
- Treat the nail plate with a degreaser.
Step-by-step execution of simple patterns on short nails
In the absence of professional tools, you can perform a manicure with the help of improvised items available in every home. Simple designs are easiest to create on short, wide nails. The lack of length eliminates the need to adjust the design to the shape of the nail plate, which greatly facilitates the task of the master.
Tassel
It is recommended to use a thin nylon fiber brush to paint the nail plate. She will take in enough varnish to draw the design evenly. With this brush, you can create both a neutral ornament and a specific shape, such as a snowflake.
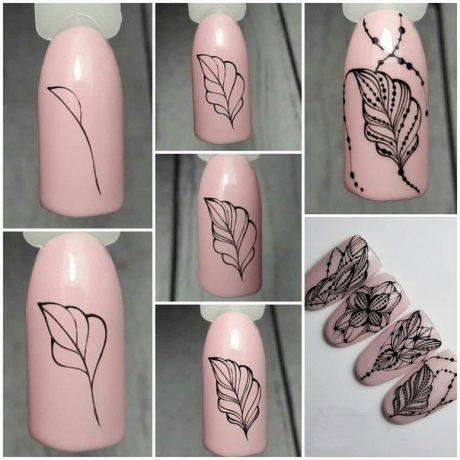
To prevent the drawing with a brush from spreading over the nail, you must follow the generally accepted algorithm:
- Prepare nails for manicure.
- Apply a base coat of varnish.
- Apply 1 layer of a monochromatic coating (must be translucent to avoid smudges and "bumps").
- Allow to dry.
- Apply the required amount with a layer of colored varnish until the desired background shade is obtained.
- Allow to dry.
- Use a thin brush to decorate the nail plate of one or more fingers. For example, draw parallel lines at the base and edge of the nail.
- Allow to dry.
- Apply a top coat.
- Allow to dry, then degrease the surface of the nail.
Needle
For the simplest manicure on short nails, you can also use a sewing needle. It should have a sharp end and be long enough to fit comfortably in the hand of the master.
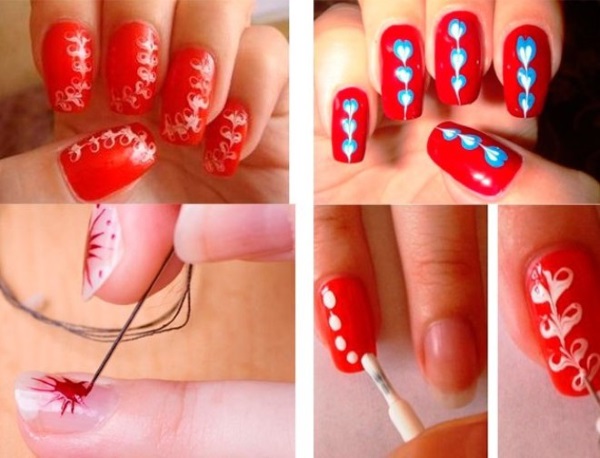
For the design of nails with a needle, you will need 3 colored varnishes (1 for the background, and two others for creating the pattern):
- Prepare nails for manicure.
- Apply a base coat of varnish. Allow to dry.
- Cover the nails with colored varnish the required number of times. Allow to dry.
- Having reached the required background shade, you should visually divide the nail plate into 2 parts of a vertical line. The right and left parts must be different in color.
- Allow to dry.
- Use a varnish brush to put 3 "bold" points on each side (the colors should be opposite: on the right side, you should put varnish points on the left and vice versa).
- Connect the points with chaotic movements of the needle, creating a decorative pattern and preventing the varnish from drying out.
- Allow to dry.
- If necessary, finalize the design (draw lines with a needle or randomly place dots).
- Apply a top coat and allow to dry.
- Degrease the nail plate.
Toothpick
A simple and beautiful manicure can be done on short nails with a toothpick. The difficulty of using such an improvised tool is that the wooden end usually absorbs an excessive amount of varnish.
If you work carelessly, this can lead to the formation of smudges and damage to the general appearance of the pattern on the nails.
Despite the small surface area of the tip of the toothpick, it is convenient for drawing large details, which are best complemented with a thin brush.
- Prepare nails for manicure.
- Allow to dry.
- Create a background by applying the required number of layers of varnish, letting them dry in time.
- Use a varnish brush to paint a few red dots in a random pattern.
- Without letting the varnish harden, using a toothpick, drawing semicircles, give the points the outline of a rosebud.
- Allow to dry.
- Taking a clean toothpick and dipping it in green, paint the ovals at the base of the flowers (leaves). Allow to dry.
- Apply a top coat. Allow to dry.
- Treat nails with a degreaser (primer).
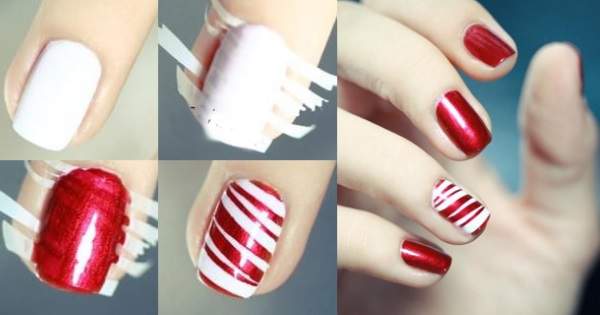
With scotch tape
It is recommended to use masking tape to create a manicure. Compared to stationery, it has the least adhesion to the nail plate, which will reduce the likelihood of damage to the background layer of varnish when it is removed. Depending on the desired design, adhesive tapes are attached to the nail, placing them in the order corresponding to the idea.
- Cut off the masking tape tape, no more than 7-10 cm long.
- Cut a piece of duct tape into thinner pieces lengthways.
- Prepare nails for manicure.
- Apply a base coat of varnish and let dry.
- Achieve the desired background shade by applying the required number of layers of colored varnish to the nail plate. Allow to dry.
- In accordance with the conceived design, arrange the pieces of tape in the required order. Press them down, ensuring maximum adhesion to the nail. The ends of the tape should protrude beyond the nail.
- Cover the nail in several layers with varnish of a contrasting shade.
- Peel off pieces of masking tape. Let the varnish dry.
- Apply a top coat and let it dry.
- Degrease the nail surface with a primer or nail polish remover.
Decorative items for short manicure
A manicure created by a non-professional at home can be as beautiful as the work of an experienced master. A simple design that uses decorative elements will look equally beneficial on both short and long nails.
A "highlight" that attracts the attention of others, to the girl's nails will be:
- decorative foil of various textures;
- broth;
- dried flowers;
- stickers;
- voluminous miniature figures;
- mica;
- stones (imitation of precious stones);
- sliders;
- adhesive tapes with a foil surface.
If a manicure is performed by a master in order to gain experience, there is no need to acquire a large number of types of decorative elements at a time. Working with each of them implies adherence to a special technique, the knowledge of which will appear in a beginner only after 1-2 months of daily practice.
Manicure ideas for short nails
It is recommended to choose manicure ideas for short nails taking into account the current season or the upcoming seasonal holiday.
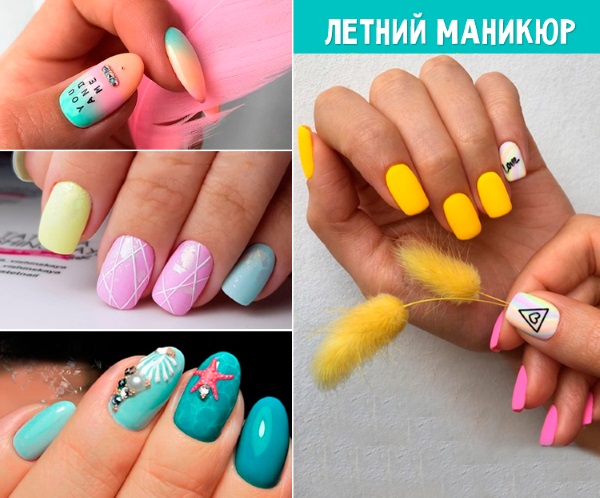
Summer design
For decorating nails in the summer, it is wise to use bright colors of varnishes. They convey the mood of the owner of the manicure, and also perfectly complement the image, which in hot weather consists of things of rich colors.
- Prepare nails for manicure.
- Apply a base coat and let it dry.
- On all fingers, except for the ring finger, apply a bright colored varnish (for example, orange). You can achieve the desired color with several layers of varnish.
- Allow to dry.
- Divide the nail plate of the ring finger with a thin brush with white or black varnish into several sections. The sections should be roughly the same size, but with “wavy” borders.
- Allow to dry.
- With a long thin brush paint the sections in different colors of saturated shades (it is recommended to use: orange, white, blue, red, green, yellow).
- Allow to dry.
- Apply a top coat and let it dry.
- Degrease the surface of the nail.
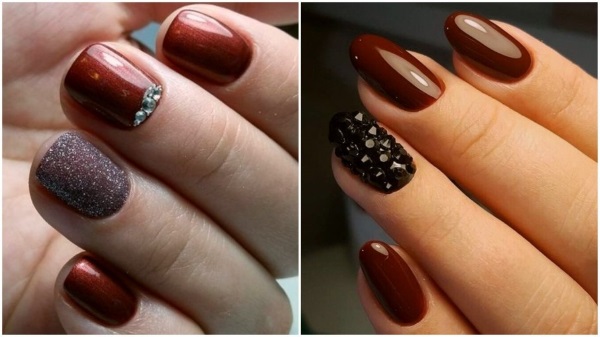
Autumn design
In autumn, in the design of nail painting, masters usually use warm shades, for example, chocolate or coffee. A manicure during this period should create a feeling of comfort and warmth.
- Prepare nails for manicure.
- Apply a base coat and let it dry.
- Create a background color (chocolate tint is recommended) on the pinky, ring and thumb of both hands. It is allowed to apply an unlimited number of layers of varnish.
- Create a contrasting background color (white is recommended) on the middle and index fingers.
- Let the varnish dry.
- At the upper edge of the nails on the middle and forefingers, fix a slider or sticker with an illustration of a cup with a hot drink and coffee beans. If the artist has artistic skills, images can be created with a brush.
- Let dry.
- Apply a top coat and let dry.
- Degrease the nail plate.
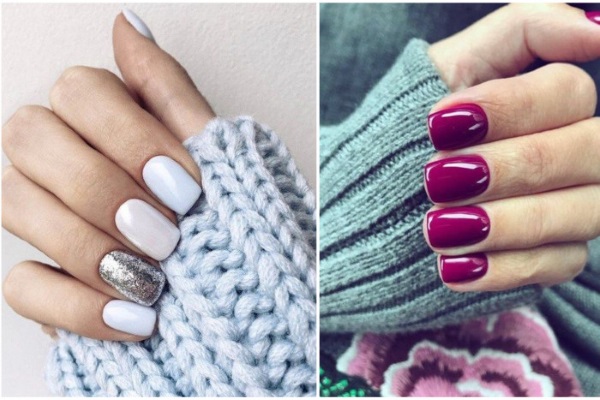
Winter design
In winter, the actual colors in nail design are blue, blue, white and green. You can make a manicure using them using any tools at handwithout spending a lot of time drawing small details.
- Prepare nails for manicure.
- Apply a base coat and let it dry.
- Apply to all nails except the unnamed blue nail polish. Achieve a rich shade by gradually increasing the number of layers of color composition.
- Paint the nail on the ring finger white.
- Let the varnish dry.
- Using a toothpick or "dots" randomly arrange white dots on the blue nail plates and blue dots on white nails.
- Allow to dry.
- Cover the nails with a top coat, then let it dry.
- Degrease the nail plates.
Spring design
Spring manicure requires the use of pastel colors. They symbolize the lightness and freshness that people associate with spring.
- Prepare nails for manicure.
- Cover the nails with the base compound. Allow to dry.
- Paint your thumb, forefinger and middle finger nails in light green (pastel).
- Paint the nail plates on the ring finger and little finger in a light blue (pastel) color.
- Allow to dry.
- On the nails of the middle and ring fingers, stick sliders with the image of blossoming flowers that completely cover the nail plate.
- Allow to dry.
- Apply a top coat and let it dry.
- Degrease the nail plates.
A manicure, subject to its high-quality execution, can not only emphasize the well-groomed hands of its owner, but also visually correct the imperfections in the appearance of the fingers upper limbs (for example, lengthen them, expand the nail plate, and so on).
A simple and beautiful design is recommended to be selected in accordance with the current season, the girl's inner state or her interests. Despite the multi-stage process of transforming nails, following generally accepted instructions, even a person who has no previous experience in the case in question can do this.
Interesting videos with ideas for a simple and beautiful manicure
Simple and quick nail design for beginners:
15 simple manicure ideas:
I love light or pastel shades on short nails. I also prefer a monochromatic manicure. Maximum - a small pattern on one nail!