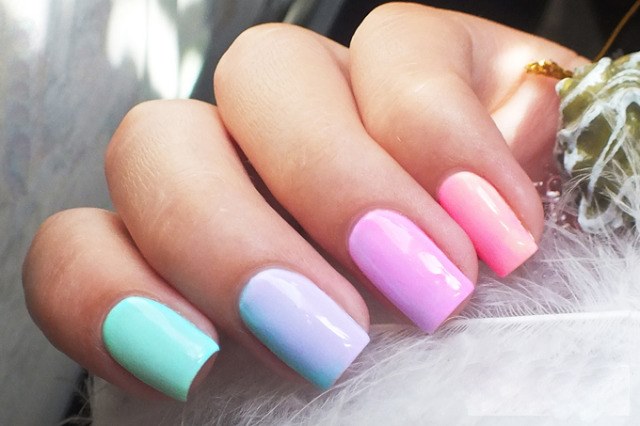
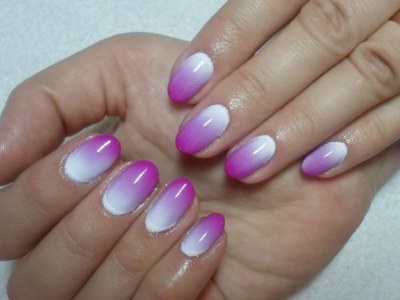
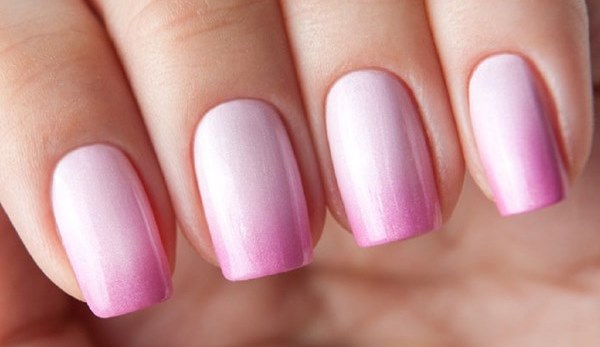
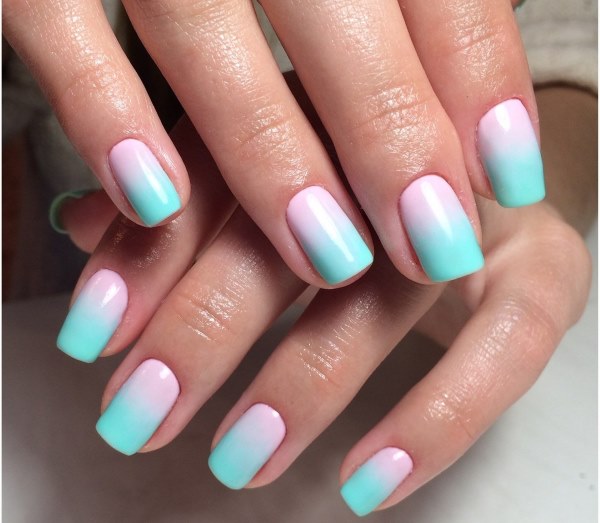
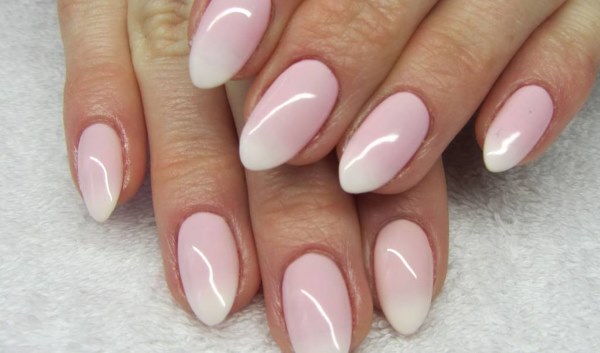
The word "ombre" is literally translated from French as "shadow". A characteristic feature of this fashionable design is the specific effect of beautifully stretching the shades of the varnish color from light to dark, while the blurred border of the stretching of the color is called a "gradient".

The ombre stretch, as seen in the photo, can be directed from the base of the nail plate to the upper edge, across the plate and even from the thumb to the little finger.
There are several types of nail design in this style:
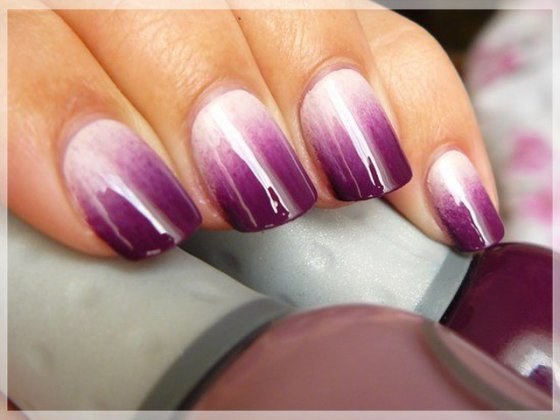
- classic (created on the basis of 2 colors of varnish, while the tip of the nail is darker than its base);
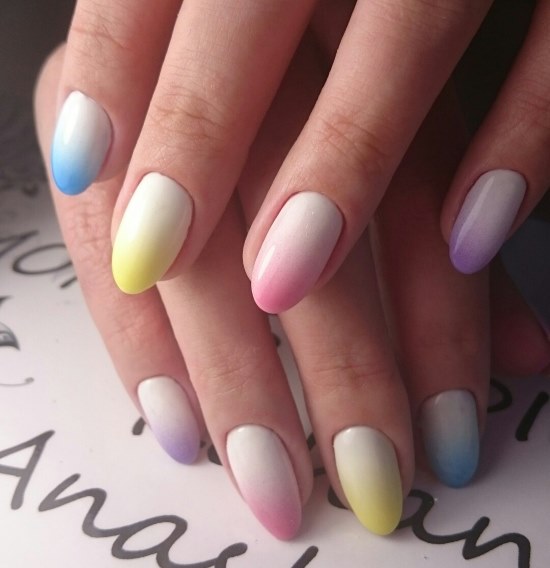
- Beverly Hills (differs in that the color transition occurs from nail to nail, for example, from very light on the little finger to dark on the thumb, while up to 5 colors or shades of varnish are used at once);
- design in the style of "French" (a characteristic feature is the coating of the tip of the nail with a light shade of varnish, below turning into a dark color);
- bright nail, suggesting the use of saturated color varnishes;
- ombre manicure with painting, this technique is ideal for evening wear, emphasizing its sophistication in gold, silver or black, as evidenced by numerous magnificent photos.
Technics. How to do the ombre correctly
The technique for creating a manicure is so simple that it may well be successfully performed at home.
Manicure can be done on nails of any length and shape.
To complete, you must have:
- at least 2 (and possibly more) bottles of varnish, as close as possible in color;
- means for degreasing nail plates;
- varnish for the main coating;
- lacquer for fixing or transparent, which is also called finishing;
- thin brush;
- sponge or regular sponge;
- for mixing shades you need a small piece of cardboard or plastic, foil is also suitable;
- sticks with cotton wool, soft discs made of cotton wool or foam rubber;
- solution for removing excess coating.
But the most important thing is you need to equip the house with a special place for nail art, with good lighting and the ability to ventilate. It is considered ideal to work under a fluorescent lamp, since such light does not distort the shades of varnishes.
How to make a gorgeous manicure - procedure:
- Bring the nails to a state of readiness of the desired level. To do this: remove the old varnish, correct the shape of the nail plate with a file, make a hot bath for nails, remove the cuticle. Degrease your nails.To protect the rollers of the skin of the fingers from traces of varnish, it is necessary to apply on them any of the following means: PVA glue, a face mask, which has the feature of hardening in the form of a film, or a fat cream. A special skin protection product that has recently appeared on the market is also suitable.
- Prepare the base. Cover the nails with clear varnish or one of the colored ones, preferably light.
- Pour varnishes onto the cardboard in the order in which the final result is intended.
- With a brush, blur the border of the color change, achieving a smooth flow of shades.
- Lightly moisten the sponge with water to reduce the rate at which the varnish is absorbed into it.
- After blotting the colors from the cardboard with a sponge, apply them to the nail plate by tapping, barely touching and not pressing.
- Prepare a set of colors similar to the first on cardboard for the next nail plate.
- Without waiting for the varnish to dry completely, apply a fixer or clear varnish.
- Let the nails dry. To speed up the process, you can use a cold water bath.
- Using soft discs and sticks with cotton wool, use a nail polish remover to remove excess drops of manicure. Clean the skin rolls of the fingers by removing the previously applied protective equipment.
Which gel polish to choose for ombre
To perform a manicure using the color stretching technique, you do not need a large number of different varnishes. Even if there are only 2 types of varnish available, on the palette you can get from them several shades of different color intensity and make a chic nail.
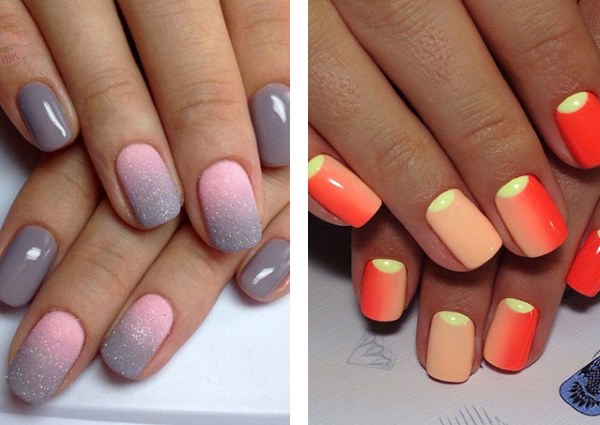
The basis for gradient manicure is traditionally varnishes of delicate pastel shades: pink, peach, beige and others.
 In numerous photographs of ombre manicure, there are 2 ways of staining the end of the nail in terms of color:
- first, when using shades from the same set of colors as at the base of the nail plate, and
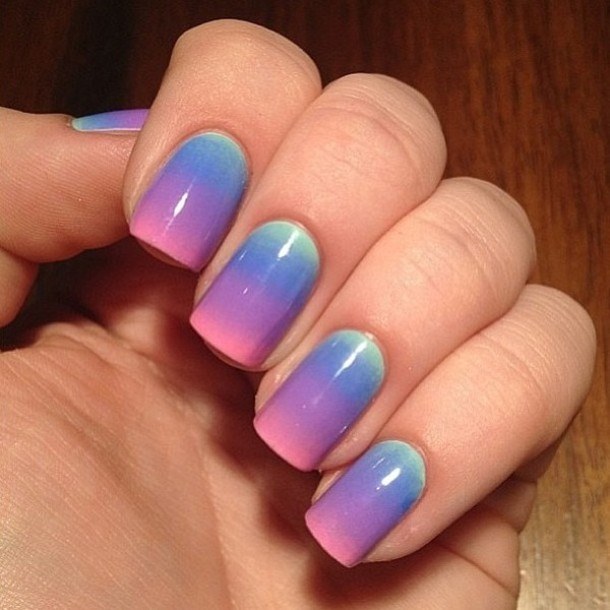
- the second, when the designer boldly experiments with other, brighter shades of the palette.
Using the second method, the master has the opportunity to implement a much larger number of design ideas. However, it should be remembered that in this case it is better to work with long nails, since the elongated nail plate allows you to effectively place up to 6 different colors.
On short nails, it is better to limit yourself to two shades of varnish, otherwise the manicure may smear and lose its unique beauty.
This season, the most popular is the gradient manicure made using gel polish, especially in combination with other interesting nail design techniques.
The use of gel polish assumes the presence of not only the usual tools for creating a manicure, but also some special devices, namely: an ultraviolet lamp, a means for polishing nails, a final coat and a solvent.
As for the selection of gel polish by color, it is allowed to use up to 5-6 different shades, but the most popular is a gradient of 3 colors.
Classic ombre gel polish manicure is created from 2 colors belonging to the same color scheme.
Sponges for ombre
To create a high-quality ombre manicure, it is quite acceptable to use a regular sponge. But, to obtain the most successful result, experts recommend working with a cosmetic sponge.
Sponges consist of high-density fine-grained foam rubber. The higher density of this structure in comparison with the sponge provides less varnish consumption and a more even tone of the transition of shades when creating a gradient.
Brushes
Brushes vary, but the most commonly used are thin, wide, flat and fan-shaped. Before starting work, they must be moistened with a nail degreaser.
It is convenient to transfer shades of color from the palette to the nail plate with a thin brush and adjust the gradient, as well as draw small decorative elements.When using wide and flat brushes, the movement goes from bottom to top along the center of the gradient, while the master's brush is parallel to the nail plate.
Small movements are allowed from light to darker, until a uniformly blurred border is obtained.
The fan brush shades the border of shades, being perpendicular to the nail plate. At the same time, the movements are quite fast and sharp, the brush, as it were, "sweeps" the border of colors from the tip of the nail to its middle. It is important not to forget to clean the brushes with a degreaser after finishing work.
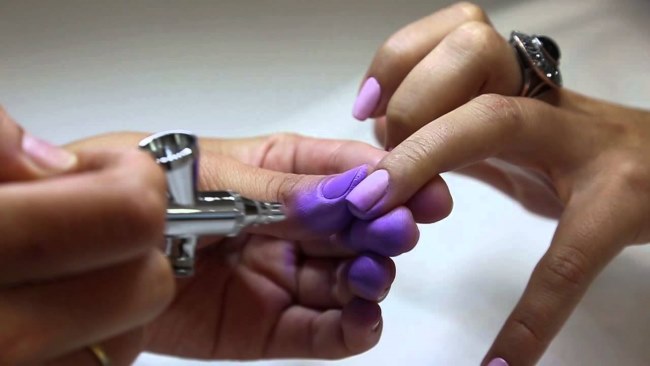
Ombre sprayer
The apparatus for creating a gradient manicure is called an airbrush. This small and handy spray applies a special varnish emulsion to the nail plate.
Apparatus (machine) for ombre
The airbrush is compact and quite easy to use, however, it requires the attention of the master and careful care. This is due to the fact that emulsion pigments tend to solidify quickly. Therefore, in order to avoid clogging of the device holes with pigments, it is necessary to promptly rinse the device during and after operation.
 Thanks to the airbrush or spray gun, as it is most often called, you can achieve excellent results in the art of manicure, namely:
- to achieve the creation of completely unique images on the nails, very detailed and carefully worked out;
- use unusual ornaments for design;
- use the smallest decorative elements for decorating a manicure.
The use of an airbrush significantly reduces the time required to create a manicure, as a result of which it takes no more than half an hour.
How to airbrush ombre
The photographs of the manicure done using the airbrush reflect a rather complex gradation of tones from the deepest dark to very light.
 Paints look voluminous, and small details seem to begin to breathe and move. This effect is not obtained with standard manicure.
A professional master spends no more than a few minutes to create a gradient manicure using an airbrush, while having the opportunity to realize the wildest fantasies of his client.
Sponge ombre manicure
Manicure creation in style Ombre with a sponge is considered the most common way to work in the color stretching technique.
Of course, using a sponge is ideal, but an ordinary sponge in skillful hands can work wonders. Not so long ago, sponges made of fine-grained material, specially designed for working with gradient manicure, appeared on sale, which, moreover, have a very convenient work surface shape for the master.
Before using such a sponge, it must be cut into small fragments, observing an important condition: the working surface of the resulting fragment should be close in size to the size of the nail. The ready-to-use sponge must be thoroughly washed and dried in order to avoid dust getting on the varnish during further work.
Currently, 3 types of techniques for creating an ombre manicure with a sponge are used, while it is almost impossible to distinguish one type from another from a photo.
The differences are noticeable at the stage of working with varnishes and palette.
The master usually chooses one of 3 options:
- Working with varnish directly on the nail plate. This option provides for the application of varnishes to the nail plate and instant shading of the border of the flowers using light patting movements with a sponge.
- Working with varnish on a sponge. In this case, the varnishes are applied directly to the sponge in strips next to each other, after which they are given a few seconds to initially absorb into the sponge. Then the sponge is applied to the nail several times until the color border is completely smooth.
- Working with varnish on a separate surface - a palette. Using this technique, varnishes are mixed on foil, plastic or cardboard.Most often, color stretching is done with an orange stick. Then the image is reprinted on the sponge by applying it, and from it - on the nail. This process can be duplicated several times until the desired result is obtained.
In all three cases, the design must be completed with a top coat or clear nail polish. This improves the quality of the gradient.
Before the procedure, it is necessary to protect the skin rollers around the nails with any of the available means, namely: a fat cream, a mask (film) for the face or a special tool that is produced specifically for working with a gradient manicure.
Ombre on nails with pigments
Using pigments to create a stretch effect on the nails is an alternative technique for this style. When using it, time is significantly saved, as a result of which the entire procedure takes no more than 10 minutes.
The overflow of color on ombre manicure made with the help of pigments is achieved due to the fusion of shades due to the superposition of particles of different pigments on top of each other, which is clearly visible in the photo.
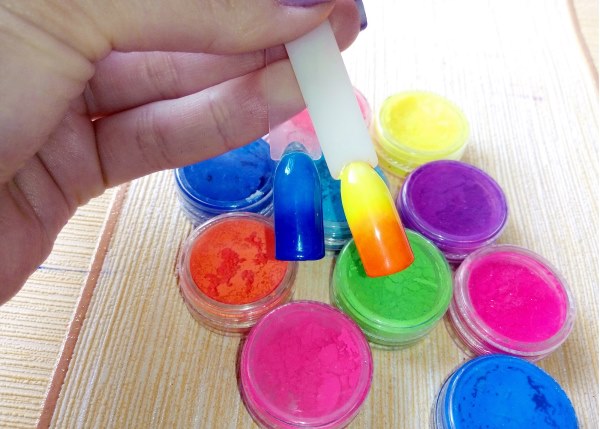
 When working with pigments, experts recommend using a white base., as it avoids color distortion.
To make stretching with pigments on gel polish, you need:
- Carry out the usual gel polish: prepare the nails, apply the base in 2 layers, while each layer must be dried in a lamp.
- With a thick fluffy brush, pick up the pigment and blend it from the bottom border to the center of the nail. Then shade the second color of the pigment in the same way from the tip of the nail to the middle, until it intersects with the first. Shake off excess pigment particles.
- Dry the resulting gradient in a lamp for 30-60 seconds.
- Cover the pigment with transparent varnish and dry in the lamp.
- Complete the procedure by removing the sticky layer from the top using a special tool. Clean the skin rollers around the nail plates.
How to make ombre shellac
Often shellac is used to create a manicure with a stretch of color on the nails. Due to the durability of such a varnish, the nail design acquires amazing stability and remains for a long time without any damage.
The use of shellac requires the availability of the necessary equipment for the procedure, namely:
- set for nail care;
- cotton swabs and liquid to remove excess varnish;
- base varnish, several varnishes of different colors, finishing varnish;
- UV lamps for drying the coating;
- a special solution for degreasing the nail plate;
- sponge;
- toothpicks;
- special liquid means for removing excess varnish layer.
Gradient manicure using shellac is performed in the same sequence as when working with gel polish.
Step by step it looks like this:
- polish nails, remove cuticles, align the nail plates with a file;
- degrease your nails, apply a foundation, let them dry;
- hold nails in a UV lamp for 20 seconds;
- apply a light-colored varnish on the lower part of the nail;
- apply a dark gel polish on the upper half of the nail;
- smooth the border of color with a brush;
- dry nails in a UV lamp for about 3 minutes;
- fix the varnish with a topcoat and again dry the nails in a UV lamp for 3-4 minutes.
Experts do not recommend applying too thick layers of shellac, as this can ruin the whole effect of the gradient design. At the end of the procedure, it is imperative to remove the top sticky layer of shellac with a special liquid agent.
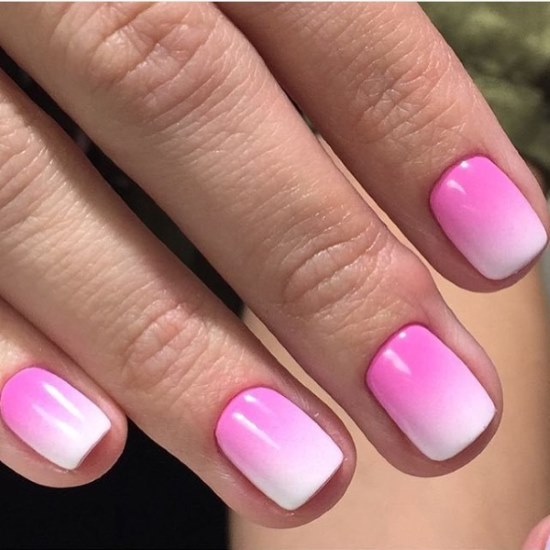
Photo of ombre manicure for short nails
Ombre manicure on short nails has one distinctive feature.
 As you can see in the photo, with a small length of the nail plate, a light tone of varnish is applied to its base, and a dark one to the upper part of the nail. This allows you to visually make the nails longer.
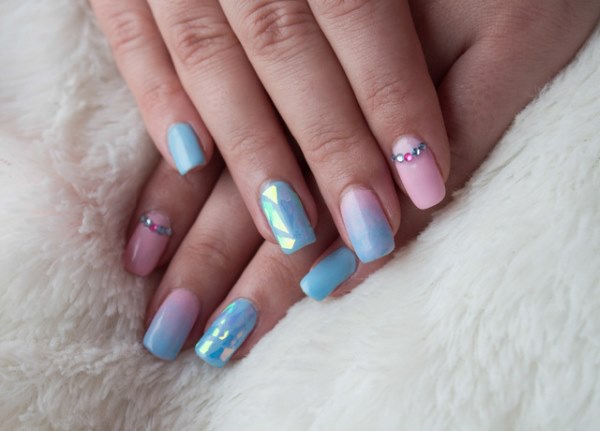
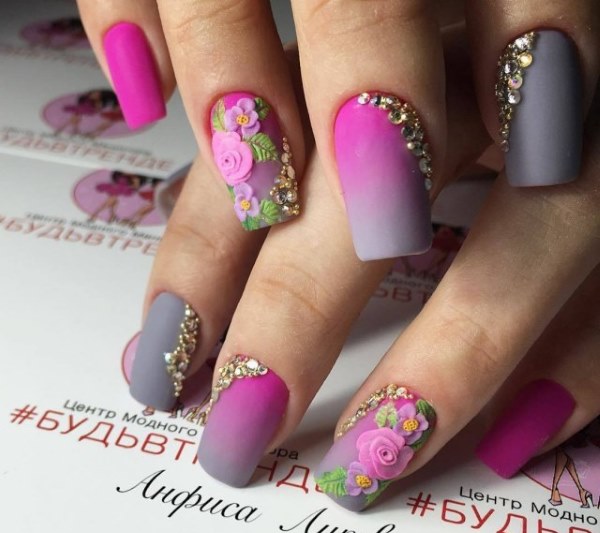
Ombre on long nails
When creating a gradient on long nails, it is quite appropriate to use several different colors of varnish, thanks to which the master has the opportunity to show the maximum of his creativity.
 You can also add sequins or rhinestones to decorate the coating.
Ombre on sharp nails
Sharp nails in the current season increasingly began to appear in fashion shows on the catwalks. Their length is very varied, from medium to frankly long and extravagant.
 For everyday manicure on sharp nails, it is better to choose calm tones in pastel shades, but for an extravagant evening look, dark colors are more suitable.
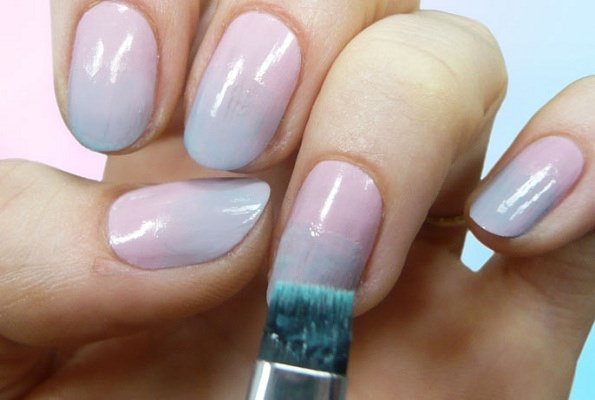
Beautiful vertical ombre on nails with a brush
It is more convenient to do vertical ombre on nails with a flat brush. In this case, the nail plate is divided into 2-3 parts by color shades.
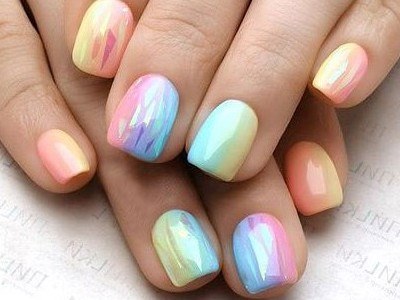
 The sequence of work is practically the same as the procedure for creating a horizontal gradient manicure. The borders of the gradient are blurred with a thin brush or toothpick... This design can be done using all the colors of the rainbow.
French (French manicure) ombre on nails
Stretching the color in the French style looks neat, unobtrusive and incredibly stylish.
On nails of medium length and short, this manicure looks great, regardless of their shape. Long nails are not always suitable for this type of nail.
The classic color scheme for a jacket is beige, neutral pink or colorless.
Traditionally, white tips of nails are increasingly being replaced with colored ones, but with a prerequisite to match the general range of shades. This is the so-called colored jacket, when the tip of the nail is painted in a contrasting color to the rest of the surface. In the current season, the most fashionable are combinations of neon shades.
Ombre gradient on nails
As you can see in the photo, the border of the transition of colors and shades of ombre manicure in the French style should be as blurred as possible.

 This type of nail design is distinguished by the most delicate tints of color, as if flowing into each other. The gradient can have a horizontal or vertical direction, as well as a direction from finger to finger, but experts say that the first option for "French" is the most preferable.
Ombre manicure with glitter
There is no need to purchase a lot of additional varnishes or solutions to perform a gradient manicure with glitter, which amazes and delights no less than in great photos. It will be quite enough 2 varnishes, of which one - with sequins.
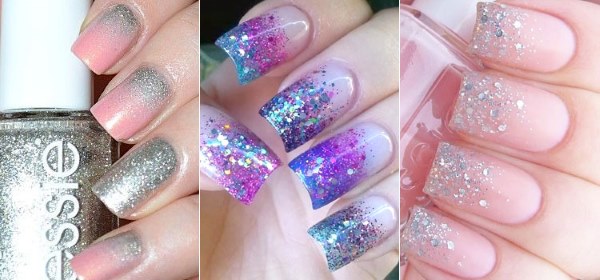
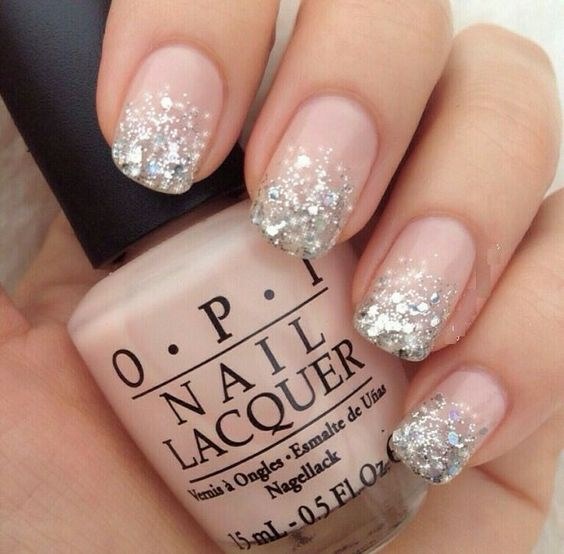
 The peculiarity of this technique is as follows: the nail is covered with a monochromatic varnish, then part of it is decorated with glitter varnish. As a rule, there is more glitter at the tip of the nail, and they disappear by the middle of the nail plate.
Work order:
- cover the nails with varnish without glitter and wait for it to dry;
- take a polish with glitter on the brush and draw from the tip of the nail to the middle, reducing the amount of glitter. You can stretch from the bottom edge of the nail to the middle;
- complete the procedure with a colorless varnish.
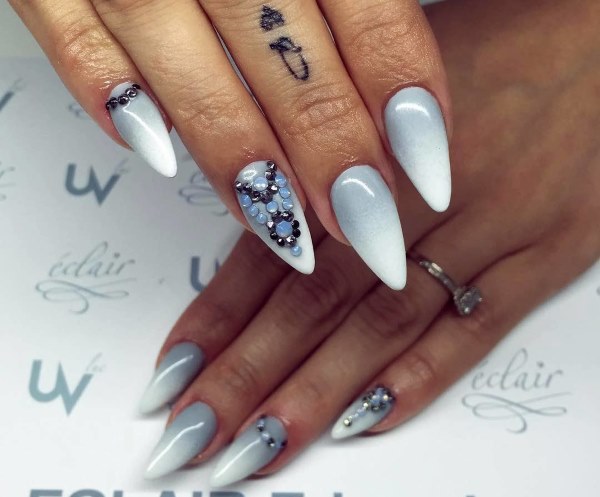
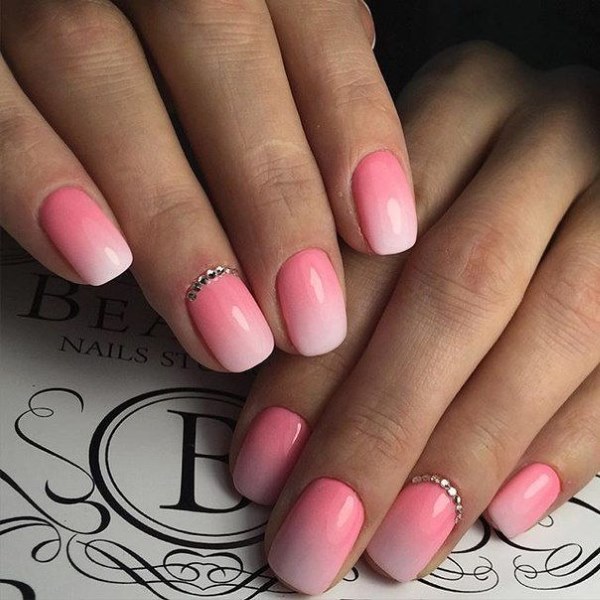
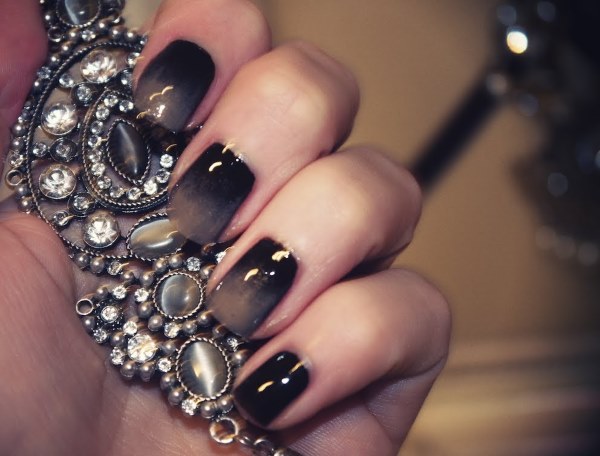
Ombre manicure with rhinestones
One of the most fashionable designs in gradient manicure today is rhinestone decoration.
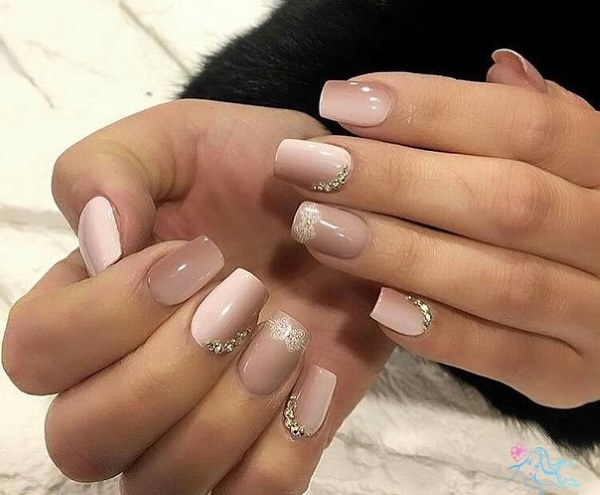
Such a manicure looks best on short nails, emphasizing the delicate taste of its mistress.
You can make an ombre with rhinestones yourself, but remember that the work entrusted to the stylist is always more original and of high quality as a result.
Experts believe that when using shellac, manicure should not be overloaded with rhinestones, but you can limit yourself to just a few decorated marigolds. Alternatively, it is proposed to decorate each nail with 1-2 crystals.
Ombre manicure with rub
To obtain an ombre manicure with rubbing, particles of special dust are added to the blurred border of color shades, giving the surface the effect of a golden or silver sheen.
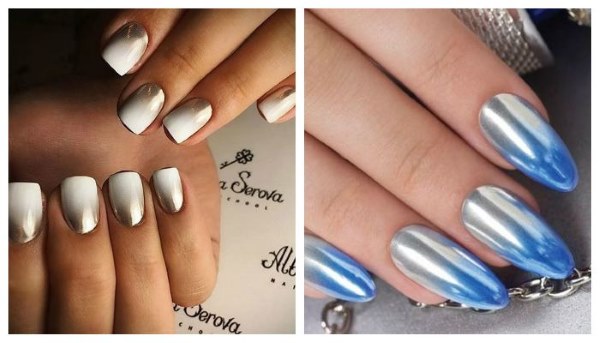
The most fashionable option is considered to be this: use dark-colored dust on several fingers, and treat the remaining fingers with light dust of the same tone.
Ombre and broken glass
One of the most fashion trends in the art of gradient manicure is the improvement of glass nailin which the nail coating looks like broken glass.
 Photos of such an ombre look quite extravagant, and it is impossible to guess from them that this manicure is created using many small pieces of foil of different colors, made in the form of stickers.
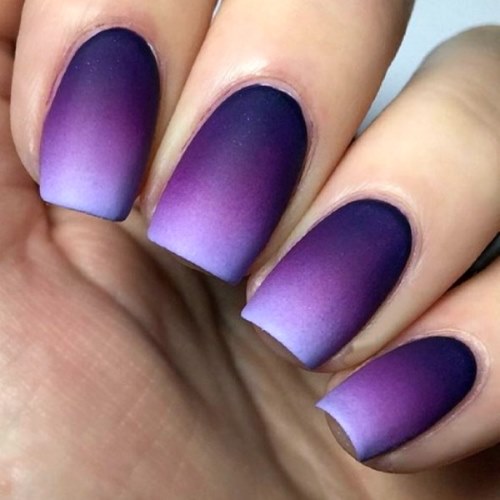
Matte ombre manicure
Depending on the texture of the varnish, the surface of an ombre manicure can be not only glossy, but also matte. Such a manicure has a wide range of incarnations and is suitable for almost any look and any time of the year.
Most often, saturated and dark colors are chosen to create a matte manicure. Gel polishes are preferred. For a festive event or party, it is best to choose a matte manicure, decorated with sequins or rhinestones. This is almost a safe bet for creating a stylish accent to your look.
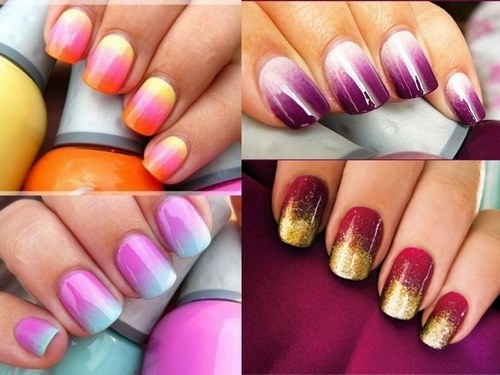
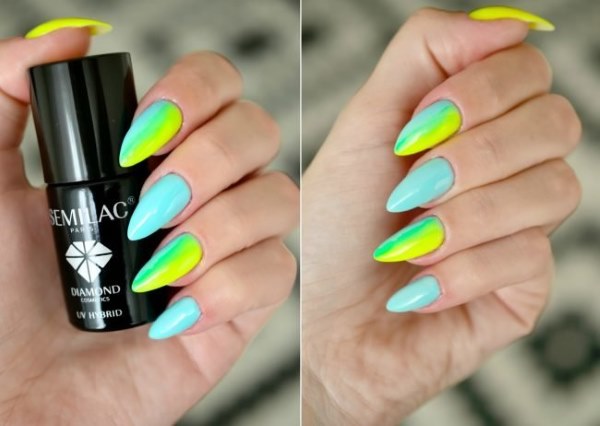
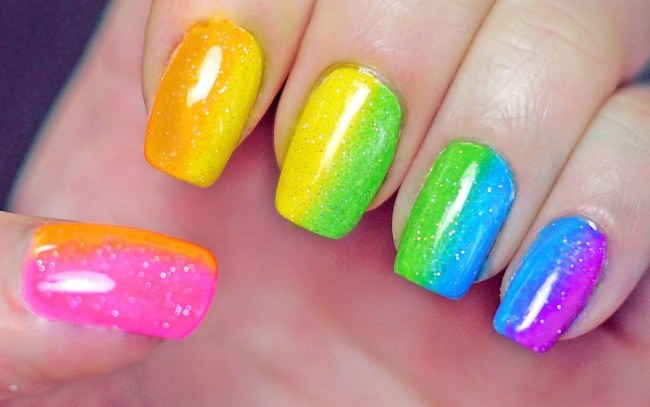
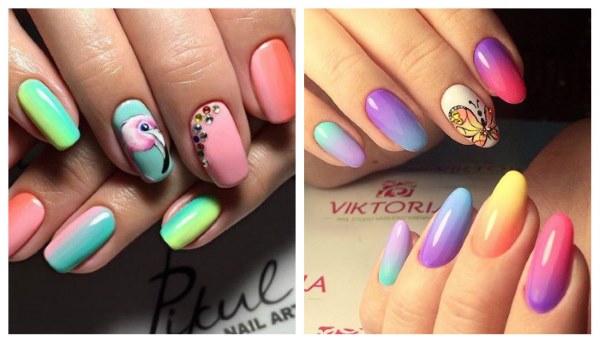
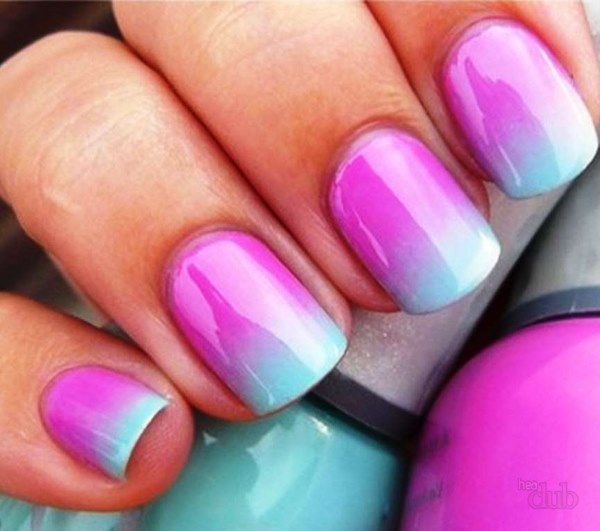
Bright ombre on nails
How to create a bright nail on your nails using color stretch?
There are several options:
- make a horizontal gradient using saturated contrasting colors: red, yellow, cherry, orange and others;

- make a colored version of the French style, directing the shades of color from dark at the base of the nail to light at the end;

- use sequins, rubbing, a variant of a glass ombre manicure, rhinestones, not forgetting to use the photo as an example.

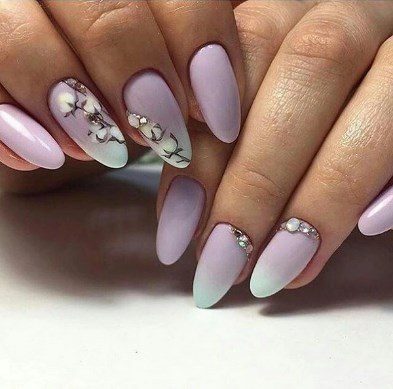
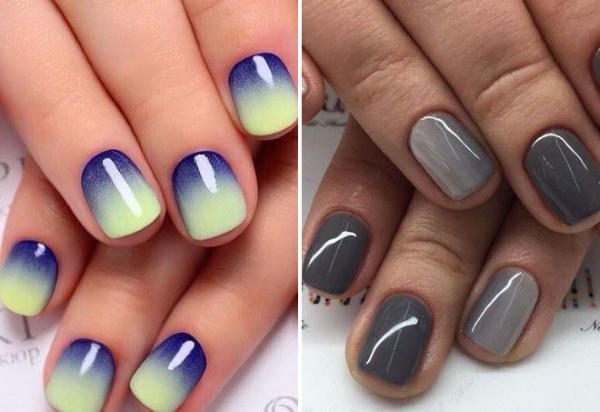
Mint ombre manicure
The mint color of the gradient manicure is confidently leading among many other shades of blue and green this fall. Mint colors go well with silver and yellow, and can also act as a component when creating a moon manicure.
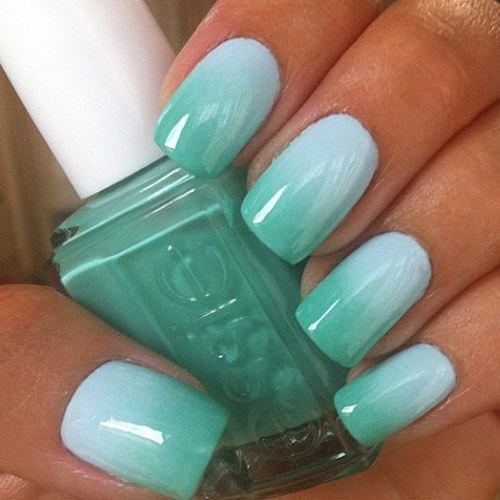
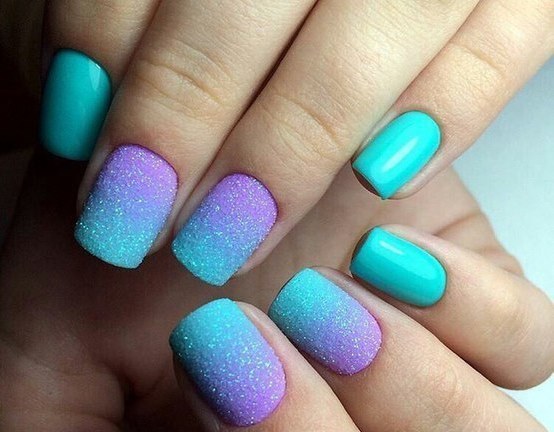
Mint manicure looks original and delicate when using a matte varnish texture. The mint color is “friendly” with both rhinestones and white “lace” (painting with a thin brush).
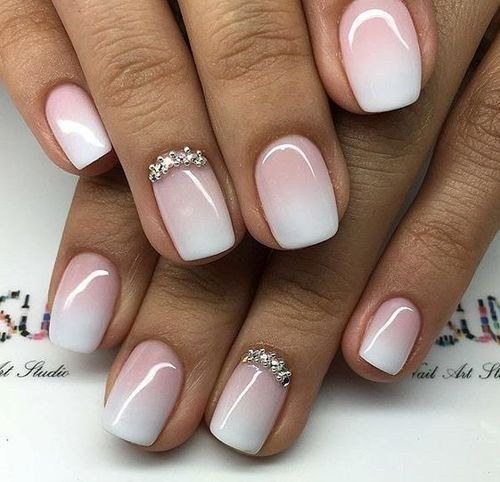
Wedding ombre manicure
Modern wedding nail suggests short or medium length nails, oval or almond shape and minimalism in design. At the height of fashion - white and nude shades... In addition to traditional colors, it is possible to use shades of lavender, mint, peach and golden shades.
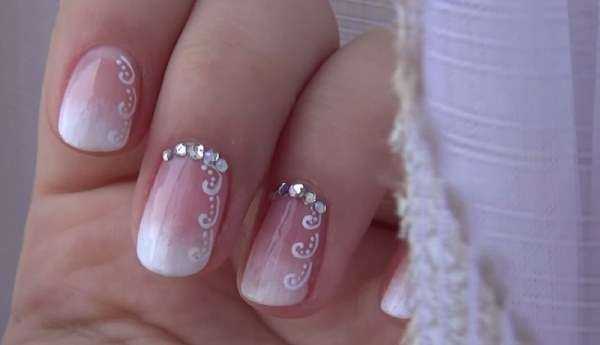
The traditional wedding jacket in natural flesh colors is still popular. Among the decorative elements in fashion: painting, white lace, modest small rhinestones and silver sequins.
Peach ombre manicure
The ombre manicure, made in a peach range of shades, has one indisputable advantage over all the others - unconditional practicality. This color will suit any clothing and any work.
The peach shade of manicure is very suitable for girls and young women.
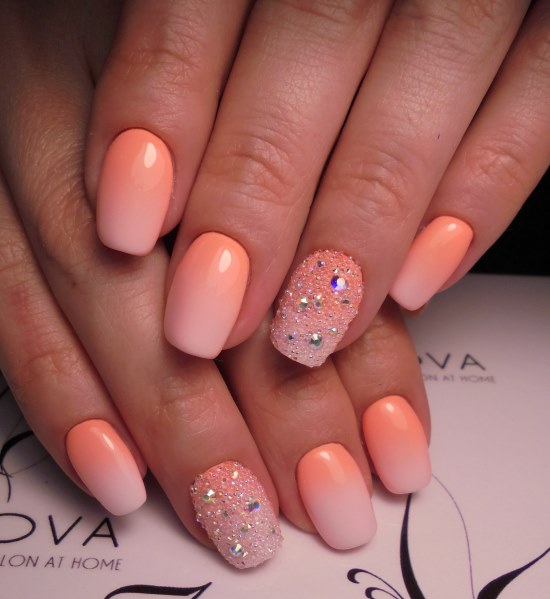
It blends perfectly with white and pink and suggests minimalism in decor.
Summer ombre manicure
Summer ombre manicure involves the choice of mainly bright and saturated colors of varnishes. The combination of glossy and matte fragments in the design of the nail surface is also in fashion.
 Dark colors in everyday nail are losing their popularity, and delicate shades of pastel colors come to the fore. Stylists recommend combining light shades of manicure with bright berry flowers next summer.
Coral ombre manicure
The rich coral color of the manicure looks great when transitioning to lighter shades on a horizontal gradient.
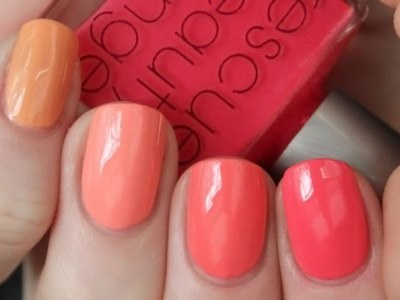 This bright summer nail is perfectly complemented with rhinestones or sequins, especially when it comes to a festive version.
Ombre manicure brown
Brown ombre manicure, as seen in the photo, is creating a gradient from lighter milky or flesh tones to more saturated colors: cocoa, coffee with milk or dark brown.
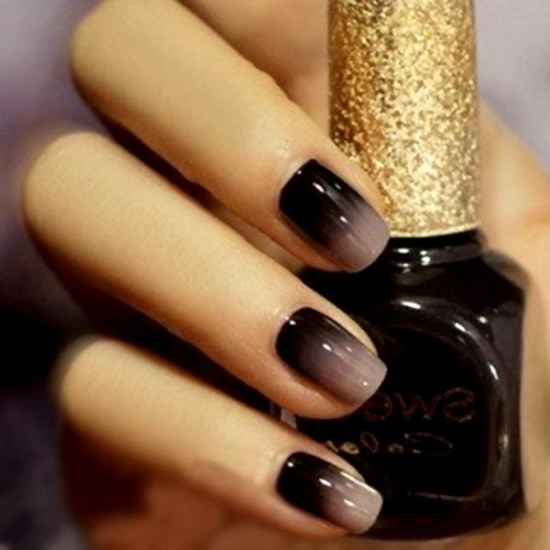
 Such a nail should not be overloaded with sequins or rhinestones. In this color scheme, the use of pigments gives gorgeous results.
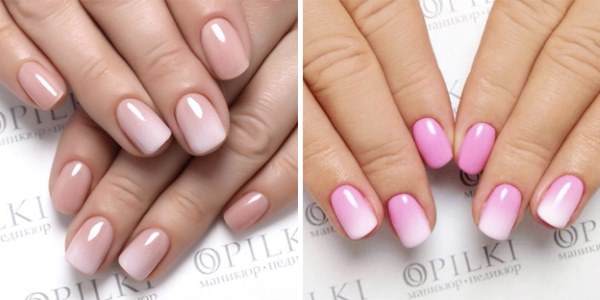
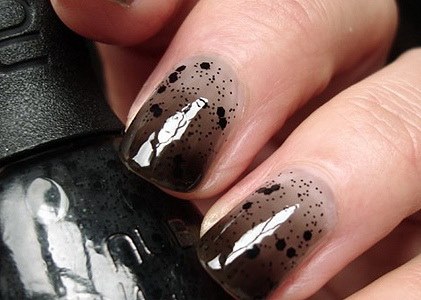
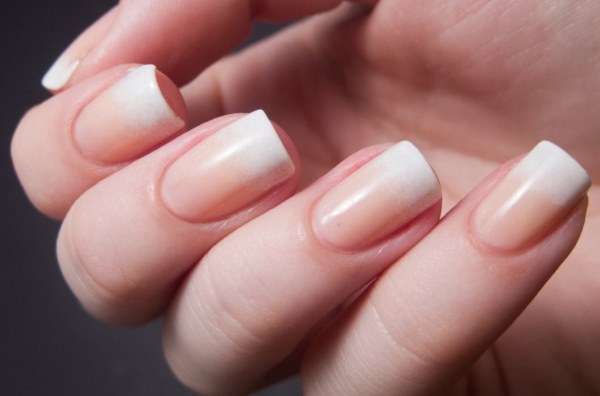
Ombre nude manicure
In the photo of the ombre manicure, made in tones of nude, it can be seen that cream, beige, caramel and coffee shades were used to create it.
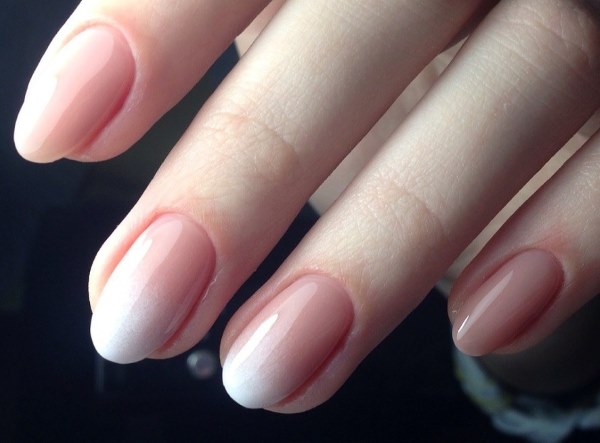 Such color combinations in a gradient can not only give the nails a unique charm, but also hide some of the flaws of the nail plates. A characteristic feature of nude color is its naturalness, and it is appropriate everywhere, both at special events and in business everyday.
Autumn ombre manicure
Autumn gradient manicure is distinguished by a wide variety of techniques and decor variations, namely: the use of stickers, rubbing, matte varnishes, painting and images of animals, birds and leaves on nails.
 The most popular shades of autumn nail polish are variations of purple, gold and combinations of black with beige, red or gray.
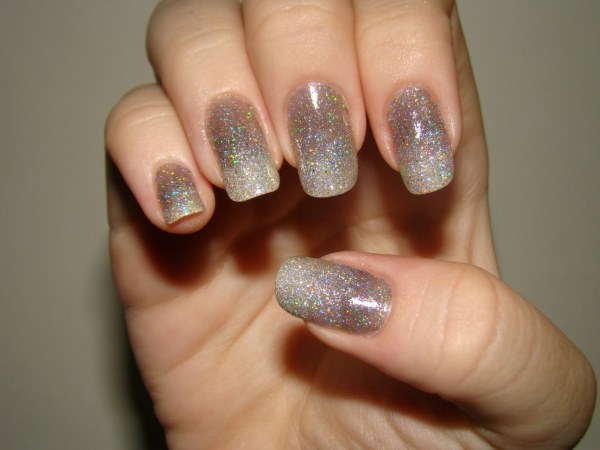
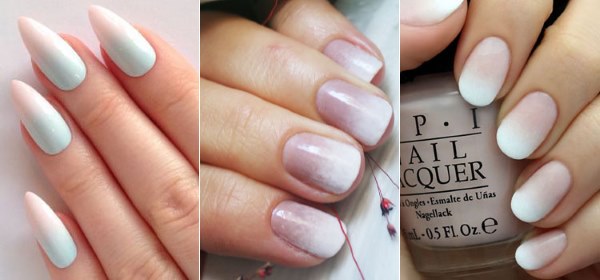
Delicate light ombre on nails
Light ombre looks very gentle and beautiful.
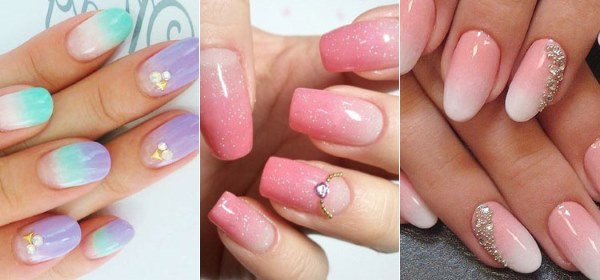 To create a delicate light ombre on nails it is very important to choose the right color combinations in the same range and make the gradient as blurry as possible.
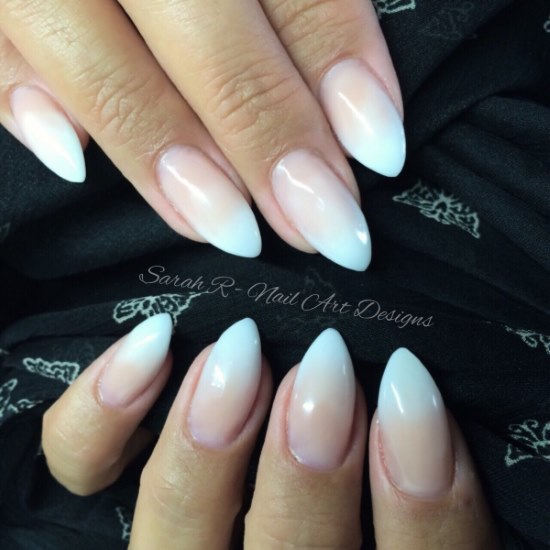
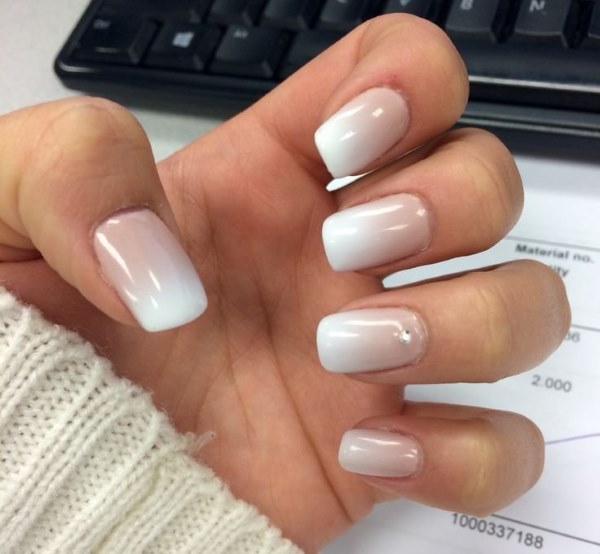
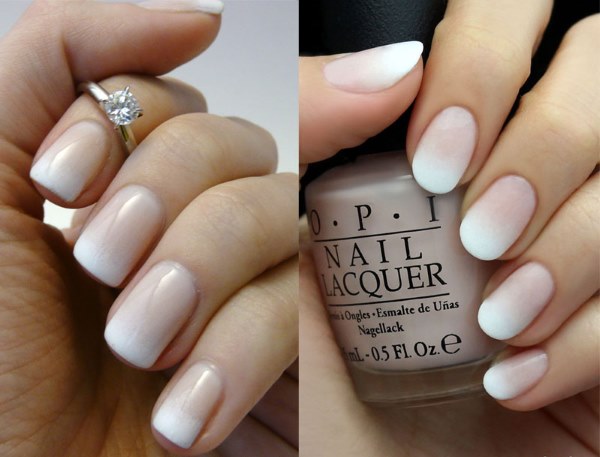
White ombre manicure
Gradient white is perfect for wedding nail polish.
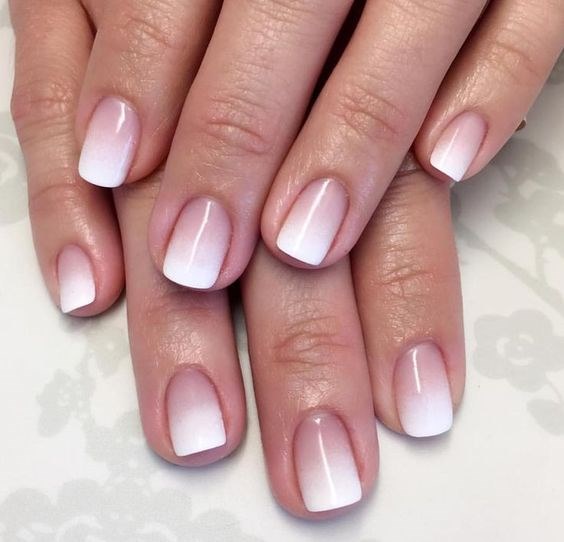
 In this case, it is appropriate to decorate with painting, sequins or rhinestones, with the obligatory observance of the principle of balanced minimalism.
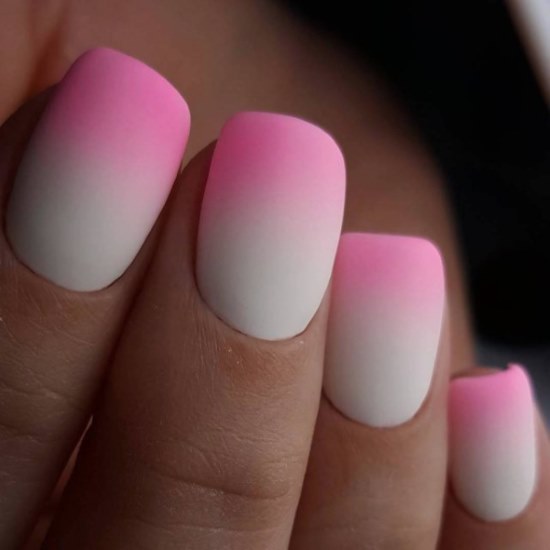
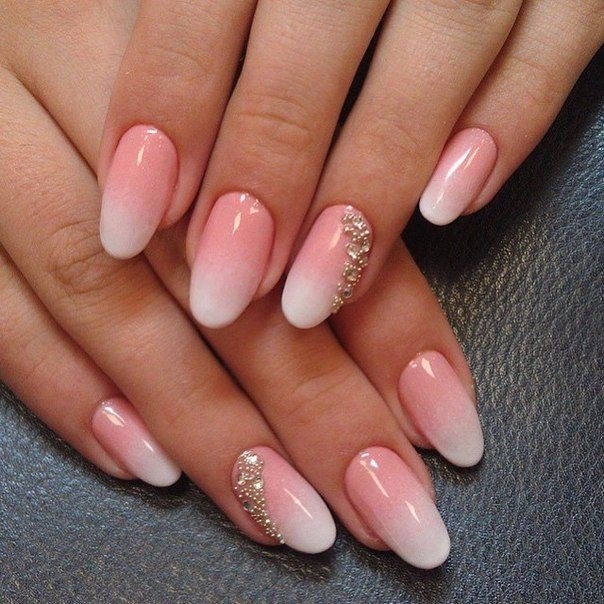
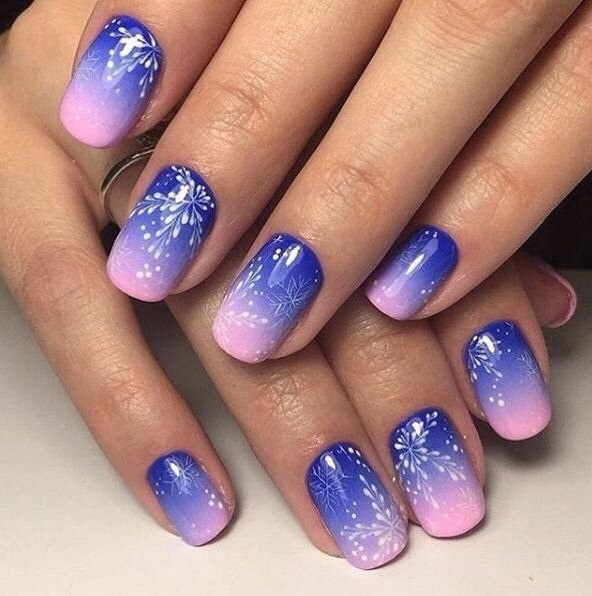
Ombre on nails pink
The color pink is undoubtedly very popular.
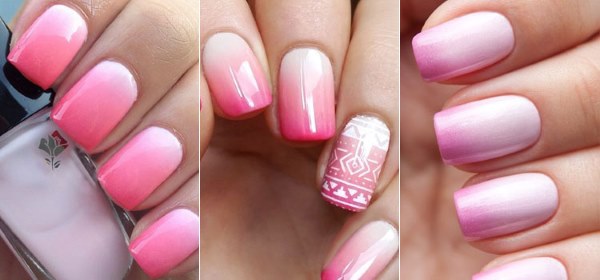
 Pink ombre on nails looks great in combination with beige, white, cherry, and also with contrasting colors, provided the gradient is carefully blurred.
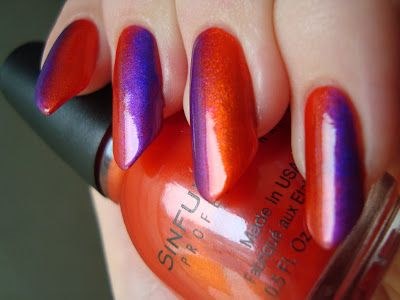
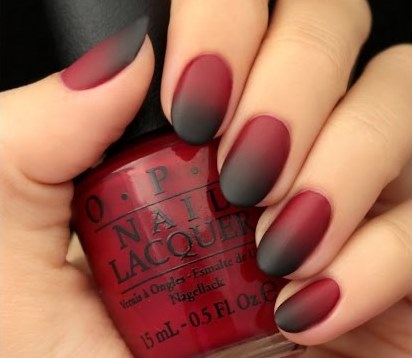
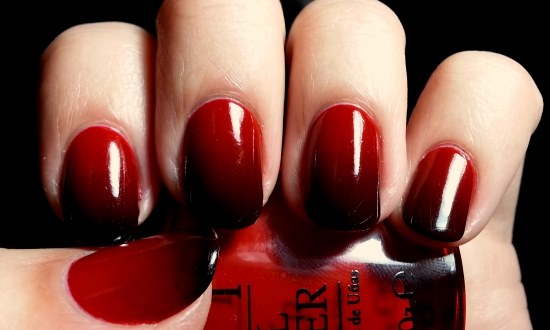
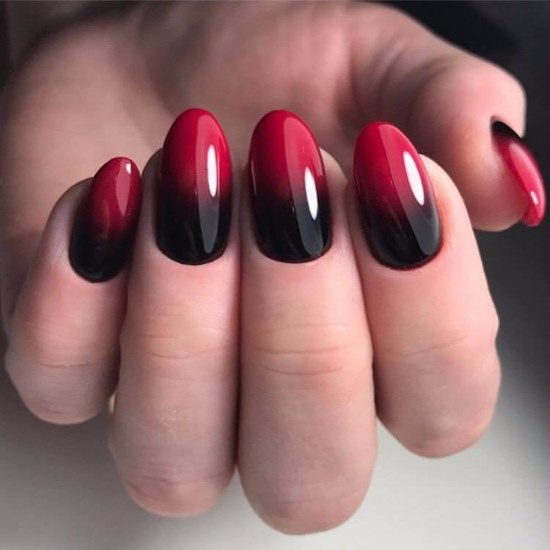
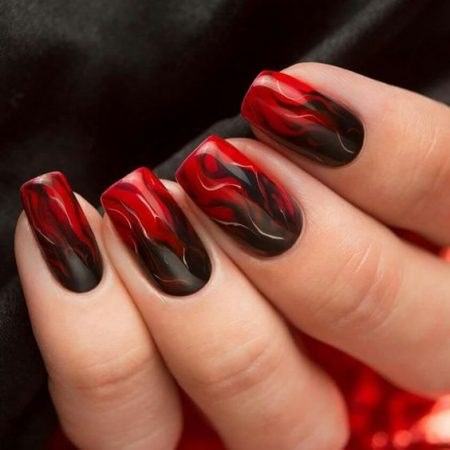
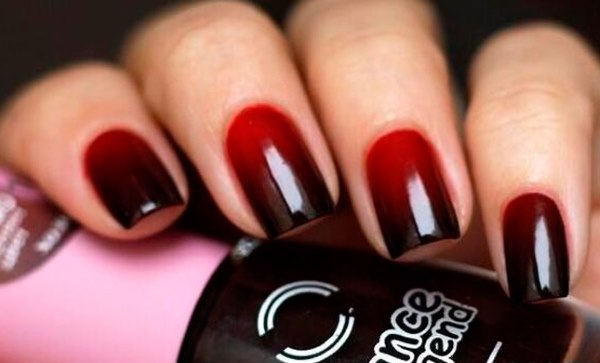
Red ombre manicure
Red gradient manicure is incredibly gorgeous even in the classic version, when only 2 colors are used to create it - red and cherry.
For special occasions, stylists recommend making a red ombre in combination with black.
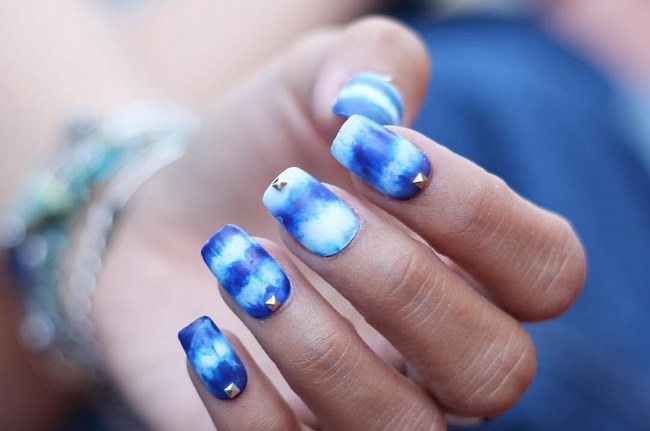
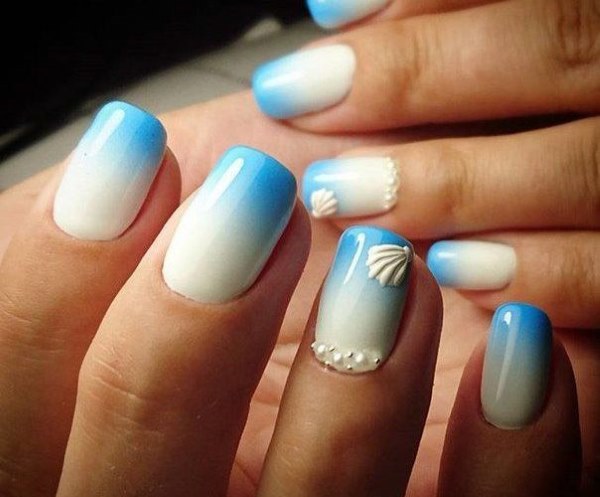
Blue ombre manicure
Gradient manicure in blue looks luxurious when the stretch is done with an admixture of black.
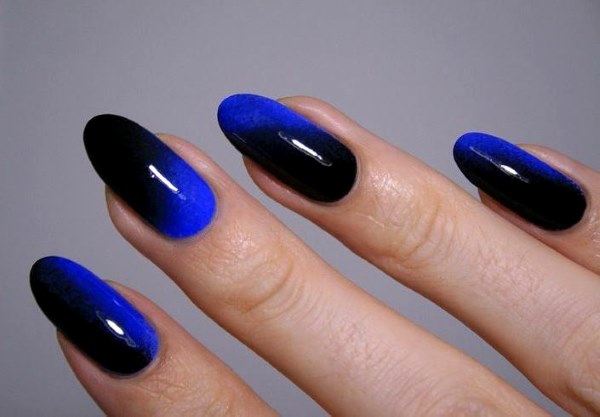
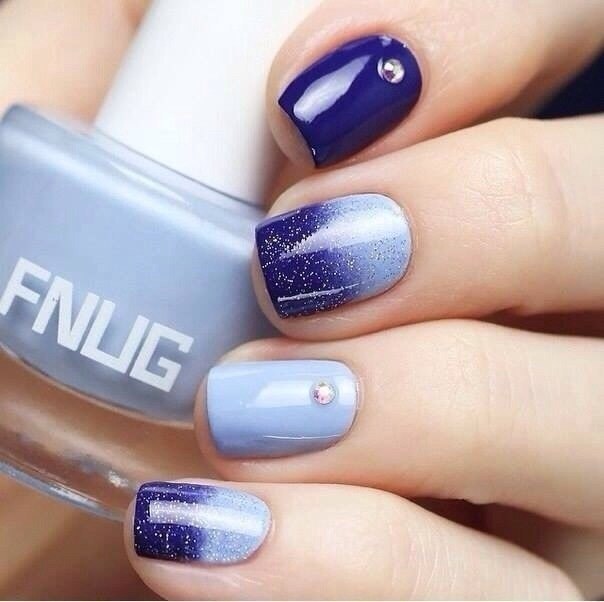 As you can see in the photo, the ombre technique in this case can be emphasized by blue or blue rhinestones, located selectively, not on all fingers.
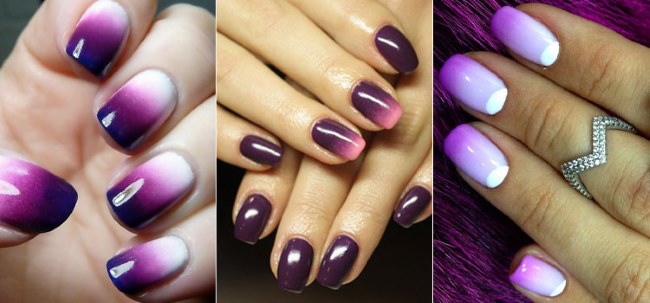
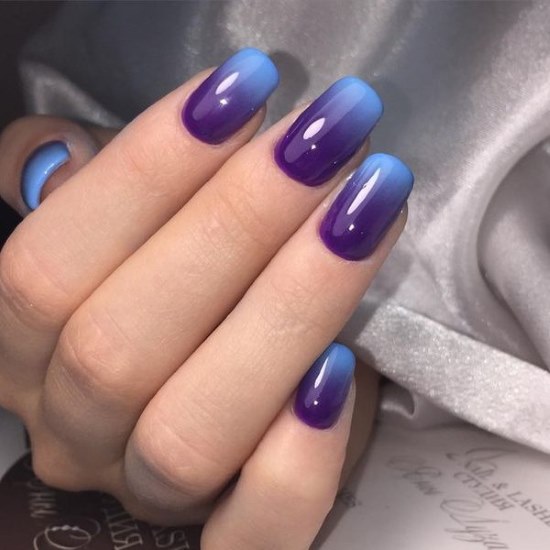
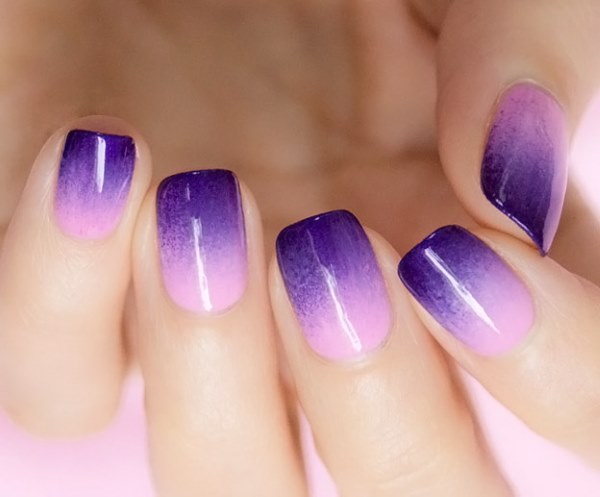
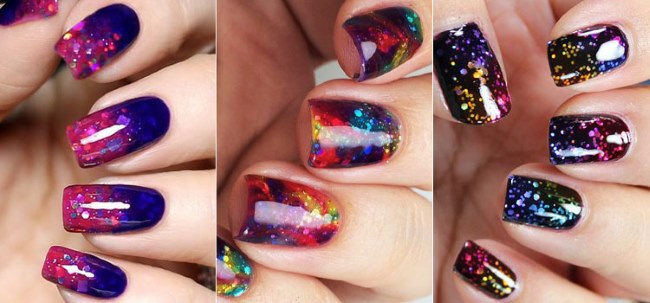
Ombre manicure purple
Purple rightfully takes first place among the most fashionable shades of modern autumn nail polish.
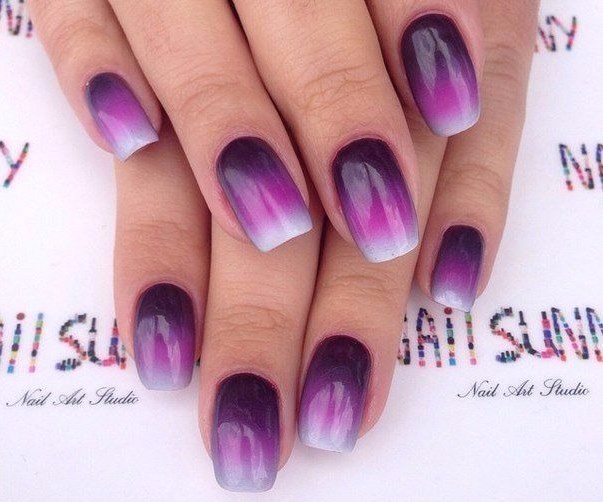
 All its variations are used, from plum to gentle lilac. At the same time, it is very fashionable to place up to 2-3 color gradients on long nails at the same time.
Ombre manicure beige
The beige color of the gradient gives the manicure a natural look, as it is close to the natural color of the nails.

 This ombre can be made in almost any technique, it goes with any style of clothing.
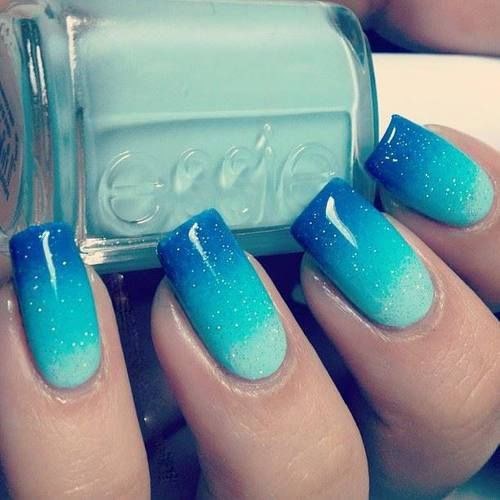
Manicure blue ombre
Blue is the color most often used to create a nautical manicure. It is perfectly complemented by blue, purple and silver sequins.
 Gradient stretch of blue shades of color looks gorgeous in combination with pink or yellow, especially when using different varnish textures.
Gray ombre manicure
Gray shades of ombre manicure color "are friends" with pastel tones, while the most fashionable are vertical gradient options.
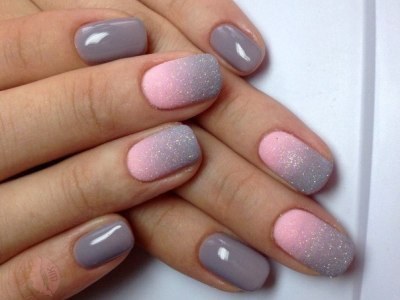
 In the magnificent photo of manicure for special occasions, you can see a gray gradient combined with a painting in black or burgundy.
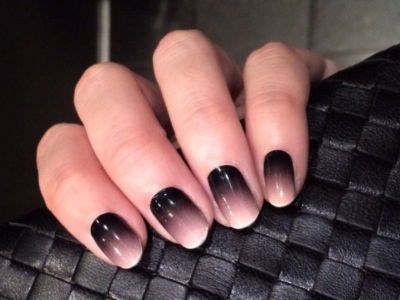
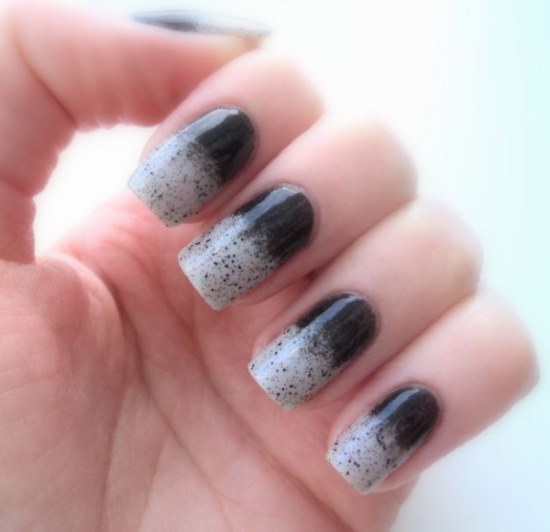
Ombre black manicure
Black ombre on nails looks amazing in any event, except for a wedding.
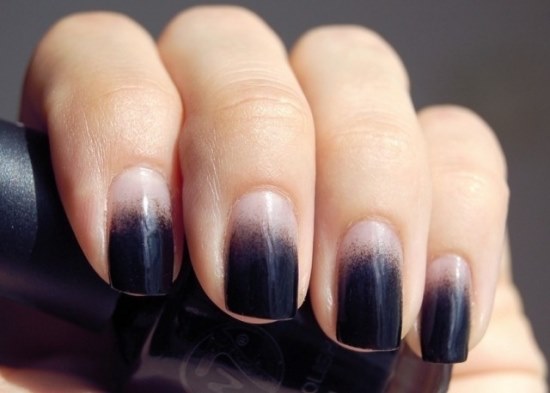
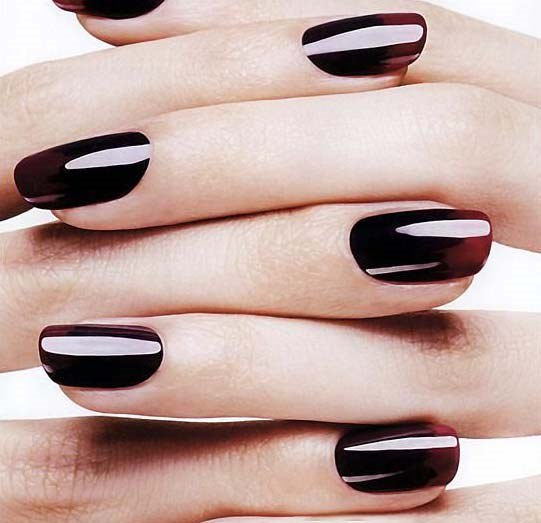
 This color is versatile, and in combination with any other (especially with a contrasting color) gives original and stylish shades.
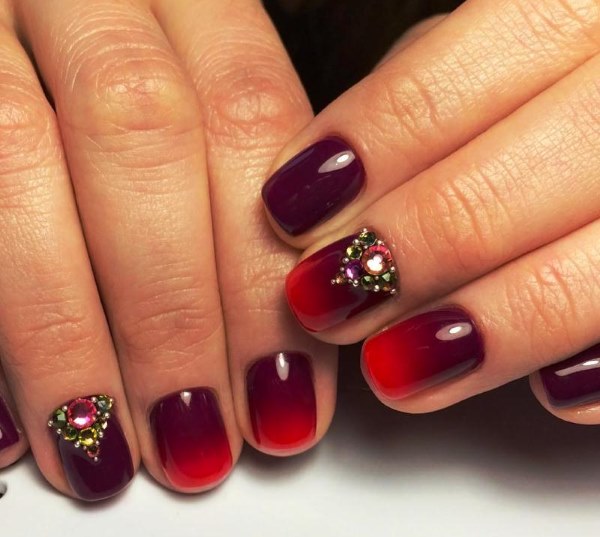
Ombre burgundy manicure
The ombre manicure in the photo, made in burgundy tones, amazes with its majestic charm.
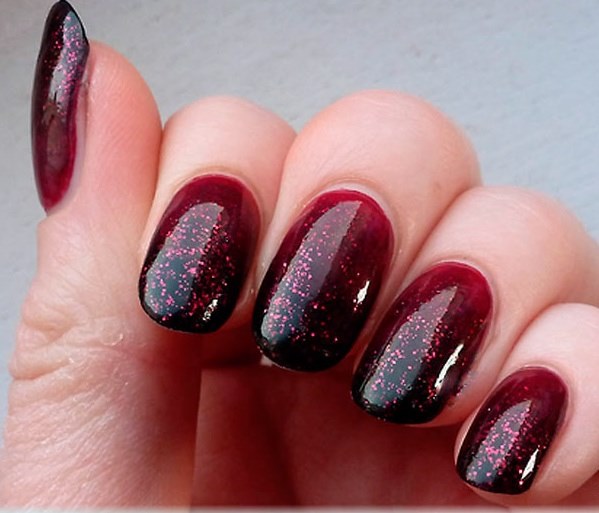

 In combination with white, which softens the aggressiveness of wine shades, this gradient looks fashionable and expensive.... For burgundy decor, golden shades of sequins or rhinestones are suitable, as well as subtle painting in a contrasting color.
Master class: video lessons of ombre on nails for beginners
In this video 10 tips for the perfect ombre manicure for beginners:
Tutorial video for creating a gradient (ombre):
Photo of ombre manicure in this video:
Author of the material: Izotova Inna Nikolaevna
The gradient on the nails looks gorgeous! I love this manicure option.
Gradients will not lose their popularity, especially nude ones. I have even those for whom the classic jacket seems boring do not remain indifferent with a blurry jacket. I use nano prof and their make up for nails set to make three versions of nails at once. The gradient is superb! Smooth transition, color saturation and density that you need. Cures in 30 seconds. Such beauty is incredibly convenient and quick.
And where is the photo? None of them open.