In pursuit of fashion trends women are increasingly resorting to the services of nail technicians for covering and modeling nails. Constant exposure to aggressive materials, mechanical damage with abrasive tools can affect the condition of the nail plate. A manicure performed without coverage will help to correct the situation. It will allow you not only to restore the health of your hands, but also to save money. After all, the price for this type of service is much lower.
Features of uncoated manicure
An uncoated manicure, the price of which depends on the method of execution, is a complex of actions for nail care.

When performing any type of manicure, the master pursues certain goals:
- giving a well-groomed look;
- removal of pterygium;
- removal of keratinized skin, burrs;
- cuticle treatment (in some techniques, removal);
- correction of deficiencies;
- sawdust forms;
- plate recovery.
Manicure without colored coating, other artificial material is much cheaper.
Its price varies between 450-1500 rubles, and depends on many factors:
- way of doing;
- cost of tools / equipment;
- the prestige of the salon;
- the presence of care procedures;
- the cost of care products (oils, vitamin complexes).
Admirers of this procedure have the opportunity to choose a technique that meets their requirements.
Nail service masters distinguish the following main types of manicure:
- European;
- classical;
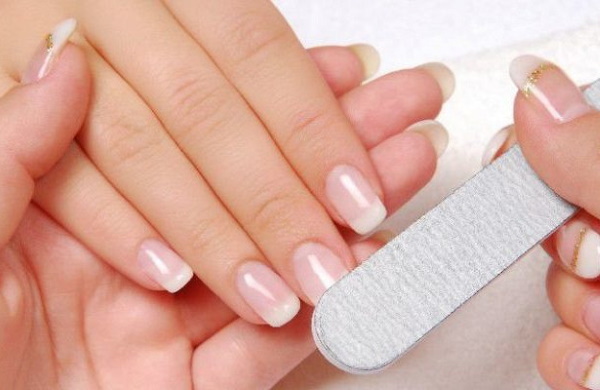
- nail file;
- hardware;
- combined.
Benefits and Recommendations
Uncoated manicure (the price of which depends on the type chosen) is attractive for saving time. The average time to complete a hygienic manicure is no more than 30 minutes, and methods with coating or modeling take at least an hour. Each of the previously listed types of manicure without the use of artificial materials has its pros and cons. Its selection depends on the individual characteristics of the nails, their condition, skin type, the desired result.
A brief description of the types of procedures, the technique of their implementation, features are presented in the table:
| Manicure type | Description | Required tools |
| European | The process involves sawing off the shape of the nails, soaking them, removing pterygium, gluing. The cuticle is pushed back to the proximal ridge. |
|
| Sawing | It is carried out on dry skin with a mild abrasive file. With its help, the keratinized skin, cuticle, and adhered pterygium are cleaned. |
|
| Classic (edged) | Shaping is done on dry nails. After that, the skin is soaked, the pterygium is removed, the keratinized skin and cuticle are trimmed. |
|
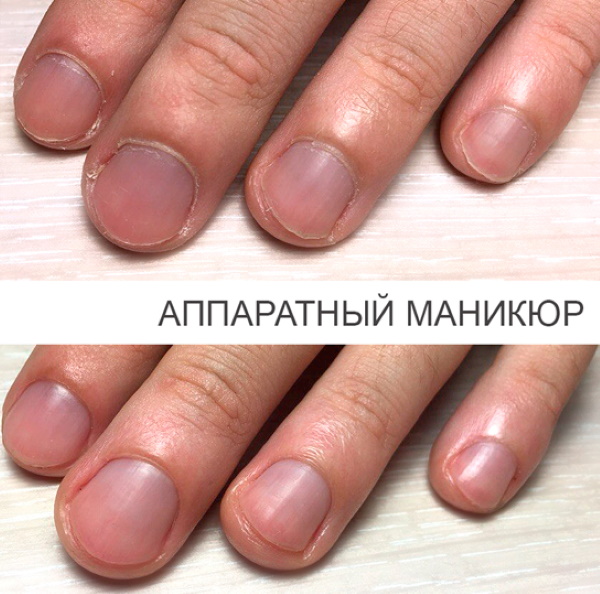
| Hardware | It is carried out with a special apparatus (milling cutter) and a set of cutters of various shapes and abrasives. |
|
| Combined | It involves the removal of pterygium, treatment of the rollers, lifting the cuticle with the apparatus. The cut of the processed cuticle is made with cutting tools. |
|
European and nail files are the most gentle and atraumatic. They are performed without cutting instruments requiring sterilization. They are applicable for thin, slowly growing cuticles, without hyperkeratosis. A minimum set of tools is required to complete. The main disadvantage is the short wearing time of the manicure.
Manicure using the apparatus is deeper, more durable and suitable for all skin types. However, in addition to the large list of necessary equipment and tools, it will take a lot of practice and practice.
Otherwise, skin and nail may be injured. This can lead to its thinning, deformation and other irreversible consequences. The middle link is the classic trim manicure. It requires minimal skills in manicure tools and is available for home use. The term of wearing a manicure is 10-15 days. The main disadvantage is the need for soaking. Frequent exposure to water is not suitable for weak and thin nails.
Required tools
The tools already listed earlier in the table or some of them are available to almost any woman. Each of them has its own purpose, application and processing features.
What do you need:
- The orange stick, like the metal pusher, is designed to lift the cuticle and open the subcuticular pocket. It is made of wood and is disposable. It is considered safer for the nail when cleaning the pterygium from the surface of the nail plate under the cuticle.
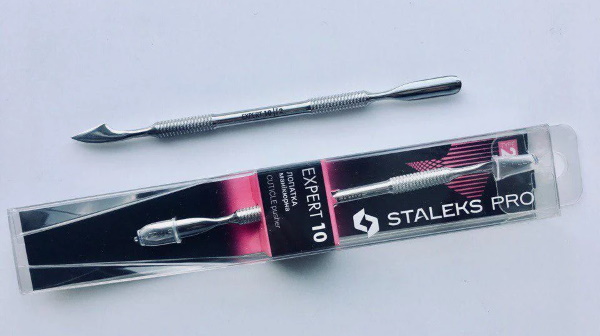
- The pusher is similar in functionality to the orange stick. A feature of the tool is the ability to choose the shape and size of its spatula. Most often, there is a sharp, flat sinus cleaner at the end opposite to the pusher.

- Cuticle scissors are preferable to choose with long thin blades, slightly rounded (anatomical). They can be replaced with tweezers depending on individual preference. Sharpening these tools should be as sharp as possible, so it is better to have a second copy for cutting nails and hardened skin.
- Sawdust of natural nails must be done with soft abrasive files. Manufacturers of this product offer disposable full-fledged files on a soft base or removable files on an adhesive base. Files are attached with the sticky side to a special metal spatula.
Used metal tools must be sterilized in a dry heat cabinet.
Home technique
Uncoated manicure (price 400–750 rubles) with the classic (edged) version is available at home. All tools are affordable and will last a long time.
Even a beginner will be able to master this technique by sequentially performing the following steps:
- Raising the cuticle.
- Opening and cleaning the subcutaneous space.
- Sawdust form.
- Applying a remover.
- Maceration.
- Deep cleansing of the pterygium.
- Removal of hardened skin.
- Cuticle cut.

- Oil application.
The compulsory home sterilization step cannot be performed. Therefore, all instruments are used strictly individually in order to maintain hygiene. Even the safest manicure can cause harm and injury. Excessive pressure, depth, pressure or angle of the instrument can damage the matrix and the nail plate. Each stage has its own characteristics and requires a more detailed analysis.
Removing the old coating
Removing the old coating is a mandatory step and can be done in two ways: sawing and soaking.
The choice of method depends on the following factors:
- condition of the nails;
- rigidity of the material;
- material thickness;
- available tools.
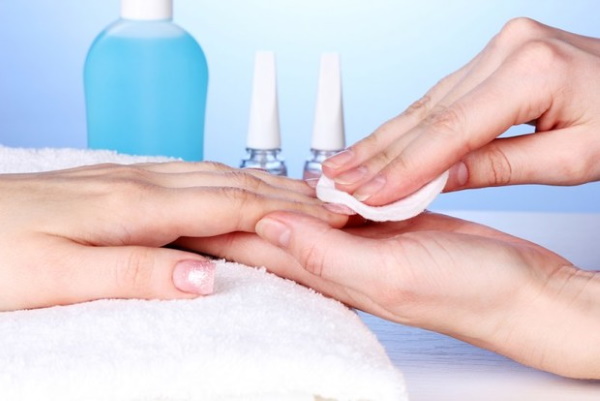
Soaking means soaking the artificial turf with a liquid containing a solvent. Varnishes that dry outdoors are wiped off with a cotton pad soaked in liquid.It is enough to apply it for 5-10 seconds. The service of covering nails with gel polish is very popular in salons.
For color-matched coatings, a base coat is applied to form the correct nail architecture. The thin layer and structure of the material allows a special liquid to soak and soften it. First, it is necessary to file the top coating and the end with a file for natural nails. This will reduce the soaking time to 15–20 minutes.
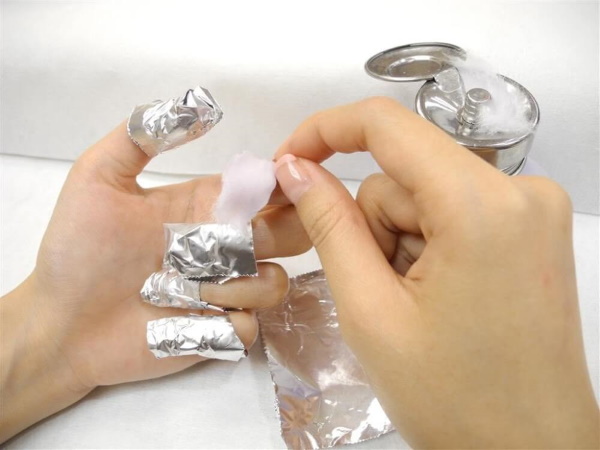
A cotton pad cut into several triangles is impregnated with a remover. Each of the pieces is attached to the nail with foil. The softened coating is scraped off the surface of the nail with gentle movements. Residues are removed with a soft abrasive buff. It is necessary to remove the material in the direction from the cuticle to the free edge.
When modeling nails, harder materials are used that cannot be soaked.
In this case, it is necessary to note the sawdust technique. For an experienced craftsman with a router and carbide cutters, the procedure will take no more than 20 minutes. Removing the coating at home will require a coarse abrasive file and a longer period of time.
Cuticle treatment
First of all, the cuticle must be lifted. With light movements of a pusher or orange stick, it is pushed towards the proximal fold. This stage makes it possible to open the subcuticular space, which will allow deeper cleaning of this area. Nail technicians recommend that beginners perform lifting in several passes, moving from the sinuses to the center of the nail. The resulting pocket must be cleaned of dry pterygium and glues adhering to the nail plate. To do this, short dash movements are made along the cuticle line from the sinus to the center of the plate.
Before lowering your hand into a bath of warm water (water temperature no more than 30–40 C °), modern manicure masters apply a cuticle remover. This thick liquid is designed to soften the cuticle and facilitate further removal. The water in the bath should not be hot, and the holding time should not exceed 10-15 minutes. Otherwise, when cutting the cuticle, the border of keratinized and dry skin will be poorly visible. This increases the risk of injury.
Using the previously described pterygium cleaning technique, it is necessary to clear the subcuticular space and lateral sinuses. Moistened keratinized skin is removed from the lateral ridges and sinuses. To do this, use the selected type of cutting tool, placing it parallel to the growth of the nail. Moving on to the cuticle cut, it is necessary to change the angle of the cutting blade. Its lower part is wound under the cuticle, and the tool is tucked across the growth of the nail.
After finishing the treatment of all 10 nails and manicure as a whole, it is recommended to apply vitamin oil to the cuticle area. The composition will moisturize the skin and rollers, prolong the wearing time.
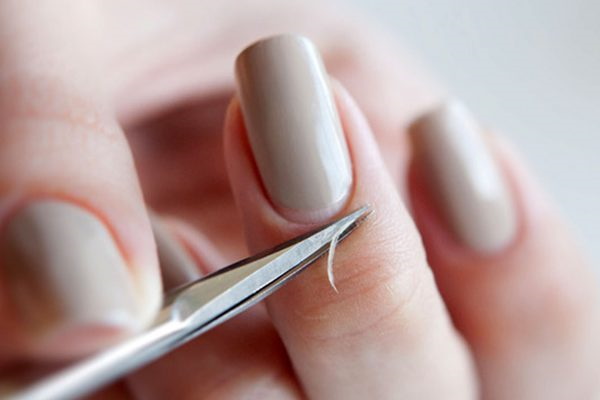
An important point in addition to treating the cuticle is to remove impurities under the free edge. Many beginners aggressively clean out hyponychium in an effort to achieve the perfect manicure. This layer between the skin and the nail is the body's defense response. It prevents bacteria from entering the subungual space. Mechanical damage to hyponychia leads to the activation of its growth. You can use a stiff bristled brush to clean this area.
Grinding
Buffing with buff is applied before the skin is soaked and after it dries. After opening the subcuticular space and cleaning the dry pterygium, this area is processed with a grinder. The nail is cleaned with long movements (in one direction) from one lateral fold, along the cuticle line and to the other.
Once dry, the grinder is used before polishing. This stage allows you to smooth the edges of the slices and visually smooth the surface of the skin around the nail.Sometimes manicurists use a file for natural nails to polish dry rough skin on the side rollers. With hyperkeratosis, stripping will shorten the processing time for these areas.
Polishing
As a rule, the nail plate is covered with an artificial colored material, and after that with a finishing material to give gloss. When performing manicure without coating, the effect of shine and smoothness is achieved by polishing. A polisher is a device that is soft in structure and has a flexible base. Due to friction, its abrasiveness makes it possible to safely shine a natural nail plate.
Shaping the nails
A natural nail consists of flat dry sheets that are layered on top of each other. Its properties resemble a sponge. After saturation with liquid, the scales rise. He becomes looser, flexible and vulnerable.
When filing a wet nail, the abrasive of the file aggravates the splitting of the scales among themselves. Once dry, the free edge can crumble and flake. It is for this reason that the sawdust of the natural nail plate is always carried out before moisturizing.
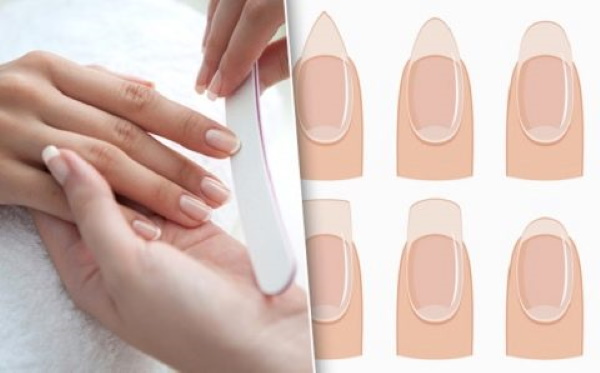
The most practical to wear are the following forms:
- oval;
- round;
- squaw oval;
- soft square;
- almond.
Forms such as a sharp square, a stiletto, a ballerina have sharp corners and can cause discomfort when worn.
Hydration and nutrition
Manufacturers of products for the nail service offer a wide range of different products for the care of natural nails. Before purchasing and using them, you need to understand the structure of the nail. The nail consists of onychoblasts - white-colored cells that form at the root of the nail.
At the beginning of the journey, they are round and filled with liquid. As you move along the plate, its shape becomes flatter and drier. Layers of dried and flattened onychoblasts are glued together to form a nail. These cells can be called dead.
Forming onychoblasts, the matrix receives nutrition from the body. Therefore, to improve their quality, it is necessary to improve the general condition of the power supply.
To improve the condition of nails, it is recommended:
- rejection of bad habits;
- healthy eating;
- healthy sleep;
- the use of vitamins;
- playing sports.
A healthy body is a complete source of nutrition not only for skin and nails, but also for all body systems. It is not possible to influence the nutrition of dead nail cells.
The closer they are to the free edge, the worse the connections between them. That is why the butt end of the nail often flakes and breaks. The main task of various nail care products is to reduce the influence of the external environment on them and improve the visual state.
Every day, nails are exposed to various factors:
- water;
- household chemicals;
- Sun rays;
- mechanical impact;
- aggressive environments.
Special oils penetrate between the nail scales and soften them. A wetted nail has better flexibility and is less prone to breakage. Various nail polish pastes give a similar effect. After applying the composition to the plate, rub it in with a polisher or a suede file. Friction heats up the composition, and paraffin particles are distributed between the flakes. Such a sealing improves their adhesion, protecting them from the influence of moisture.
It's hard to imagine a modern woman without a manicure. The abundance of artificial materials, techniques for their use, a wide color palette of gel varnishes for coating make it possible to implement the most daring ideas. The cost of such experiments can be deterioration of the condition of the nails. That is why classic manicure techniques remain steadily popular.
Uncoated manicure video
Manicure without acceleration and without coating: