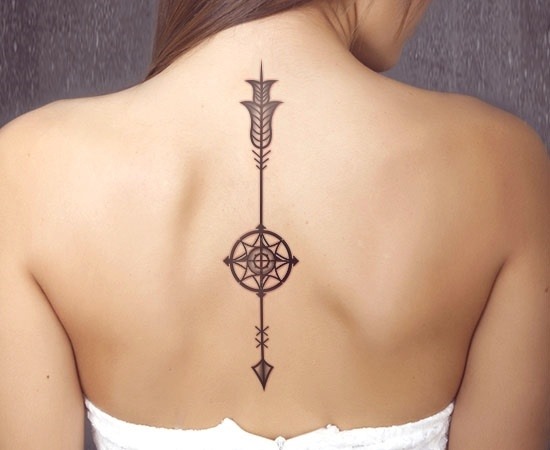
Instead of a traditional tattoo, which is done once and for life, it is quite easy to make a temporary decoration on the body, even at home. Such a tattoo will stay on the skin for a maximum of a month. This is convenient, since not everyone is ready to decide on a radical change of image.
Transfer tattoo
A transfer tattoo is the easiest and fastest way to apply a temporary tattoo. This method is relevant if you need to apply jewelry to go to any event.
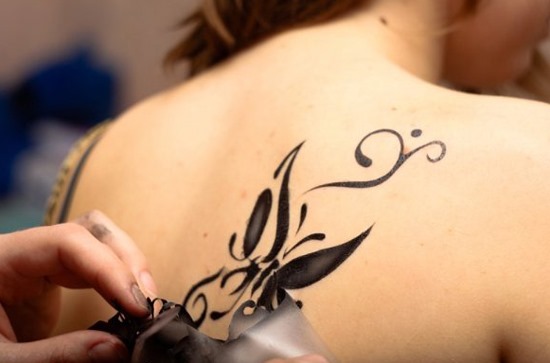 The advantage lies in the large selection of pictures. And the most important disadvantages are the fragility of the tattoo and the unnatural appearance, i.e. A transfer tattoo is easily distinguishable from a traditional tattoo.
- Having purchased the picture you like, you need to cleanse the tattoo site from sebum - this way the tattoo will last longer.
- Then either moisten the place to which the tattoo will be transferred, or press the transfer sheet with a damp cloth, after removing the protective film from it.
- It must be remembered that the drawing will be applied in a mirror image.
- Having well smoothed the paper to the skin, after 15-20 minutes, the sheet is carefully removed. Only the translated film with the pattern will remain on the skin.
- The drawing is allowed to dry, then, for fixing, it is sprayed on top with hairspray.
The tattoo must be protected from water and rubbing parts of clothing, otherwise the image will quickly crack and begin to separate in parts.
Temporary tattoos: photo


Using special paper
A tattoo made with paper gives you more room for experimentation, since you can print any drawing you like on it. Specialty paper is a layer of plain paper and a self-adhesive layer on which to print the image.
Printing is done on a color or black and white printer. Choosing a color image, you should select shades that are suitable for the color type. Having selected an image, you need to adjust its size in a graphics editor. Then you need to insert the paper into the printer so that the pattern is printed on the adhesive side.
Be sure to take into account that on the skin the image will turn out in a mirror image.
If the image contains inscriptions, then you need to use the "Reflection" tool in the editor. The printed workpiece is cut with scissors, slightly stepping back from the edge of the image. Then the workpiece is applied to the skin and pressed with a damp cloth. Smooth the workpiece with pressing movements. After 30 seconds, you can gently remove the paper. The picture will remain on the skin.
A temporary tattoo made in this way will last for about a week. If necessary, it can be removed earlier by rubbing it with a stiff brush and soap.
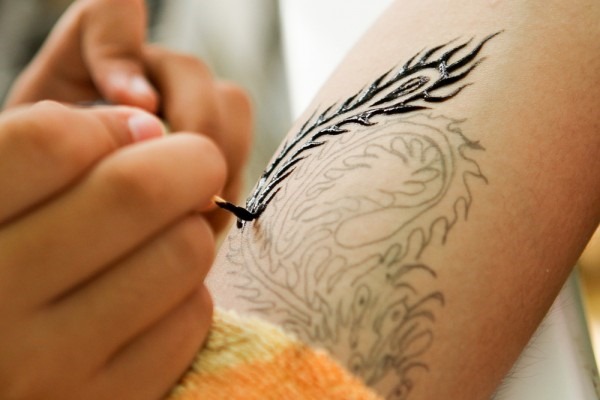
Eye pencil tattoo
The eyeliner allows you to make a stylish temporary tattoo at home as it looks almost the same as a traditional tattoo.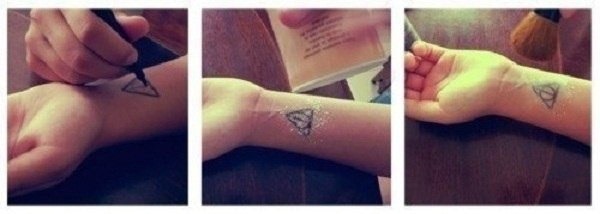
- To make the tattoo look as natural as possible, you should choose the right pencil. It should be a pencil that needs to be sharpened, not too soft or shiny. It is not forbidden to use pencils of any other color instead of black.
- Do not use liquid eyeliner - it will spread.
- The image can be both large and small, but it is necessary without thin, closely spaced lines.
- Before drawing on the skin, you need to practice on paper.
- From the place where the tattoo will be located, hair must be removed.
- It is better to choose an area that will not be covered with clothes, otherwise the tattoo will smudge with a high probability.
- The skin must first be wiped with alcohol to remove grease.
- After applying the contour, the tattoo is sprayed with a small amount of varnish.
You can use carbon paper in the process if you need to draw a complex drawing:
- They choose a place for drawing, remove hair from this area and degrease with a cotton pad dipped in alcohol.
- A sheet of carbon copy is placed under the drawing prepared on paper.
- Apply a stencil with a carbon copy to the desired area of the skin. Outline the lines.
- Remove the paper and trace the outline with a cosmetic pencil.
- Use baby powder or hairspray to help fix the lines.
The drawing is cleaned with warm water, soap and a washcloth. In a similar way, make a drawing with a ballpoint or gel pen.
How to get a tattoo with a Sharpie permanent marker
A permanent marker will allow you to make a tattoo very similar to the real one, which will last 2-3 weeks.
Here's how to get a realistic temporary tattoo at home:
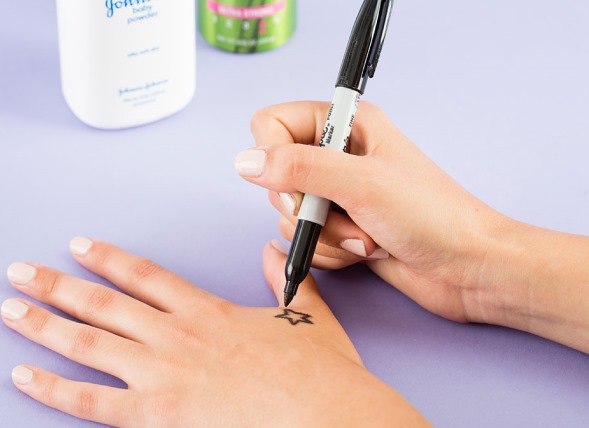
- With a marker, draw immediately on the selected fat-free area of the body.
- After applying the picture, you need to sprinkle the image with baby powder and rub the powder into the skin.
- Then a little hairspray is sprayed onto the drawing.
- For greater durability of the tattoo, the "powder-varnish" procedure is repeated again.
- The tattoo will be more durable if you apply a liquid adhesive plaster on top.
Before making a temporary tattoo at home with a marker, you need to draw a line on an inconspicuous area of the skin and wait.
If redness or itching appears, this is a sign of an allergic reaction. This means that this method of tattooing is not suitable. The marker must be erased immediately.
The Sharpie marker can be wiped off with an alcohol-based lotion or makeup remover. The liquid must be applied to a napkin and rubbed over the skin. If the paint is not completely washed off, a scrub should be applied.
How to prepare a mixture for biotat
The solution-catalyst for biotatu is prepared on the basis of tea, coffee, lime juice and a small amount of henna. Lime juice can be substituted for lemon juice. It promotes better absorption of pigment into the skin, and coffee makes the henna color brighter.
 The proportions are as follows: coffee and tea for 2 tbsp. The coffee should be ground and the tea should be in the leaves. Henna is best purchased green. It will take 40 g. Lemon juice needs 2 tsp.
- First, tea is brewed with a glass of boiling water.
- When the infusion acquires a dark color, filter it, removing the tea leaves.
- Then coffee, henna and lemon juice are added to the tea. When mixing coffee and henna powder, you need to make sure that there are no lumps.
- Cook until caramelized to achieve an intense, rich color.
Henna should be chosen natural in the form of green powder, without artificial colors. Such henna can provoke a severe chemical burn, the traces of which will not heal for a long time.
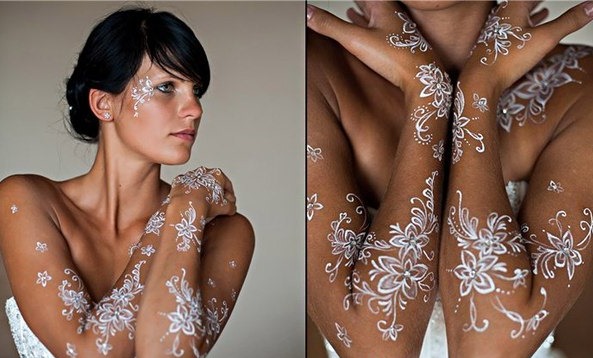
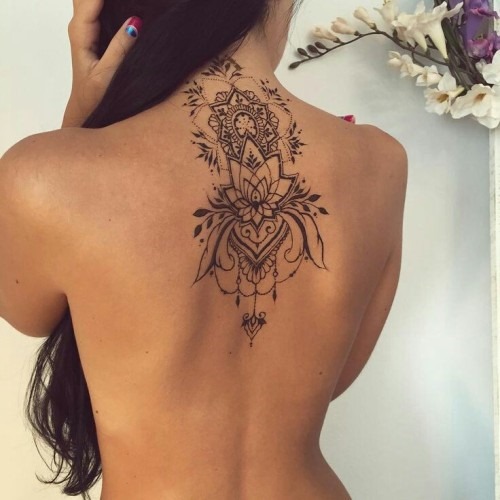
Temporary tattoo with henna
With the help of henna, a temporary tattoo called mehendi is applied to the body. Such an image will last on the skin for up to a month.The henna pigment ensures the durability of the result, and the comfortable consistency of the composition allows you to experiment with the tools for application and the complexity of the pattern.
Usually, traditional Indian motifs are chosen as subjects for drawing, which have a sacred meaning and, as Hindus believe, contribute to gaining good luck. However, you can make henna and ordinary drawings, such as inscriptions.
To apply the composition, use brushes, cotton swabs, stencils. In addition, special henna for mehendi is required. The henna that is used for hair coloring is not suitable. Best to use Iranian henna.
The composition can be prepared from fine powder or use a ready-made mixture packed in a cone-shaped briquette. The powder is diluted with lemon juice with a small amount of sugar and 2-3 drops of essential oil to a pasty consistency.
When making the composition yourself, it is convenient to make a kind of a pastry bag for application. It is made from a tight bag, tied hermetically, and the corner of the required diameter is cut off. Now the composition can be applied by gently squeezing out of the package. Instead of a pastry bag, a medical syringe is also used.
To make the tattoo beautiful, you need to pre-apply the outline of the drawing on the skin with a water-based felt-tip pen or use a ready-made stencil.
After application, the composition must dry for at least an hour. Experts recommend leaving the paste on the skin even longer, for 6-8 hours, protecting the ornament with hairspray or cling film. For a more intense color contour, it is recommended to keep the paste moist by sprinkling with water or lemon-sugar syrup.
After removing the composition from the skin, the pattern gains brightness within 2 days. A henna tattoo lasts for about a month, but begins to fade after the first two weeks. However, this is the most affordable and durable home tattoo option.
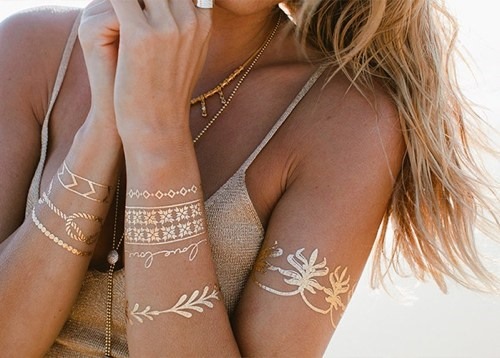
Glitter tattoo based on glue and paints
Glitter temporary tattoos look bright, they are made for some kind of festive event such as a birthday or New Years party. When applied at home, a stencil with an adhesive base is used (you can buy ready-made or cut out of plain paper yourself), acrylic body glue, glitter and decorative rhinestones.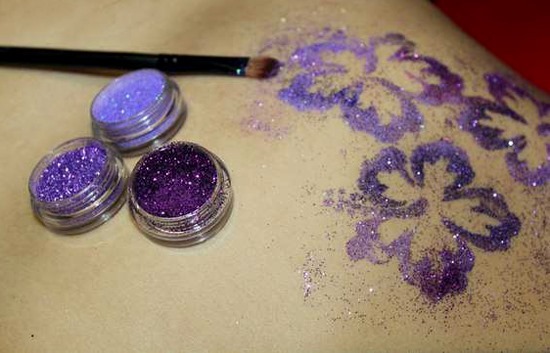
- The skin is pre-degreased with alcohol.
- Remove the protective film from the stencil and stick to the skin.
- Acrylic glue is applied along the lines of the stencil with a brush.
- Remove the stencil and wait until the glue becomes transparent.
- Then glitter is applied with a cosmetic brush. They are literally rubbed into a layer of glue with a brush. Shake off the excess with another brush. This is a base layer of sparkles.
- Now, with a thin brush, apply another layer of glue to the contours of the drawing and, after waiting 2-3 minutes, pass over it with sparkles of a different color.
- If rhinestones are glued instead of sparkles, then they will last up to 1.5 weeks on the skin. The sequins will last up to 2 weeks.
The advantage of a glitter tattoo is effectiveness and simplicity, a wealth of shades and plots.that can be used when creating. The drawing will last on the body for at least a week, and will gradually disappear.
Tattoo with a stencil
It is easy to make a temporary tattoo with clear contours using a stencil at home. You can use either a ready-made stencil or create one yourself. The stencil greatly facilitates the distribution of paint over the skin, allows you not to think too much about the accuracy of applying the composition.
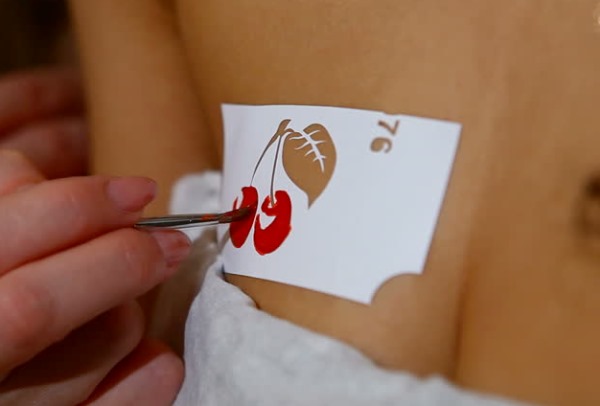
It is not necessary to create a drawing on paper by hand. It is enough to print the image you like on a printer.After that, the contours of the pattern are cut with scissors, a blade or a clerical knife. You should get holes in size exactly corresponding to the contours of the future image.
Then the stencil is applied to the skin so that it is in close contact with it. A regular or double-sided tape will help prevent the stencil from moving, which should be used to glue the paper to the skin.
With the help of a stencil, tattoos are even applied with nail polish, using a new stencil for each color. The stencil you like can be reused.
How to get a temporary tattoo with a printer and tape
If you have a printer at home, you can make yourself a realistic temporary tattoo with absolutely any image. Any picture found on the Internet is suitable as a sketch. You can even draw it yourself in a graphics editor.
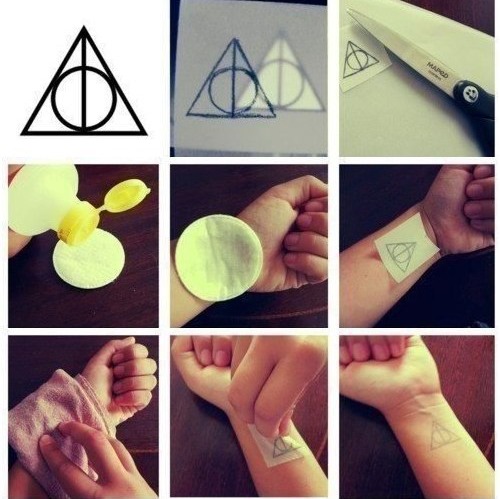 Then you should take a wide tape and carefully glue it to a sheet of paper in the longitudinal direction. Next, place the sheet in the printer so that the printed pattern is on the tape. Due to the smooth surface of the tape, the pigment will not be absorbed into the paper, but will remain on the surface of the film, if you apply the sheet to the skin, the pattern will be well printed on it.
This method allows you to make a tattoo of any complexity on the skin. Monochrome tattoos look best - from the side it is difficult to distinguish them from real ones. However, such a tattoo is not durable. It will only last a few hours, after which it will be lubricated. If you need to keep it a little longer, you need to spray it with hairspray.
As in the case of a transfer tattoo, it is necessary to mirror the drawing in the editor if there are inscriptions on it.
Tattoo sleeves made of nylon tights
This temporary tattoo looks great in photographs and allows you to "try on" your favorite sketch. However, it is not very suitable as an everyday tattoo.
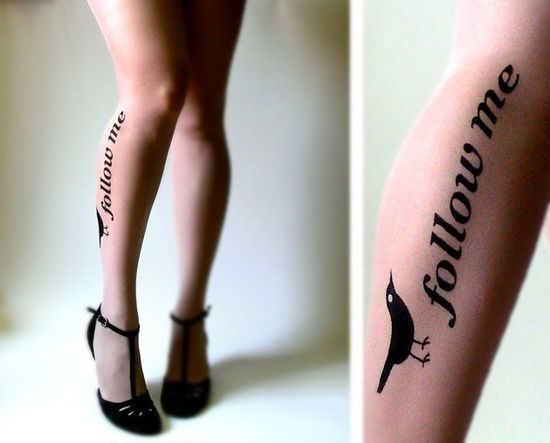 All that is needed to create a tattoo from tights is nylon tights or stockings, alcohol markers or acrylic paints on fabric, an image printed on paper.
- The tights are cut to the desired length.
- The nylon is pulled on a rigid cylindrical base, for example, a smooth plastic bottle filled with water or thick paper rolled into a roll (something rigid can be inserted into the roll).
- On top of the form, wrap a sheet with a printed sketch.
- Capron is glued on top with tape.
- Now you need to trace the drawing with a marker through the nylon material and sprinkle with hairspray.
- Instead of markers, acrylic paints for fabric are also used. They do not need to be additionally fixed, but the layer is not made too thick, otherwise cracks will appear.
You should choose the thinnest tights that blend with the skin color.for a natural look on the sleeve.
How to make a temporary tattoo for a month
So that a temporary tattoo made at home retains its original appearance as long as possible, it is recommended to use a pinning top, which can be talcum powder, hairspray or liquid adhesive plaster.
However, the lifespan of a tattoo largely depends on what pigment was used to apply it. The most short-lived tattoos are made with decals, cosmetic pencils. The biotat, drawing with a marker and glittering image will last 1-2 weeks. The most durable drawing is a mehendi tattoo. Only he is able to survive up to a month in an acceptable form.
A spectacular temporary tattoo that will highlight your style and personality. For application at home, various materials are used, from the most affordable (ballpoint pens, markers, cosmetic pencils) to professional mixtures of pigments for mehendi tattoos.
Interesting videos about tattoos at home
The video presents several ways to apply a temporary tattoo at home:
The video shows a master class on how to make a henna tattoo at home:
Cool article! I have long wanted, but could not dare to get a tattoo, now I know where to start)))