Modern women use bright, shiny nail designs in everyday life. There are no restrictions on decoration, even within the office style, which dictates its own requirements for clothes and shoes.
To create a shiny design yourself, just glue bright colored foil on your nails. For the durability of such a manicure, you need to know the rules for applying and fixing the material.
Design benefits
A shiny manicure can be created using different decorating materials, such as glitter or kamifubuk. But manicurists prefer foil. It is provided on the nail art market with a large number of options (colors, texture).
Foil has a number of advantages:
- easy to use;
- variety of colors;
- retains a bright shine after application;
- durable in wear when fixing rules are followed;
- is inexpensive.
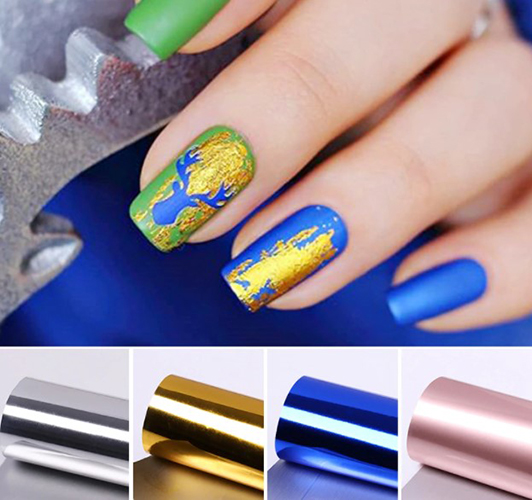
The foil is sold in multi-colored kits. This allows you to choose the right shade for any color gel polish.
What materials and tools are required for work:
| Name | Description and quantity |
| Top | Polymer material intended for fixing the design (used as one of the options for printing foil) - 1 pc. |
| Foil | Any kind of material in sheets, containers or rolls - quantity as desired. |
| Glue for foil | Special glue in a plastic bottle, air-dry - 1 pc. |
| Orange stick or silicone brush | Tool for spreading foil over the surface of the nail and removing air bubbles under the material. |
How to apply and fix the foil on the nail will be described below in the article, depending on the complexity of the design and the availability of additional materials.
Material classification
Nail art manufacturers offer different types of foil. They differ in several parameters and are packaged in a collection of the same texture, but in different colors.
The main types of foil by the method of application:
- Tear-off foil - sold in rolls, where bright elements are printed on the ribbon, which are separated by perforation.
- Transfer foil - is produced in the form of long strips that are rolled up and packed in plastic containers or as a set of small fragments of such strips. Foil is easy to use (it is preferred by beginners to create designs at home). There are several ways of attaching to the plane of the nail, but a prerequisite is the presence of a strong sticky (dispersion) layer on the surface of the nail.
- Thermofoil - it is characterized by increased resistance to abrasion during the wearing of a manicure, but has difficulties in application (mandatory heating during application).
- Liquid foil - an innovative product that greatly simplifies the application of bright material to the nail, it is convenient to use it to completely cover the nail plate.
Foil can be divided by color:
- monochromatic foil in various bright, neon and shiny colors;
- foil of the same color, but with a geometric or floral print of the same color, highlighted by a higher print density;
- multi-colored material with a matte effect;
- colored drawings on a transparent tape, which are transferred to the nail;
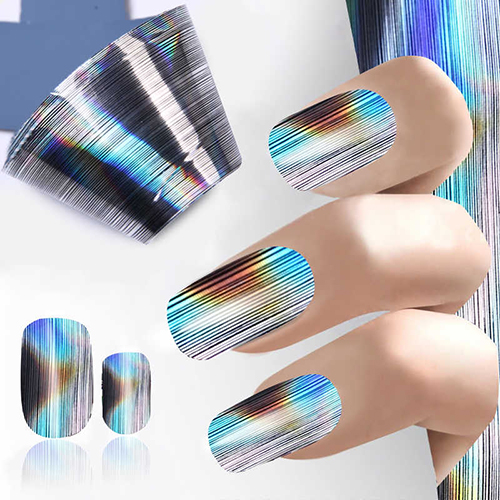
- plain ribbons with holographic effect;
- holographic drawings on a transparent background, which are transferred to the color coating of gel polish;
- foil with the effect of iridescent stains - "broken glass".
The shape of the foil is:
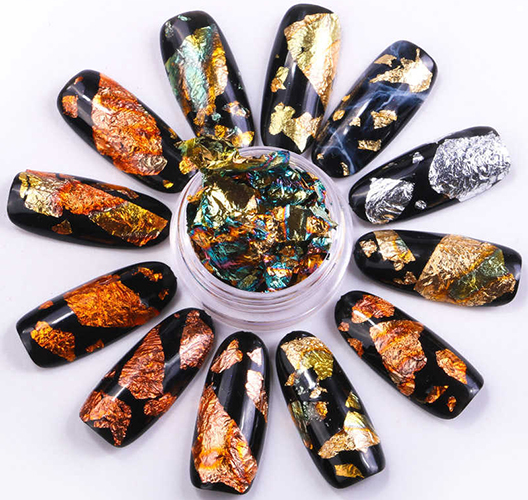
- leaf - presented in the form of a flat sheet with a colored spray applied, it is often rolled into rolls with the shiny side inward to avoid damage to the pattern or the shiny layer;
- reaped - it is produced in gold and silver color in the form of separate pressed pieces in small glass or plastic jars, it differs in that it is very thin and requires tweezers to apply to the nail;
- Scotch - foil in a roll with a ready-made sticky layer, on the other side a drawing is applied;
- stickers - patterns are applied to the transparent tape, which are pasted over from the substrate with tweezers and transferred to the nail in the desired design place.
A beginner is also capable of glueing foil on nails when creating a design, but in the collection of a manicure master there are all options for foil, since the right to choose according to the color and quality of the material belongs to the client.
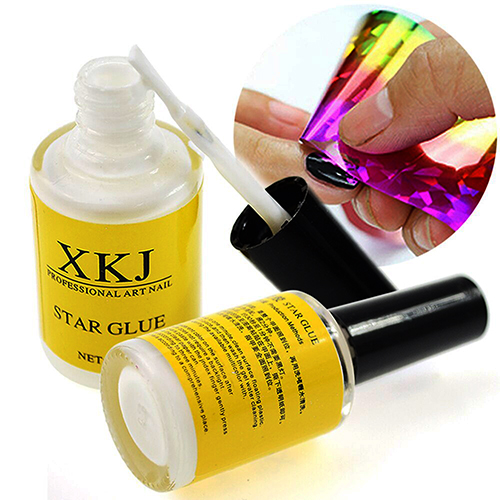
Glue
You can glue the foil onto your nails with a special foil glue. This material is produced by almost all companies that produce nail art products and foil. Produced, as a rule, in opaque plastic bottles with a brush in the cap.
With its help, it is easy to apply glue to the nail. The material does not require drying in an LED lamp, except for special gel fixatives, which must be dried in UV rays.
Popular brands of glue for foil from manicure masters:
- Born Pretty;
- CityNail gel glue (10 ml);
- SVN (10 ml);
- AND (12 ml);
- Global (10 ml);
- Globdlndils 6 ml (China);
- XKJ (16 ml);
- Maxximum Star Glue (8 ml);
- Nail Foil & Glitter Tattoo Glue (12 ml);
- Naomi FOIL GLUE (12 ml).
It must be remembered that regardless of the type of glue with which the foil is attached, the durability of its use in manicure is determined by a high-quality finish coat.
Analogs of glue
There are alternatives for attaching the foil to the nail. Each of them has its own pros and cons.
The simplest of them is to print the foil onto a sticky (dispersion) layer of colored gel polish. This technique is often used when creating designs at home in order to save on the purchase of a large amount of expensive materials that may not be needed in the future.
However, when printing foil on gel polish, a high-quality result will be obtained if there are 2 factors:
- the presence of a strong sticky layer (varnishes from different manufacturers have a different degree of dispersion);
- the presence of a soft texture of the base film, on which the foil pattern is applied (a layer with a pattern or color should be easily separated from the substrate surface).
To glue any type of foil when creating complex designs on nails, you can use an acid-free primer, which is an indispensable component when preparing the nail for coating or creating an artificial nail plate.
The stages are as follows:
- For this method, it is necessary to completely complete the procedure for creating a colored coating and cover it with a top.
- After drying the design in an LED lamp, the primer is applied in spots to the places where the foil is to be printed.
- 3-5 seconds after applying the primer (no drying in the LED lamp is used), foil can be printed.
- A high-quality result is not always obtained, especially when transferring drawings to a nail. This is due to the different quality of foil from different manufacturers. There is a foil that can only be properly printed on special glue.
If a manicure is created at home without the use of gel polishes and LED lamps, you can also use foil to create bright prints. However, it is most likely not possible to achieve complete coverage of the nail plate.
To do this, you need to apply several coats of regular varnish and let them dry.Then apply a thin layer of the same varnish and wait 1-2 minutes (the varnish should not dry completely) to print the foil onto the sticky layer of the drying varnish.
Foil gluing methods
There are several types of foil, each of which can be applied in a design in several ways. There are foil manicure ideas that cannot be realized without glue, for example, covering the entire surface of the nail with the material.
However, decoration with foil prints is quite possible to carry out on a sticky layer of gel polish. The design idea often determines the choice of how the foil is attached.
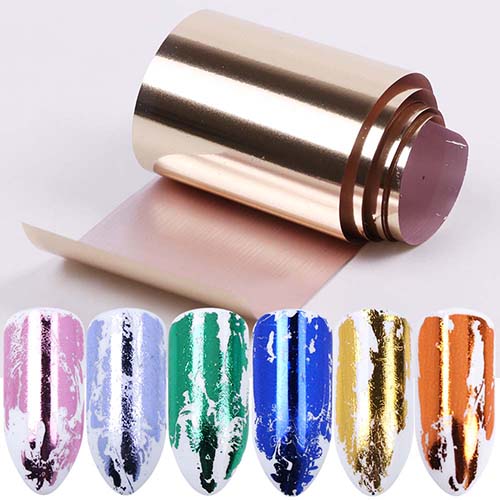
Sheet transfer
The quality of adhesion of this type of foil depends on the thickness of the film on which the colored coating is sprayed. If the foil is thin and soft to the touch, then it can be glued to the dispersion layer of gel polish after drying.
To make it the most aggressive, it is necessary to dry the colored coating in an LED lamp for at least 60 seconds. The simplest and most reliable way to fix the foil is to use a special glue. It is applied in a thin layer on a completely dried colored coating and allowed to air dry for 1 min.
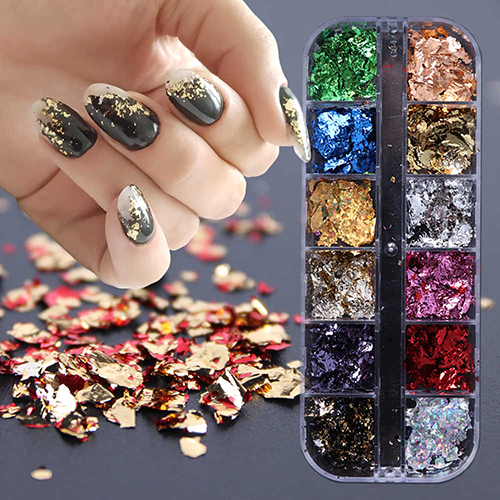
Harvested
Crumpled foil is a thin material without a backing that is transferred in small pieces using tweezers to an adhesive layer. It must be smoothed with an orange stick or a silicone brush. This type of foil is very thin and adheres well to a weak dispersion layer, but is overlapped by at least 2 layers of top.
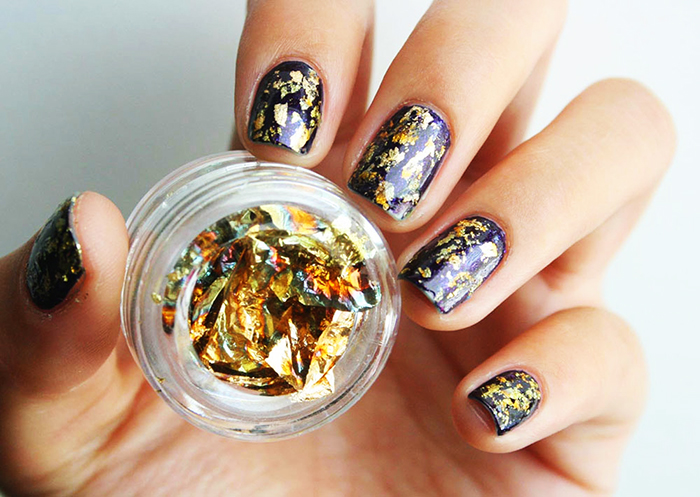
Crumpled foil is often used by nail artists to create aquarium designs.
Liquid
Liquid foil appeared on the nail art market relatively recently. Such a foil is a gel in which shiny components are mixed.
The rules for applying the material are the same as for gel polish:
- the gel-foil must be applied to the colored coating completely dried in the LED lamp;
- depending on the desired effect, the material is applied in several layers, with each layer drying in an LED lamp for about 30 seconds;
- from above you need to overlap with a top (masters recommend using a top without a sticky layer for reliable fixation of the design).
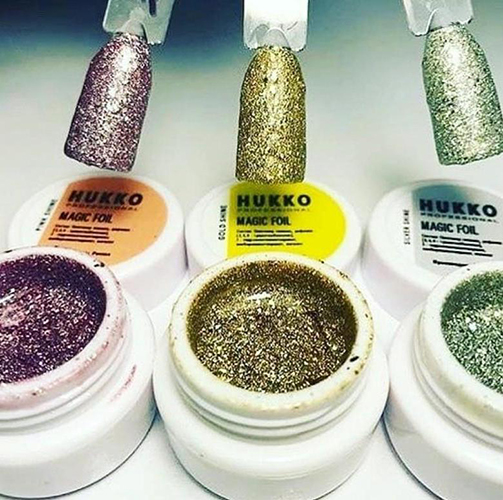
It is easy to use at home, and the effect of its use is not inferior in quality to the classical transfer foil. It is convenient to apply this type of material both on the entire plane of the nail, and in fragments.
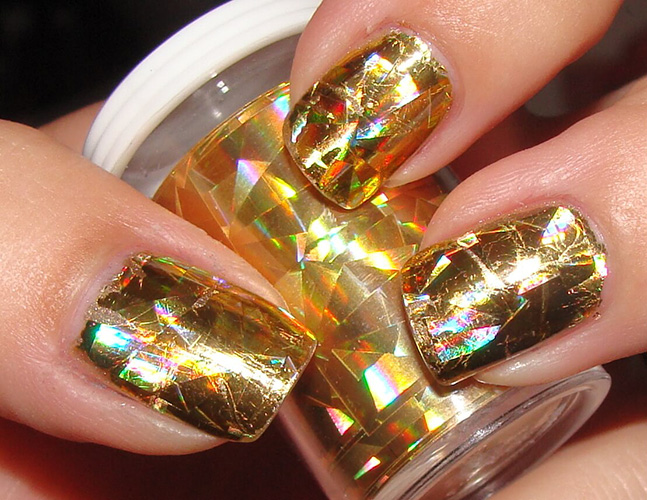
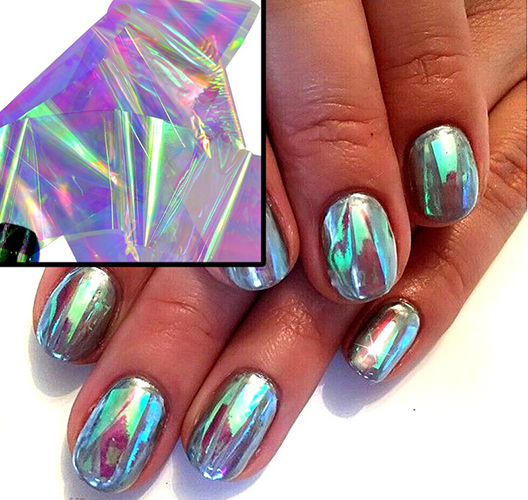
Broken glass
Such type of foil as "broken glass" is distinguished by a special technique of application. The material is a transparent film on which smoky iridescent stains are applied, which shimmer gently when exposed to sunlight from different angles. Their appearance resembles gasoline streaks on the surface of the water.
Such a pattern does not translate to the plane of the nail, so it is necessary to glue the foil fragments directly to the transparent substrate. The design will turn out to be of high quality and neat if very thin and soft foil is available. Because the thinner the foil is, the less you need to put the finishing gel on top to align the plane of the nail.
Before work, the “broken glass” foil is cut with nail scissors into fragments, each of which is transferred to a sticky layer on the surface of the nail. It can be attached to the dispersion layer after drying the gel polish or to foil glue.
If you have a high-quality thin sheet of foil, you can glue small fragments with an acid-free primer. The technique for using this method is described later in the article.
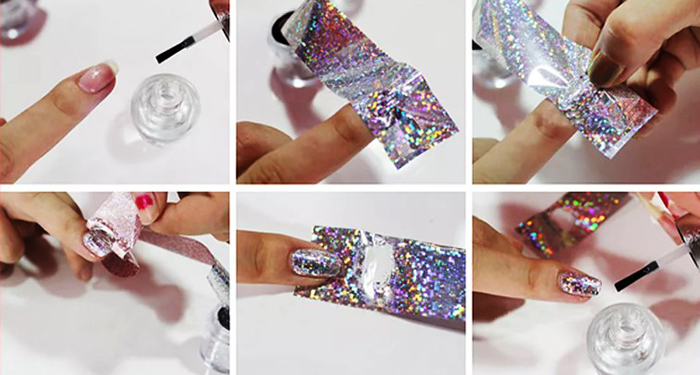
Application methods without glue
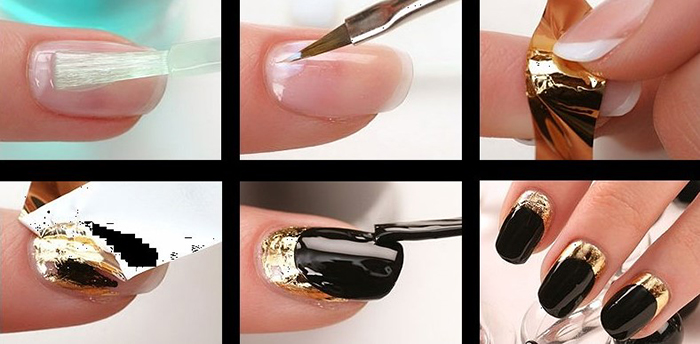
It will not work to glue the foil on the nails over the entire surface without glue, but it is quite possible to decorate parts of the nail with separate shiny elements. To do this, you need to perform a manicure and apply a colored gel polish. It must be dried in an LED lamp for at least 30 seconds and covered with a top coat.
For foil printing, it is necessary to choose only tops that form a sticky layer after drying (usually it is removed with a cleanser as unnecessary).A foil is imprinted on this dispersion layer by applying its glossy colored side to the surface of the nail. You need to carefully smooth out the foil and wait about 30 seconds.
Then carefully separate the backing from the film so that the colored foil spray remains on the nail. To fix it, you need to send your hand into the LED lamp for 10 seconds and cover it with a top with drying for about 60 seconds.
On gel polish
There is a method that is often used by beginners in manicure for decorating nails with foil at home. If the attempt to print the foil onto the sticky layer of gel polish failed (the material has a weak dispersion), then you can try to print on a thin layer of undried gel polish.
If, according to the design idea, it is necessary to print the foil on the entire plane of the nail, you need to apply a colored coating, dry it in an LED lamp. Then it is required to cut a fragment from the foil tape, which is as close as possible to the contours of the nail plate. Apply a thin layer of gel polish to the nail and attach a fragment to it with the matte side up (so that the bright part of the foil is on the nail).
The hand must be sent to the lamp for drying for 30 seconds. Then gently pick up the edge of the foil fragment and peel the backing off the nail. In case of a satisfactory result, the design is covered with a top layer. If the appearance does not suit the wizard, you can try again.
On dry top
The method of attaching the foil to an undried top is similar in technique to the method using gel polish, which is described above in the article. In this way, you can print the foil, both on the entire plane of the nail, and in the form of shiny fragments.
To get a shiny print in the right place according to the design idea, it is necessary to apply stripes, spots, geometric shapes with a top to the colored gel polish coating. It is recommended to use a thin paint brush to apply the material. Then attach a piece of foil to this place and dry it in a lamp for 30 seconds. Then separate the transparent foil base from the plane of the nail.
It is not necessary to apply a large amount of the top, because upon contact with the foil, it will form streaks after drying in a lamp.
On a sticky layer
The easiest way to create a foil design is to print it onto a sticky layer of colored gel polish. It is not possible to completely cover the entire nail plate in this way, but it is quite possible to create a stylish design with chaotic prints in the form of brush strokes or an abstract shiny pattern.
This method of foil printing is used by masters in nail salons to create bright, shiny backgrounds in aquarium design. A layer of transparent construction gel laid on top in the form of a lens will provide a high-quality fixation of the design. For this method of printing, it is better to choose plain foil strips without a pattern.
Acid-free primer double-sided tape
Some types of foil are successfully attached to a wet layer from an acid-free primer. But a high-quality result is not always achieved, it depends on the properties of the foil and the materials from which it is made.
By its properties, an acid-free primer that is applied to a polymer material (in the case of a design with foil, to a colored gel polish coating) exhibits the characteristics of a double-sided tape. He glues the shiny part from the foil tape to the nail, but it must be fixed on top with a top.
To ensure the durability of the use of the manicure, the masters recommend fixing such a design with 2 thin layers of top, drying each in an LED lamp for at least 30 seconds.
It is not difficult to glue any type of foil on your nails, but you should follow the rules for applying it for each type of material. When creating different designs, depending on the complexity and stages of its implementation, different methods of fastening are used and with experience comes an understanding which of the options for fixing the foil is the most convenient.
Video about gluing foil on nails
Secrets of applying foil on nails without glue: