Manicure is a service that women consider irreplaceable. The main development of recent years has become such a material as shellac, which has many advantages. However, it is easy to learn how to apply it correctly without visiting a salon.
Shellac manicure technique
Shellac, or gel polish, is a type of nail coating that hardens when exposed to ultraviolet radiation. The very concept of shellac comes from the name of the first gel polish, which was produced by CND.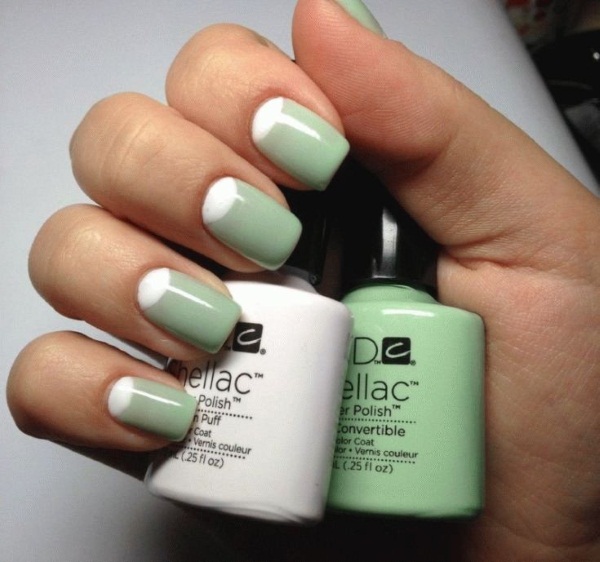
Shellac (how to apply correctly, it's easy to learn) combines the features of varnish and gel. From the latter are taken such qualities as durability, strength, plasticity. There are similarities with ordinary varnish: shellac is sold in jars with a brush. However, in the technique of applying shellac, several different means are used at once.
Pros and cons
| pros | Minuses |
| Durability. If the manicure is done well, the coating can last up to a month. | A multi-stage, complex procedure for applying gel polish, which takes about 1.5-2 hours. |
| Protection of the nail from flaking, cracking and breakage. | If shellac is removed carelessly, the structure of the nail can be damaged. |
| Wide color palette. Complex designs with shellac are easier to do than regular varnish because they dries faster. | Instability to temperature extremes. Cracks appear on the varnish from moisture and heat. |
| Lack of toxic substances such as formaldehyde and toluene in the composition. | High price. In salons, a manicure with a gel polish coating costs 1000-1200 rubles, and with an ordinary varnish - 700 rubles. |
Is shellac harmful to nails?
The master should know how to follow the correct technology for applying and removing shellac. Then the coating will not spoil the nails. Even the opposite effect takes place: thanks to shellac, thin nails are strengthened and protected from external influences.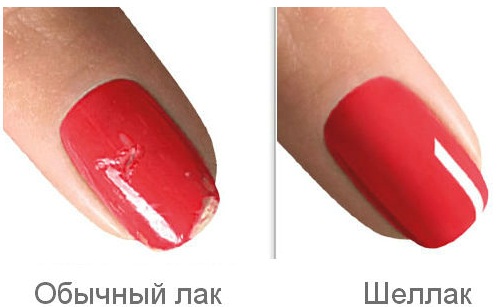
Since the composition of a high-quality gel polish is non-toxic, it can even be done by pregnant women. It is not even the coating itself that can cause alarm, but the process of its application.
Some people express their concerns about the dangers of gel polish when they feel a burning sensation in the nail area during the drying process. It's not that the varnish somehow penetrates the nail plate and destroys it.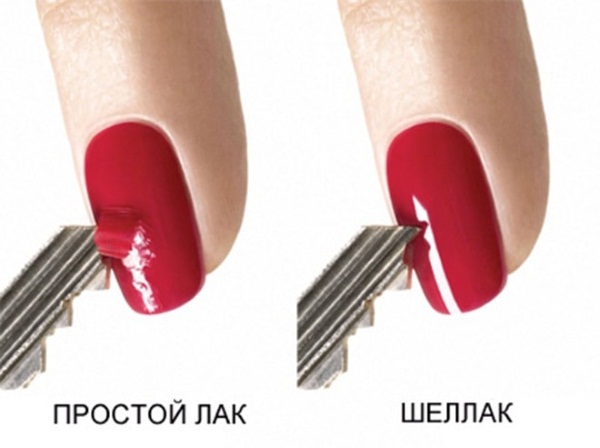
This is a natural process: when exposed to ultraviolet rays, certain components of shellac, called photoinitiators, undergo a polymerization reaction, as a result of which the coating hardens. Most often, tingling occurs if too much material is applied to the nails (for example, if the plate alignment procedure is also done).
Thus, the burning sensation does not harm the nails. If you feel it, you just need to pull your hands out of the lamp for a few seconds, until the discomfort is no longer felt, and put them back.
If impatient girls begin to remove the shellac coating on their own, without using a special liquid, tearing it off in pieces, then the top layer of the nail plate also leaves with the varnish, which can damage the nails.
In this case, the already thin nails can become thinner even more. This can cause nails to break and flake. Too strong and long polishing of the nail plate before application is also detrimental.
Shellac varieties
Shellac (how to apply yourself correctly, described below) can be done in many different ways, so the whole scope of imagination is given:
- Plain single color coating... In this case, you can make all the nails of the same color, or highlight 1-2 fingers on each hand with a different shade or even design.
- Gradient. In this case, there is a smooth transition between 2-3 colors on the nails.
- French. You can make a classic gentle version of French manicure, or you can experiment: for example, make a strip of bright color.
- Moon manicure - this is something like a reverse jacket. The well at the bottom of the nail can be filled with color or left transparent.
- Marble manicure. In this case, a texture is created on the nail, reminiscent of this material.
- Shellac with pictures: you can draw monograms, geometric patterns and more complex compositions
- Shellac using additional materials: rub, foil, rhinestones.
Shellac materials
Shellac how (it must be applied correctly after practicing) a multi-stage procedure requires various products that can be purchased in specialized stores.
- Degreaser. It processes the nail before applying the next layers of varnish.

- Acid-free primer and bonder. These materials do not form a separate layer as they dry out or absorb quickly. Their use is essential for the durability of the manicure.
- Basic coverage. This is a colorless, thick varnish, on which all subsequent colored layers will be applied. It is the base that can be used to align the nail.
- Gel polish in any suitable color. It should be noted that transparent shellac does not exist, but there are so-called camouflage shades that mimic skin color.
- Top, or topcoat. It protects the entire manicure.
- Lint-free napkins. It is necessary to use just such a material, since otherwise the pile or threads may stick to the nail.
- Lamp for drying shellac.
- Sticks. It is best to use wooden or orange ones, because metal can damage the structure of the nail.
- Tweezers, or side cutters, which will remove the cuticle. Instead, you can use a special manicure machine.
- Pusher. This is a metal tool that allows the cuticle to be pushed back.
- File 180 grit, which you can shorten your nails and give them the desired shape.
- Small brush in order to brush away the dust that forms when filing nails.
- Buff - the same as the file, only in the form of a parallelepiped.
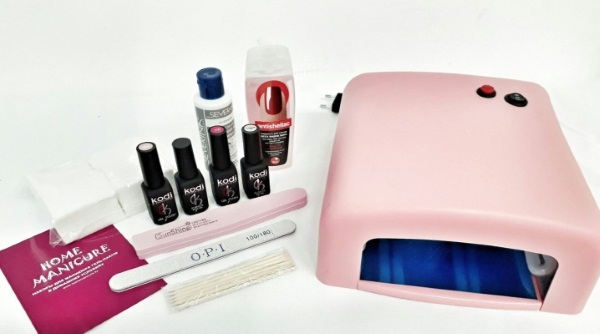
Should I choose a UV or LED lamp?
The UV lamp emits ultraviolet light. During the research, it was found that a 36 W UV lamp (optimal power) cures the coating for about 2-3 minutes, and lamps of lower power take even longer. At the same time, it is highly likely that when shellac is dried in a 9-18 W UV lamp, the coating polymerizes unevenly, of poor quality, matte areas may appear. In addition, you need to periodically change the bulbs.
The LED lamp is powered by LEDs. The radiation spectrum of such a lamp is higher than that of a UV analogue, therefore, it takes only 20-30 seconds to dry one layer of varnish. This saves a lot of time and makes the shellac procedure shorter.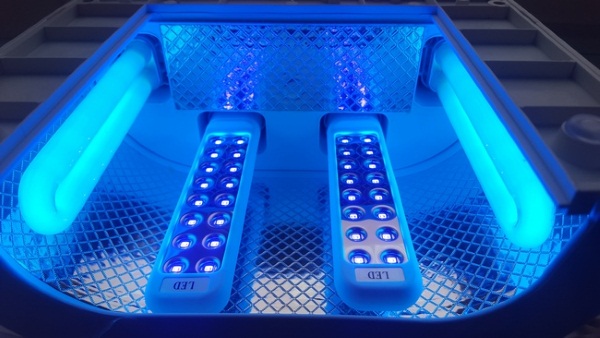
According to the statements of many manufacturers, LED lamps can work up to 50 thousand hours, that is, almost 5 years. There is no need to replace the LEDs as they will not burn out. At the same time, LED lamps are not capable of drying all varnishes.
Recently, many scientists have expressed their concerns about the safety of ultraviolet radiation, since its excess can lead to the development of various diseases. Of course, the ultraviolet radiation emitted by the lamp is not enough to adversely affect human health.
However, in this regard, it is still much safer to use LED lamps. You can also protect your hands from ultraviolet radiation: for example, use special gloves in which only your nails remain open, or sunscreen.
Preparing nails for the procedure
First you need to do a classic manicure: file the nails to the desired length, shape them, trim and push back the cuticles. Then you need to buff the nail plate with a buff until it stops shining and becomes matte.
Next, you need to wipe your nails with a degreaser using small lint-free wipes. This substance removes dust and excess fat from the surface of the nail.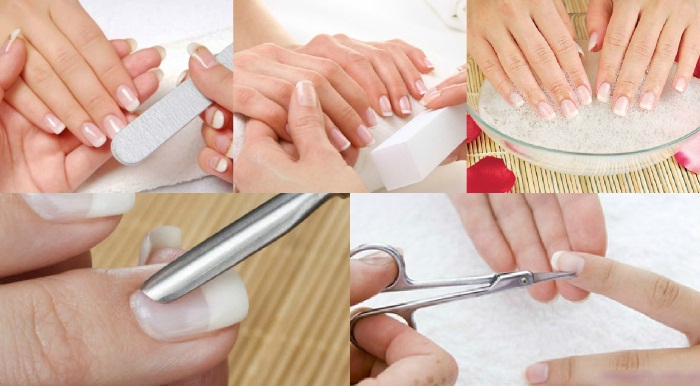
Using the following two tools is not always necessary. However, if they are not used, the durability of the coating is called into question. Both of these products are in jars, like varnishes, and are applied with a brush. A primer is needed to dehydrate nails. Bonder is the "primer".
Firstly, the primer and the bonder create a layer between the nail and the following varnishes, that is, they seem to protect it. Secondly, thanks to these materials, the varnish adheres more tightly to the nail and adheres to it. This means that the likelihood of further chips and varnish flaking is reduced.
It is important to use an acid-free primer. It is more efficient. In addition, it treats weak, brittle nails more delicately and does not cause skin irritation.
The primer is applied only to the end of the nail, and the bonder is applied to the entire nail plate.
Step-by-step instructions for applying shellac base
Basecoats are available in different thicknesses. It is better to use a medium density base, such as a rubber base. Most often, the base is applied in 1 layer. If you plan to align the nail plate, you will need 2 layers.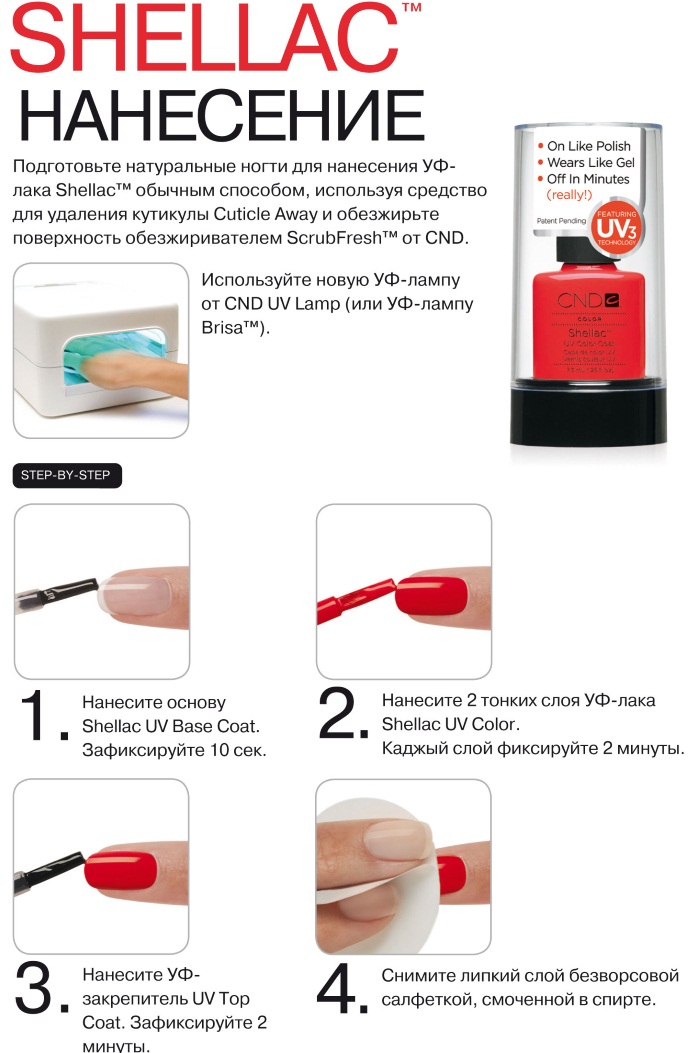
The following will describe in detail how to apply the base coat correctly:
- First you need to pick up the product on the brush and squeeze it out a little.
- Coating should be started a short distance from the base of the nail. It is necessary to brush a little forward, to the cuticle, then paint over the entire nail and "seal" the edge. It is important not to flood the cuticle and side ridges, otherwise the coating will harden. When finished applying, you need to place your hand in the lamp and polymerize the layer.
- The alignment procedure is done when the nail is thin, weak, flat, and there are irregularities. You need to pick up a brush with enough material and put a drop on the nail, placing it close to the base.
- Without touching the nail plate, it is necessary to easily distribute the resulting drop over the entire nail. It is important to pay attention to the fact that the ideal shape of the nail is preserved, that is, there should be some bulge in its middle.
- If the coating has spread too much, you need to turn your hand with your fingernail down until you can achieve the desired shape.
- Next, you need to put your hand back into the lamp.
Instructions for applying a color layer
Shellac (how to apply a colored coating correctly, described below) should be done in several layers. Their exact number is difficult to say, since it depends on the shade. Usually a minimum of 2 coats is required. In this case, the color will be rich and pleasing to the eye.
First you need to cover the entire nail with shellac. The layer should be very thin and almost transparent.
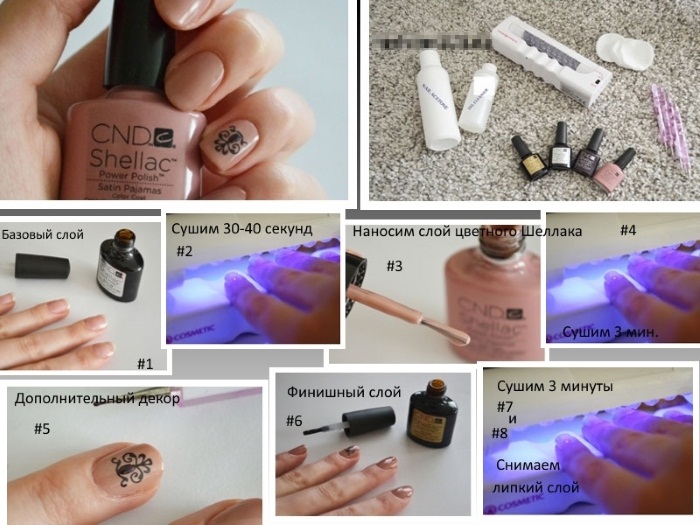
It is important to get close to the cuticle, but not flood it, otherwise the manicure will look sloppy. Then the coating is polymerized. The 2nd and subsequent layers are applied in the same way.
Application of the top coat step by step
The top coat is applied at the very end of the manicure, when both the coating and the design are ready. Only 1 dense layer is required without irregularities and bubbles.
First you need to pick up a little product on the brush and remove the excess from the neck of the package. Further, the coating is evenly spread over the entire nail. At the very end, you need to seal the edge, as it happened when applying the base. To do this, you need to brush along the edge of the nail. If you skip this step, the longevity of the manicure is no longer guaranteed, as the varnish can begin to flake off.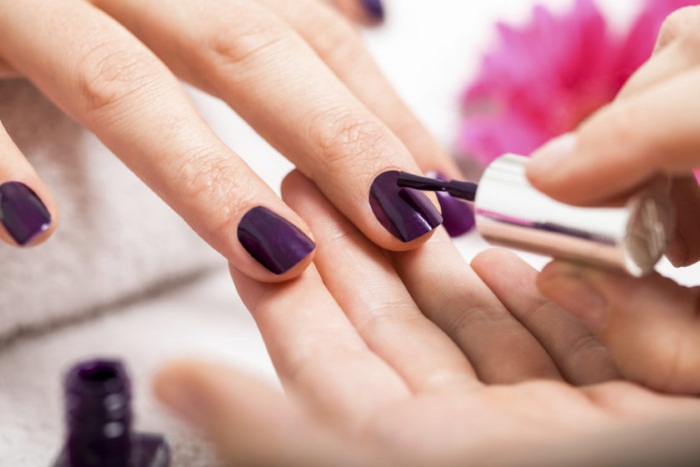
After polymerization, the so-called sticky layer must be removed. To do this, you need to type a degreaser on a lint-free napkin and blot your nails with it until they become smooth to the touch.
Common mistakes when applying shellac
For beginners, the typical mistakes that are made when creating a shellac manicure seem insignificant. However, these little things affect the quality and how long the coating will last without chips.
- Insufficient nail preparation. For example, a degreaser was not used, the nail plate was poorly sanded with a buff, before the manicure, the hands were treated with cuticle oil or nourishing cream.
- Use an acidic primer that will damage your nails.
- Shellac is applied in a thick, not thin layer. In this case, it may polymerize unevenly, swell.
- The base and subsequent funds flowed over the side ridges and onto the cuticle. It is important to take into account that when drying, varnishes can expand, spread over the nail.
- Shellac or other packaging was shaken before use. This can cause unwanted bubbles to appear. Before use, the bottle of varnish must be gently rotated between your palms, and not shaken.
- The shellac or other packaging has been left open after use or has been exposed to light or sunlight. In this case, the gel polish may lose its properties and deteriorate.
- The end of the nail was not sealed when the base and top were applied. This threatens the coating to peel off.
How to make a French design with shellac?
The beginning of the procedure is standard: the nails are being prepared. Next, you need to apply the base, and on top of it - a nude shade of shellac, camouflage. Light pink tones or skin-tone colors will do. All layers are polymerized.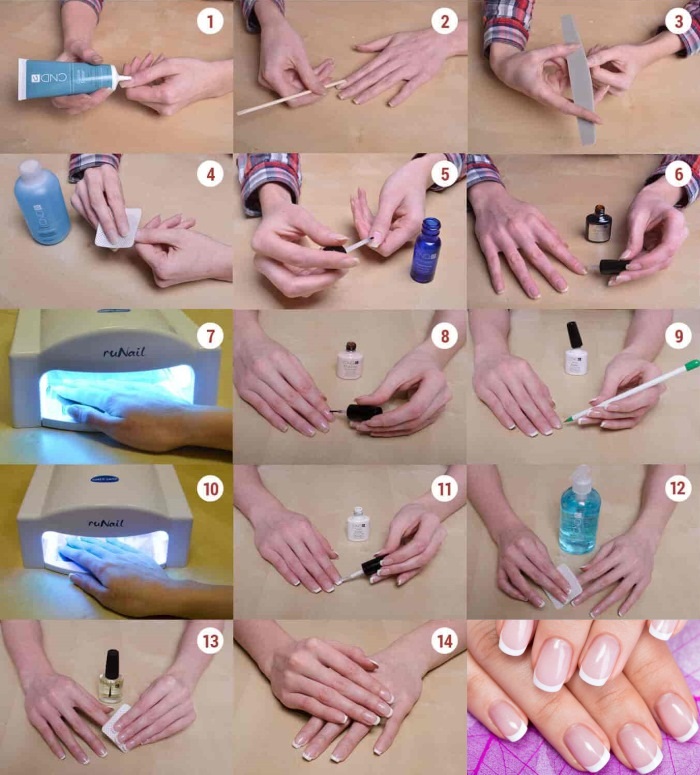
The most difficult thing in french design is drawing a strip called a smile. There are special brushes for drawing it, but not every craftswoman finds them convenient. You can also use stencils, but it is not always possible to predict how the varnish will behave: it can flow under the piece of paper or blur when it is torn off. That is why it is better to draw a smile by hand.
To make a smile, draw it starting at each edge. You can rely on the natural smile of the nail. You can also sketch out the path first and then fill it with color. At the end of the drawing, the hands are placed in the lamp, then the top is applied.
How to apply a drawing to shellac?
Drawings and patterns are applied with a separate thin brush or with a special tool called dots. Depending on the desired result, the drawing can be done over the base or a colored layer.
The drawing itself depends on the imagination of the author. You can just put dots, you can draw curls, flowers, or even more complex compositions. In any case, you need to carefully think over all the elements so that in the process of work it is already clear what to do.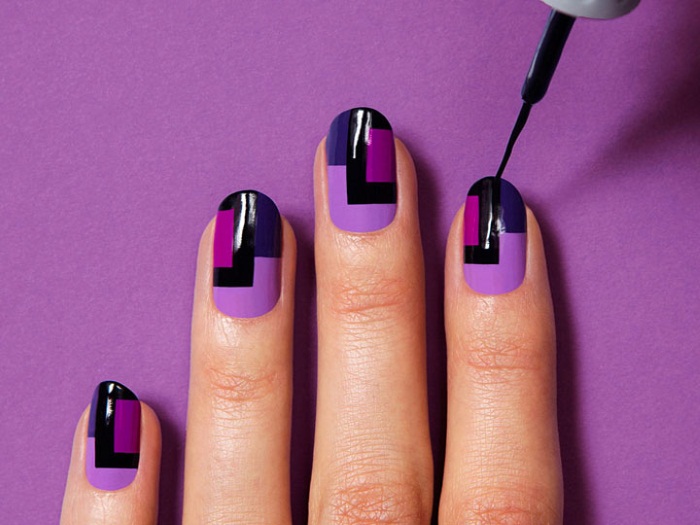
You can paint not only with shellac, but also with acrylic paints. In this case, after applying the base or colored layer, the nails must be treated with a degreaser.
If drawing by hand seems overly difficult to you, you can use a stamping kit or special stencils. However, you need to act carefully so that the varnish does not spread.
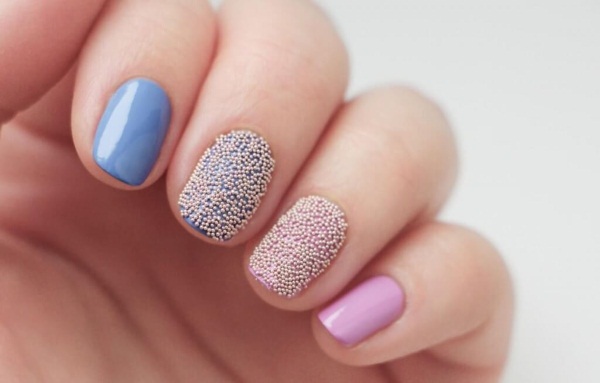
Rubbing design
Rubbing is a sparkling pigment that, as the name suggests, is rubbed into the nails before applying a top coat.It is better to apply bright colors on a dark substrate, but delicate shades give a pearl shine to a light manicure.
After polymerization of the colored layer, the sticky layer does not wear off. After rubbing some rub on a pusher or a special fan brush, you need to pour the material directly onto your nails. Then you should use your fingers or an applicator (like for eyeshadow) to rub the pigment into your nails. The main thing is that there are no bulges and irregularities, otherwise they will be visible with rubbing.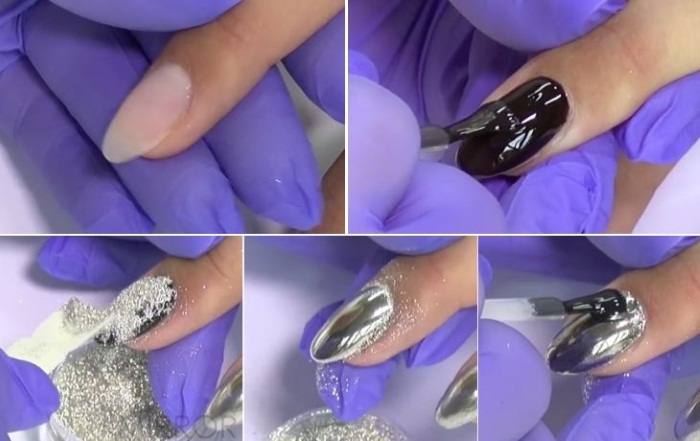
Finally, you need to apply a top coat. Excess rubbing that remains on the skin around the nail can then be washed off with water.
Kamifubuki design
Kamifubuki are large round sequins. They come in various colors, and in some sets, 2-3 shades suitable for each other are selected at once.
After polymerization of colored shellac, a finishing coat is applied, but hands do not fit into the lamp. While the top is still wet, place the kamifubuki on your nails.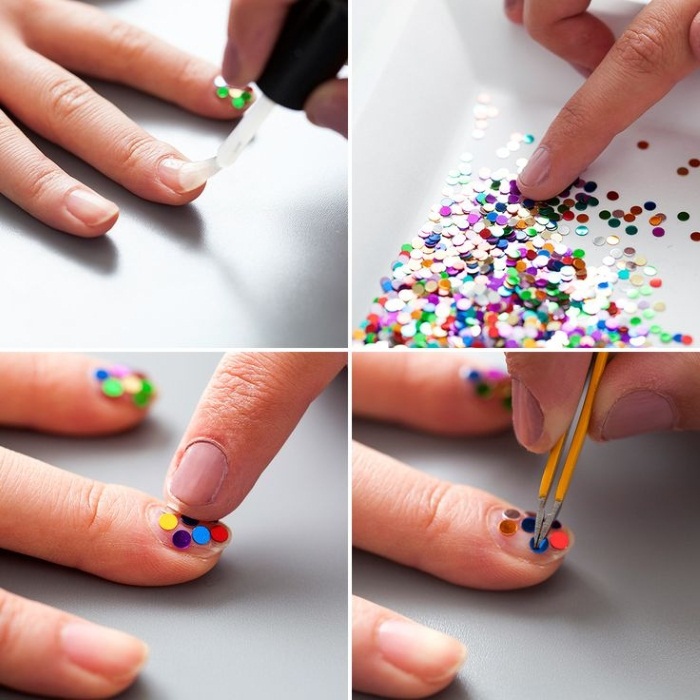
4 They can be moved with a toothpick, needle or dots along the nail plate to create a harmonious composition. After applying sequins, dry the layer. Then another layer of top coat is applied over it to secure the design.
Monochrome design
Solid color manicure is a classic and the simplest type of design. This is the most advantageous option if you want the shellac to look strict and restrained, and not pretentious.
The monochrome design can be diluted with rhinestones and sparkles by decorating one finger on each hand. You can also dilute the colors by using a complementary shade, such as on the ring fingers.
Basically, a monochrome design is just a layer of color without any additional tweaks. That is why such a manicure is ideal for beginners.
What other simple designs for beginners are there?
Rhinestones and broths
From rhinestones, you can make both a minimalistic design and a voluminous, luxurious composition - a matter of taste. The technology for creating decor with rhinestones or broths is very similar to the design with kamifubuki.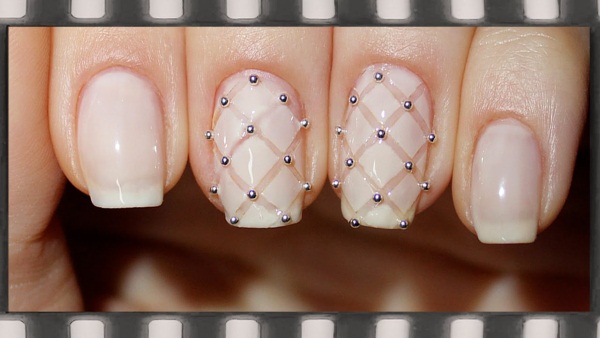
A top is applied on top of the colored layer, into which rhinestones are placed. Only after that the manicure is dried. Then the top coat is again applied on top, which, however, does not "sink" the stones in itself. It is necessary to bypass the rhinestones with a brush. After that, the layer is polymerized.
Foil
Foil for manicure is sold in special rolls or "booklets". It can be applied both to the entire nail, and to its individual fragments.
After applying the topcoat, there is no need to remove the sticky layer. It is necessary to cut off a small piece of foil and attach it to the nail, press with your fingers. Then the material comes off, and the drawing had to be transferred to the nail plate. At the end of the procedure, a finishing layer is applied.
Matte finish
Finishes are not only glossy, but also matte. The matte design will look great both on monochrome surfaces and over rubbing and foil.
How to spot fake shellac?
The original shellac can be distinguished from a fake by the external characteristics of the packaging. The print quality on counterfeit material is generally worse: the label is too glossy, the font is blurry.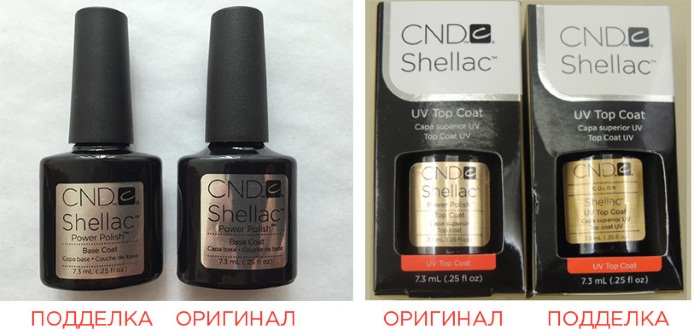
In addition, the composition is not indicated. Counterfeits most often have a very unpleasant odor. It is worthwhile to be on your guard even if the gel polish of a famous brand is sold at a very low price, which does not correspond to the cost in other stores.
How to remove shellac at home?
To remove gel polish, you will need the following materials:
- buff or file;
- 10 lint-free wipes;
- 10 pieces of food foil;
- orange stick;
- shellac remover.
First, you need to walk over the nails with a buff or file until the gloss disappears. Then lint-free wipes are placed on the nails, soaked with liquid for removing gel polish. All fingers are tightly wrapped in foil. When 10-15 minutes have elapsed, the foil should be removed.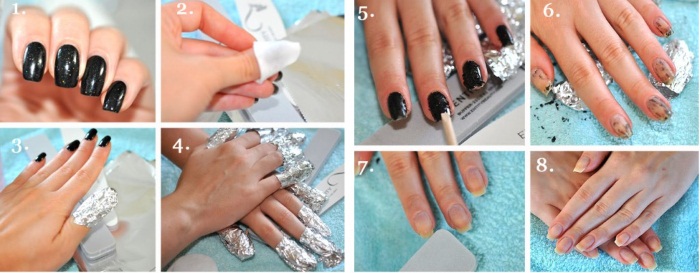
At this point, the varnish should have softened and began to flake off.Following the growth of nails, remove the varnish with an orange stick. Finally, you can buff your nails again to remove any remaining shellac.
Causes of nail damage after removing shellac
When removing gel polish, it is very easy to damage your nails if a pusher or any other metal tool is used instead of an orange stick. Such things injure the nail plate.
Moving against the growth of the nails or pressing too hard on the tool while removing the shellac can cause the nails to delaminate.
Treatment for nail restoration after shellac
There are several ways to restore nails after wearing gel polish:
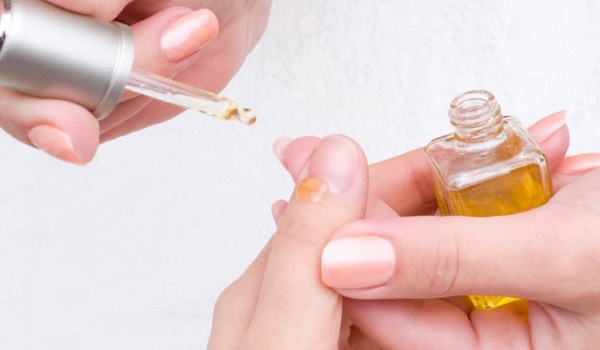
- Using cuticle oil. You need to apply it 1-2 times a day.

- You can buy special healing, strengthening varnishes, enriched with vitamins.
- All kinds of masks and baths for nails, which also have a beneficial effect on the skin.
- Paraffin therapy. This procedure can be carried out both in the salon and at home.
If you follow the above tips for applying shellac correctly, you can achieve an excellent manicure. However, one should not forget how important practice and use of quality materials and tools are in this matter.
Author: Elizaveta Perepelitsa
Article design: Vladimir the Great
Shellac video
Where to start making shellac: