Do-it-yourself knits are always in fashion. They are very wear resistant, the quality is much superior to the purchased ones. Even an inexperienced needlewoman will be able to easily understand how to learn to knit with simple knitting needles, available for beginners.
Step-by-step instructions for knitting scarves, socks, booties for newborns on 2 knitting needles will help you learn new skills and add useful needlework techniques to your creative piggy bank.
Yarn types
Depending on the raw materials, knitting yarns are natural and artificial. In the production of natural yarn, animal wool or vegetable fibers are used - viscose, wool, silk, linen.
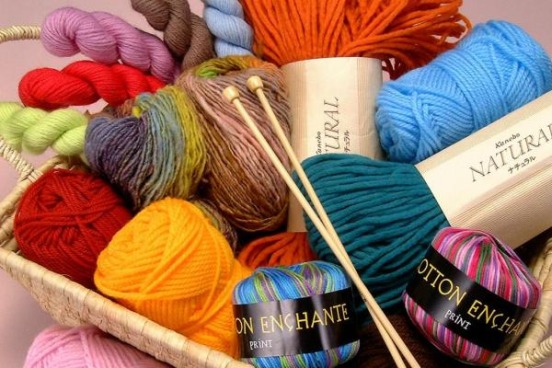 Artificial yarn is made from synthetic threads - acetate, polyester, polyvinyl chloride, polyamide, acrylic. In addition, there are various types of blended yarns, using both natural and artificial raw materials.
The most popular woolen yarn:
- Regular wool - it is spun from sheep's wool, this yarn of all natural types is considered the cheapest and most affordable. It is coarser than other types of yarn, but at the same time it lends itself well to dyeing, including natural dyes. The price is always available.
- Alpaca - This is the wool of the alpaca llama, which is bred in the mountains of South America. Alpaca has only 22 natural shades from white to black, usually it is not dyed. It is very warm, soft and very expensive.
- Angora - wool of angora rabbit, delicate, fluffy, shiny, lends itself well to dyeing in a variety of colors. When knitting and wearing, it should be borne in mind that short angora fibers can "come out" from the threads. Therefore, if mistreated, the Angora quickly loses its edge. This is a very expensive type of wool.
- Mohair - wool of angora goats. These are long-haired animals with a very beautiful wavy coat. Mohair is a very lightweight, fluffy and extremely warm knitting material. The mohair villi are very slippery and long; they usually use artificial thread or cotton to secure them. Therefore, mohair is never 100%.
Summer knitting yarn is made up of plant fibers. The cheapest and most common is cotton. It is hygroscopic, lightweight, and easy to stain. Linen is a smooth, even yarn with a characteristic sheen, more elastic and heavier than cotton.
In the manufacture of silk yarn, rejected silk cocoons, tangled and short fibers are used. After appropriate processing, silk yarn acquires a magnificent appearance, the yarns are shiny, even, very tear-resistant and elastic.
There is no pure silk yarn, usually cotton is used for the basis of the spinning. Products made of silk yarn are easy to wash and do not wrinkle.
Artificial yarns are extremely varied both in quality and appearance. Especially attractive are synthetic threads with various fancy additions - bumps, thickenings, painted in different colors, bouclé, long fluffy threads, shiny lurex.
In general, the yarn is twisted from several strands, and it can consist of one.In some yarns, the fibers can be very tightly packed and highly twisted. In others, on the contrary, the thread is lighter and looser. The yarns vary in pile thickness and length.
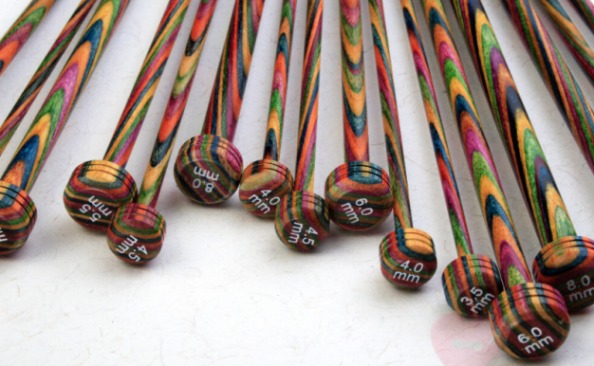
Spoke sizes
The size of the needles is determined by their diameter. There are standard needle numbers from 1 to 10, which corresponds to their thickness from 1 mm to 10 mm.
 You can determine the size of the knitting needles yourself using improvised means. If you attach a knitting needle to a centimeter ruler, you can measure its diameter by eye and determine the corresponding number.
For knitting thin, smooth yarn, small-diameter knitting needles are chosen. For fluffy yarns such as mohair, use at least 5 knitting needles.
It all depends on what task the knitter sets for himself. If you plan to create a product with a dense knit, then even for a thick thread, you can take knitting needles smaller by size. When knitting an openwork, loose pattern, use thicker knitting needles.
Determining which number of knitting needles will fit the selected yarn is easy. The thread thickness for normal knitting should be at least two times thinner than the needle.
Knitting for beginners on 2 needles
How to learn to knit - clear step-by-step instructions for beginners. To master this type of needlework, you first need to use 2 knitting needles. Choose medium-sized knitting needles and a smooth thread of appropriate thickness.
Before you start creating a product, you need to master the basic knitting techniques. Therefore, first of all, you need to try to tie a sample measuring 10 by 10 centimeters.
So it will be clear what density the knitted fabric is obtained, how smoothly the loops lie.
Loop set
The thread should be placed on the left hand, stretched between the index and thumb. Hold it gently with the other three.
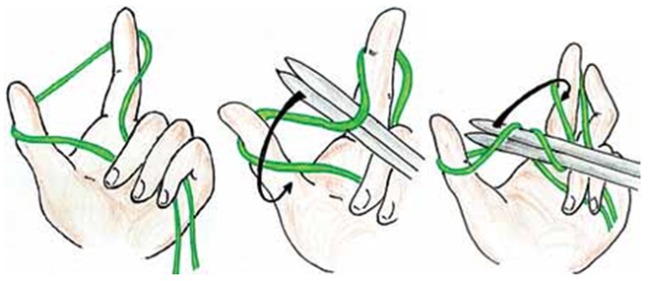 The knitting needles need to be folded together, and then insert their ends under the thread from the side of the palm and pull it slightly towards you. The result will be a loop on the thumb. Now you need to insert the ends of both knitting needles inside the resulting loop. Then pick up the thread from your index finger and drag it through.
Release the thumb and tighten the knot on the needles. When typing at the beginning of the row, there are always two loops on the needles at once.
So, repeating these steps, you dial the required number of loops, which is indicated in the diagram or by measuring the width of the future product along a centimeter ruler. At the end of the set, one knitting needle is carefully pulled. All the resulting loops remain on the left needle. Now you can knit the first row.
Front loop
The free knitting needle that is in the right hand must be inserted into the loop from the front. Hook the thread and drag it onto the right knitting needle. This knitting technique is called classic.
Another technique is to insert the needle into the loop from the back. It's called "grandmother's face." When knitting with knit ones, you need to make sure that they do not twist in the fabric.
Purl loop
The thread is laid on top of the left knitting needle. Then an empty knitting needle must be inserted under it and pushed into the loop. Then pull out the thread, which with a new loop falls on the knitting needle that is in the right hand.
Nakid
The thread just needs to be thrown onto the right knitting needle without knitting. In the next row, the yarn is knitted like a regular front or purl, depending on the pattern or pattern.
Nakida always increases the number of stitches on the spoke. Therefore, the knitting fabric becomes wider.
How to complete the product?
They finish the work with a special non-opening row. The first loop is removed on a free knitting needle. The second is simply passed through it, without tying. The entire canvas is processed in the same way. When the last loop is on the knitting needle, the thread must be cut off with scissors and pulled through it, tightening the knot.
English gum
The English elastic band is more elastic than the usual one, so it is used in products that require more elasticity.
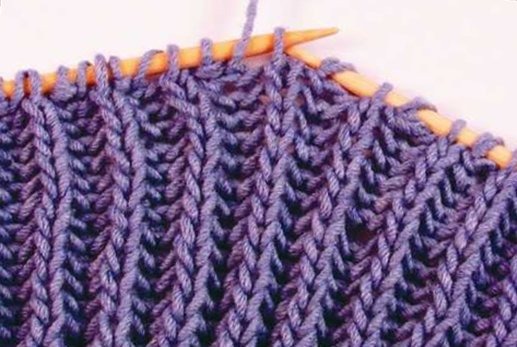 First, you should knit two rows with a regular elastic band, alternating two purl and one front loops on the front side of the product.
Next, proceed directly to knitting an English gum:
- In the first row, all purl loops are knitted according to the pattern, and the front loops are simply removed on the right knitting needle untied. At the same time, the working thread is left, without tightening strongly, behind the front loop.
- The second row is knitted according to the pattern, all the front loops are performed with the front loops, and the purl loops - with the purl.
Openwork technique
Openwork knitting is always done according to a special pattern. Its peculiarity lies in the fact that there are small holes in the knitted fabric.
You can make such a hole using a yarn. At the same time, so that the number of loops does not increase on the needles, the next or previous (in front of the yarn) two loops are knitted together with a front or back loop, according to the scheme.
The next row is knitted according to the pattern, including the yarn, it acts as an independent loop. A hole in the fabric appears where the yarn was made. It can be done anywhere in the row, regardless of where the two stitches are tied together.
It is imperative to ensure that the number of loops in a row does not increase due to yarns.
If it is necessary to make a large hole, then make a double yarn, wrapping the thread around the right knitting needle twice. In the next row, one turn around the knitting needle is knitted, and the second is simply discarded.
Diagram designations
Patterns are always read from below, the bottom row is tied first. The designation of even rows goes from right to left, and odd rows on the contrary, from left to right. In some schemes, there are no purl rows, odd. Because they fit in the pattern.
In one diagram, only one rapport can be presented to create a picture. This means that it must be done several times, either along the height of the product or across the width. As a rule, the decoding of the icons is indicated near the diagram of the picture.
If no explanation is provided:
- Empty square - no loop.
- Facial - indicated by a small vertical bar.
- Purl - horizontal dash.
- Crochet - usually represented in the diagram by a circle.
- The triangle directed to the right side is two loops knitted with the front one.
- Left triangle - front two loops at the back.
- An oblique line passing through several empty squares at once means that it is necessary to cross the loops with each other. The number of loops is the number of squares. The upper end of the line indicates the direction of crossing.
Tips for Beginners
For beginner knitters, it is better not to take fancy yarn and mohair into work, as they easily get confused when knitting. To learn how to knit an even fabric, you will have to dissolve the connected section of the product several times and perform it again.
This is the only way to develop the necessary skills. It is almost impossible to safely dissolve a canvas with entangled mohair fibers.
You should also abandon yarn, which consists of several twisted threads. Since it is not always possible to correctly draw the loop, holding all the thin threads on the knitting needle.
The result is confusion, which will also be very difficult to dissolve, and it will look ugly in the product.
You cannot take on a complex drawing or large work. You need to start your career as a knitter with small and very simple things.
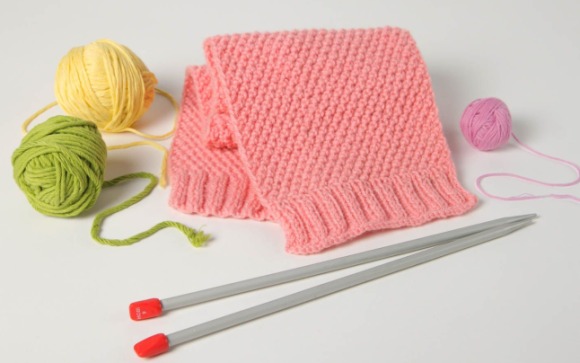
The most suitable option for a person who is just mastering knitting needles is to knit the simplest scarf.
In the process of making it, all the necessary skills will be worked out, the fingers will get used to holding the knitting needles correctly, the loops will begin to turn out smooth and neat. The speed will gradually increase.
How to knit a baby scarf
This is the simplest product, a completely inexperienced knitter can handle it. To knit a scarf, it is better to take a smooth yarn of medium thickness and select the appropriate knitting needles for it. The width of the scarf should not be too large, 10 cm is enough. The length is optional.
 The number of stitches taken depends on the thickness of the thread. You can knit a children's scarf with a garter stitch.All rows, both from the face and from the inside, are knitted with front loops.
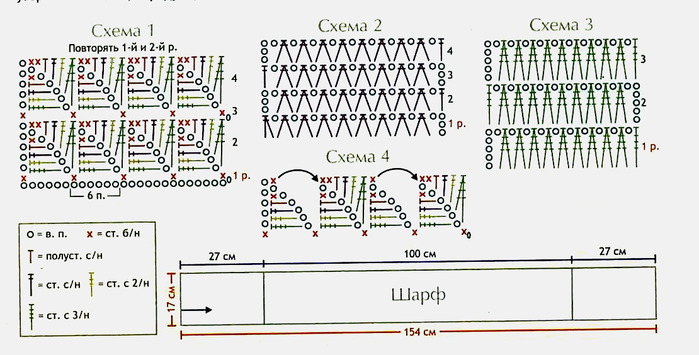
You can decorate the ends of scarves with a fringe. To do this, cut threads 10 cm long and pull each one through a loop in the extreme row. Fold the thread in half and tie it in a knot.
Classic men's scarf
How to knit a men's scarf for beginners is clear. The previous step-by-step instructions for knitting on 2 knitting needles of a children's scarf are taken as a basis. It is only required to increase its length and width. A classic men's scarf should be at least one meter long.
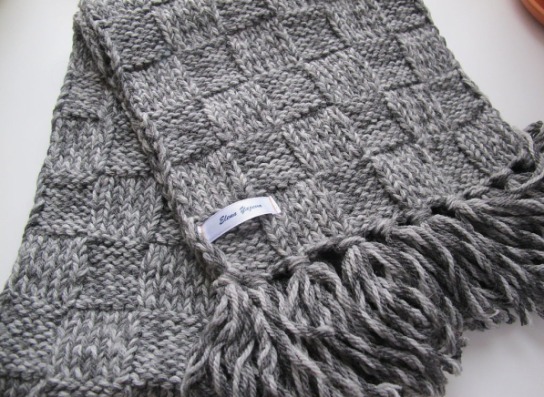 A scarf is a two-sided product, which means that the pattern, both from the front side and the wrong side, should look the same. Therefore, it is best to knit it with garter stitch. The elastic also looks good. It is performed by alternating two front and two purl loops in an even row, and in an odd row it is knitted according to the pattern.
You can also decorate the ends of a men's scarf with a fringe.
Snood scarf for beginners
The snood scarf is made both on two separate knitting needles and on circular needles.
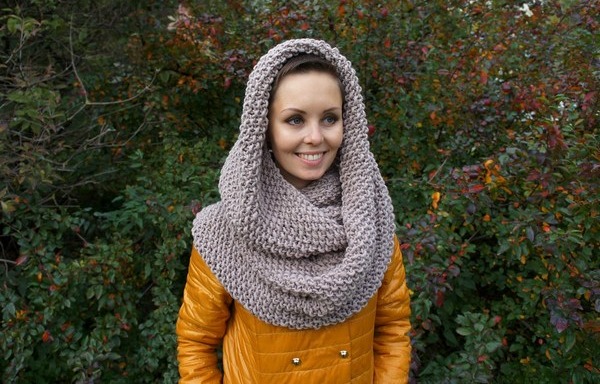 You need to knit a rectangle on two separate knitting needles, 50 cm high and a length equal to the head circumference or slightly more. Then sew its side parts together.
It is most convenient to knit such a product on circular knitting needles. Before knitting the second row, you need to pull out the plastic wire between the loops in the middle. Then close the circle by knitting the last loop of the first row.
In this case, the entire scarf-snood is knitted on the front side, which should be taken into account when creating a pattern.
Knitted socks for beginners
How to knit for beginners step by step on 2 knitting needles socks is the simplest and most affordable technology. Work starts with 22 loops to tie the cuff for the back half of the sock. An elastic band 1x1 with a width of 4 cm is knitted. Then the work is performed with the front stitch to the same height.
 They begin to form the heel, decreasing the loops by 2 in each row. In this case, two loops are knitted together in front of the edge ones with an inward slope. After 12 loops remain on the needles, they begin to expand the canvas.
The addition of loops is in each row of 2. New loops are knitted through the hem in the previous row. On the needles, there should be 22 loops as a result. The heel is ready, it's time to start making the sole.

The length of the sole depends on the size of the foot. For 37 foot size, you need to knit with a front stitch of 8 cm. Next, a sock is knitted. This stage of work is very similar to the previous one, when the heel was formed. It is necessary to decrease the canvas until there are 12 loops left, and then the expansion proceeds again.
Now you need to make the top half of the sock. The length of this part is equal to the length of the sole.
The peculiarity is to pick up with knitting needles and knit the edge loops of the soles so that they do not need to be sewn.
Then another 4 cm is knitted with the front satin stitch and the same amount with an elastic band. In this case, you still need to use the edge loops of the rear half of the sock.
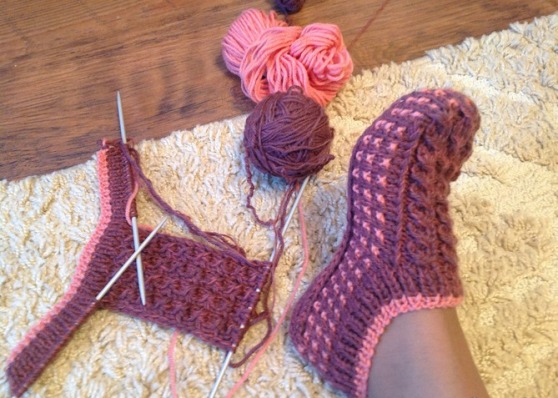
Slippers for beginners
How to knit slippers for beginners according to the easiest pattern. This step-by-step master class allows you to make 2-knitting slippers very quickly, in a couple of hours.
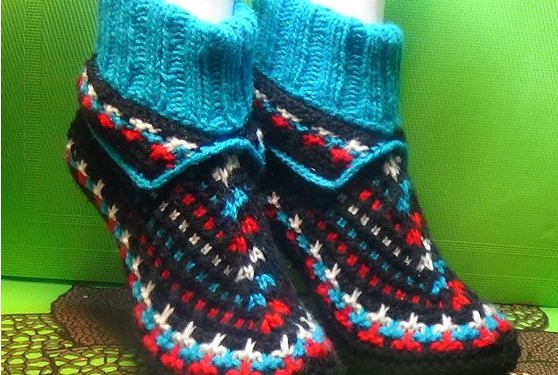 The pattern for the slipper is a rectangle, one of the corners of which is cut out so that the slippers do not look like a dwarf's slipper with a pointed toe. Slippers are sewn on the sole.
For the thirty-seventh size, you need to dial on the knitting needles such a number of loops that will correspond to 44 cm.Further, a stocking knit fabric with a height of 7 cm is knitted.
After that, the number of loops corresponding to 3 cm is closed from one edge. There will be a slipper toe here. Then another three centimeters in height are knitted. The blank for the slipper is ready.
Now it needs to be sewn correctly. First, we make a sock - the cut corner is folded in half and sewn together.
Accordingly, the triangular part of the finished canvas is folded back. We align it with the lower edge of the side of the rectangle where the tip of the sock was sewn.
From the opposite end, where the heel will be located, bend 17 cm of knitted fabric towards the toe. The entire slippers are sewn along the sole with one seam. There is one more small seam that connects the nose and the sidewall.
We turn out the slippers to the front side. The edge and oblique seam at the front can be laced or beautifully crocheted.
We knit footprints in stages
When knitting footprints, you must adhere to the following actions:
- Cast on 20 loops on the needles number 3. Next, knit with regular garter stitch 6 rows. The tail of the thread from the set of stitches should be on the right side.
- Then 14-16 rows are knitted with the front stitch and begin to knit the heel. For this, the canvas is conventionally divided into 3 parts, 10 loops each. The middle 10 loops are the heel. The first 19 stitches are knit, and the twentieth loop is knitted along with the twenty-first. Knitting is turned over and in the next row 9 loops are knitted from the seamy side according to the pattern. The tenth loop is knitted together with the eleventh, after which the fabric should be turned over again. The actions are repeated until 10 loops remain on the spoke and the heel is ready. At the same time, knitting ends on the seamy row.
- Now you have to dial 10 purl loops along the edge of the canvas from the edge loops. The product is turned over, and on the front side all the loops on the left knitting needle are knitted according to the pattern. Then from the edge loops of the edge of the canvas, 10 loops are typed with the front ones. The knitting is turned over again, and all the loops are knitted according to the pattern with the front stitch 22 rows for size 38.
 Now begins to decrease the width of the canvas to form a sock. Seven stitches are sewn, then 3 together. Then there are 10 loops, again 3 together, and the remaining 7 loops. Purl rows are knitted according to the pattern without subtraction. In the next row, 6 loops are knitted across the face of the product, 3 together, 8 loops, 3 together, 6 loops. In this way, the decrease of the loops continues until there are 14 loops on the spoke.
- The next row on the face is knitted like this: 3 loops, 3 together, 2 together, 3 together and 3 loops. Remains on the needle 9 loops, which are further knitted in the purl row. A loop 10 gets to them from the edge of the previous row. Now front: 1 edge, 4 front, 3 together, 3 front, 1 loop is typed along the edge of the fabric from the edge. The actions are repeated until a ready track is obtained. The hinges are closed.
Poncho for beginners
How to knit a poncho for beginners with knitting needles, because this product is voluminous. The step-by-step principle of making it on 2 knitting needles is very simple.
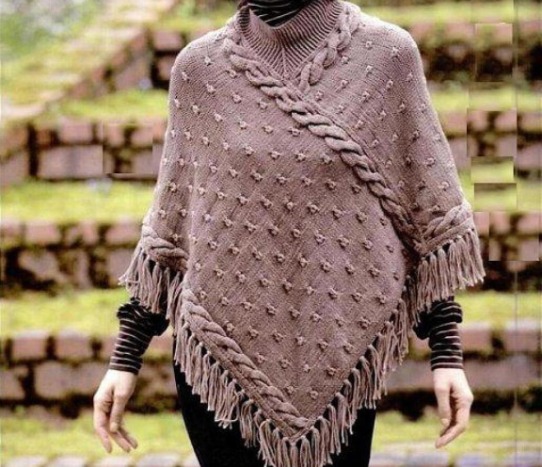 You need to connect two large rectangles, 40x80 cm each. The thickness of the yarn and knitting needles, you can choose any pattern. For inexperienced craftswomen, even a simple front surface is suitable.
The main secret is in stitching the two resulting canvases. Each must be folded in half. The shoulders will be in the fold area. Then attach the narrow side of one rectangle to the wider side of the other so that you get a nice corner at the bottom of the poncho, and sew a seam.
We do the same on the other side.
Now you can process the neckline by typing loops around the edge. Perfect for such a poncho, a collar with a large lapel, like a sweater, tied round.
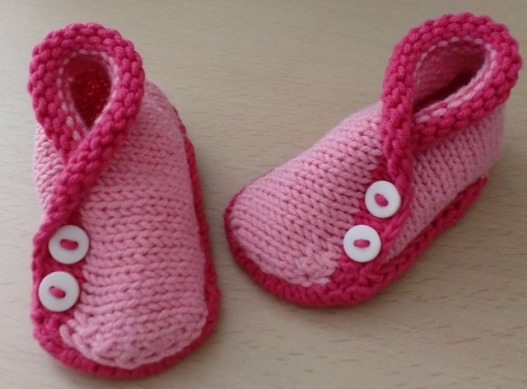
Booties for newborns on knitting needles
These booties are designed for a baby's foot length of 8 cm. They are made with garter knitting needles number 3.
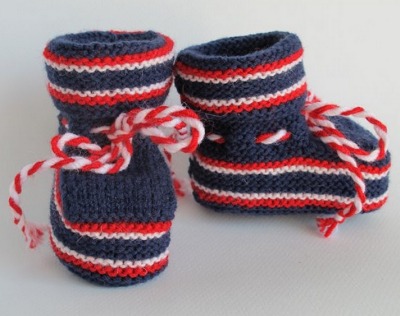 Knitting starts from the part that is above the ankle and wraps around the lower leg. Then the toe is knitted, after which the middle part is tied, connecting the sole and the top, then directly the sole and the back of the booties.
Working process:
- 27 loops are recruited and 12 rows are knitted. The last edge in each row is purl.
- The next step is to make holes for the lace. The next 2 rows are knitted with the front stitch. Fifteenth row: 2 together, 1 yarn, at the end of the row - 1 front and edge. The sixteenth row goes all purl.
- We knit a sock, divide the canvas into 3 parts, 9 loops each. Knit 17 knit stitches.The eighteenth loop is sewn on the wrong side, after which the product needs to be turned over. And now only the middle part of 9 loops is knitted separately, 16 rows.
- We proceed to the side part, here it is necessary to lift the loops from the sock fabric. First of all, we do this on the left side. Therefore, we knit a row to the end, and we put the left knitting needle into the hem of the previous row, pull the thread and knit with the purl. Then we collect in this way 7 more loops to the end of the canvas. Next comes the left side of the canvas, which is performed with the front ones. We turn the product to the wrong side and do everything according to the drawing. Now cast on 8 knit stitches on the right edge. After that, the loops remaining on the knitting needle are tied according to the pattern. There are 43 loops left, which are then knitted with garter stitch 12 rows.
- We carry out the sole. In this case, only the middle part of 9 loops is knitted with the gradual attachment of the sidewalls. First, knit with front 25 loops. Then the 26th loop with the 27th is performed together with the front one. We turn the product over, knit 8, the 9th goes with the 10th together with the purl. The work turns to the face, and the sole is knitted further in the same manner. The loops that are knitted together follow the pattern. At the end of the sole, 9 loops remain.
- Then the back is knitted. The edge loops of the remaining parts are connected. After the first row of the back, remove the last loop on the knitting needle, which is in the right hand. Then we collect an additional loop from the edge, reshoot the last loop from the right knitting needle to the left one and knit them together with the front one. We turn the product, we carry out a row with purl to the end. Remove the last untied loop on the right knitting needle, insert the left knitting needle under the edge side part. Then we drop the free loop from the right knitting needle to the left one, and knit 2 together with the purl. We continue to do this until we come to the place where you need to make holes for the lace. In the next front row, we alternate yarns and 2 together front, while lifting the loops on the side parts of the product. Then we knit according to the pattern to the end of the product, until all the sidewalls are attached to the back of the booties. We close the hinges.
This step-by-step knitting pattern on 2 knitting needles booties for beginners, as experience shows, is universal. On its basis, you can knit booties of different models, adding new details. One has only to show your creative imagination.
 You can decorate do-it-yourself products with the help of embroidery with multi-colored woolen threads, beads, braid. Some craftswomen use natural materials - buttons made from pieces of wood, stoppers for ties from walnut shells, leather straps. Bold imagination allows even inexperienced needlewomen to create impressive exclusive things.
How to knit for beginners step by step on 2 knitting needles:
https://www.youtube.com/watch?v=awp0Y95D17g
Knitting socks on 2 needles:
How to knit booties on 2 knitting needles:
How to knit tracks on 2 knitting needles: