Recently, gel polish has become increasingly popular among women. How to apply it at home, the pros and cons, as well as interesting manicure options using such a tool should be found out.
What is gel polish. Advantages and disadvantages of technology
The modern nail polish in question consists of conventional nail polish and gel. It gained fame among fans of beautiful manicure due to longer wear, achieved due to the greater strength of the material.
Besides good tenacity, the advantages of gel polish include a wide palette of colors and shadescreating interesting effects. The texture of such varnish is such that the nail plate covered with it is less prone to damage as a result of tight contact. At the same time, the growth of nails is accelerated, their fragility decreases.
The main disadvantage of the product is the long and complicated procedure for applying and removing by soaking in a special solution for at least 15 minutes. Improper cleansing of varnish leads to thinning and brittle nails.
Required tools and materials
Gel polish is a cosmetic material that requires careful preparation. Before learning how to apply it at home, you should familiarize yourself with all the tools required for this process.
Lamps
The creation of a beautiful, even manicure is impossible without the use of a special lamp. Cosmetologists call the best of them LED lamps, since they do not contain mercury, which harms the body. The price range is wide enough as is the choice.
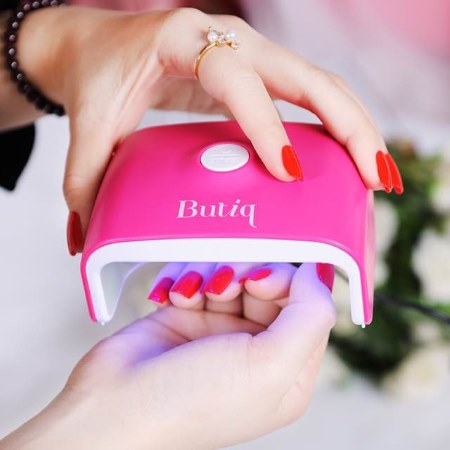
Such a device is used to dry gel polish using light from LEDs. For home use, small, compact lamps are best suited for practicality and space-saving reasons.
Napkins
The presence of this simple item in a woman's manicure set is really necessary, because it will be difficult to achieve a perfectly even coating without them.
It is recommended to use "lint-free" wipes, helping to quickly remove the oily shine of the nail plate, preparing it for painting, as well as for convenience in the process of removing varnish and cleaning the tools used.
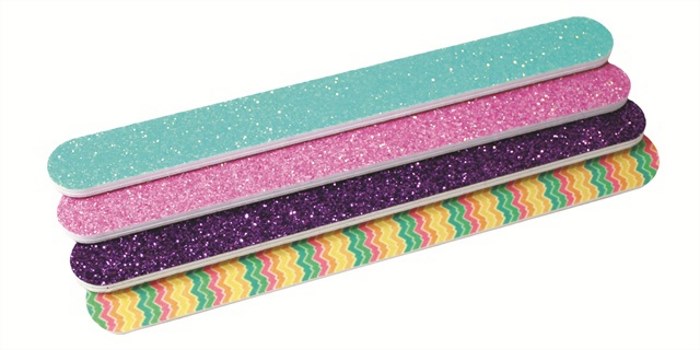
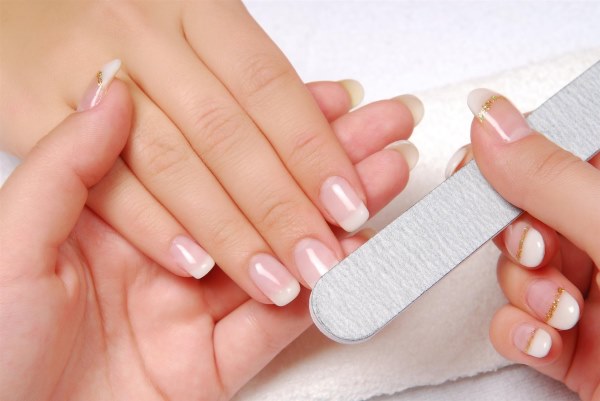
Nail files
One nail file for such a manicure is indispensable. You will need files from different materials that serve different purposes:
- For filing a natural layer (soft file, 240 grit, any material).
- To create a shape (a glass, ceramic or file with emery chips is suitable).
- For sanding (400 grit).
- To prepare for removing gel polish (the main purpose of the nail file in this situation: destruction of the integrity of the varnish, therefore the hardness is not important, however, you should not use a tool with a value less than 180 grit, so as not to injure the structure of the nail).
The shape of the files is chosen individually from the point of view of convenience.
Buffs
Buff is a type of nail file designed for polishing and grinding.
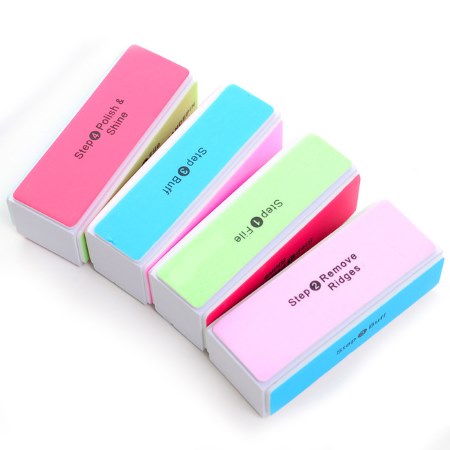
Its distinctive features are shape (usually presented in the form of a bar) and delicacy of the impact due to the softness of the materials used.
It is used to prepare for the application of varnishes, makes the nails smooth and shiny.
Nail scissors
The purpose of this tool does not raise any questions: scissors are needed to shape the nails from the side of the free edge, by removing excess areas. Also used to remove cuticles.
There are scissors with straight, curved ends and universal ones with a narrowed, pointed edge.
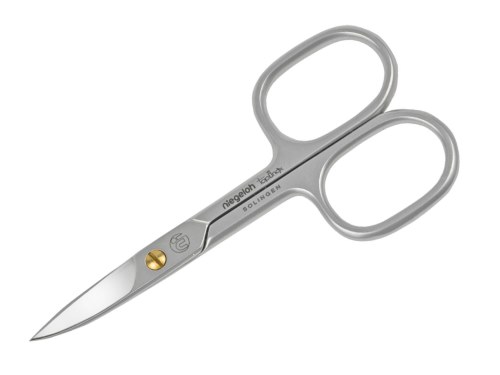
It is preferable to purchase the tool in professional stores, because it must be made of solid steel and be of high quality.
Tweezers
Cuticle removal with forceps is much safer and more accurate, in contrast to the same procedure using scissors. You need to use the device carefully, smoothly, cutting off the skin in an arc. After each procedure, the instrument must be disinfected.
Dehydrator
Degreasing and removing dirt with a dehydrator is necessary to create conditions for high strength and durability of a manicure with gel polish. The liquid is also used as a disinfectant to help maintain hygiene at home.
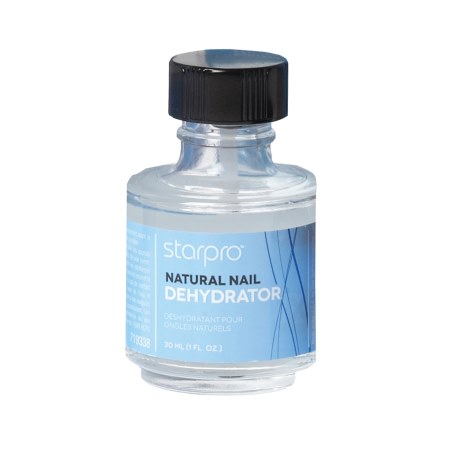
It is quite simple to apply: with a brush, like a simple varnish.
Primer
The role of a primer in working on beautiful nails is similar to that of a dehydrator. The difference is a deeper effect on the nail plates and the provision of their thorough protection.
To maintain the water balance, a pre-primer is used; it serves as a good base for the coloring element.
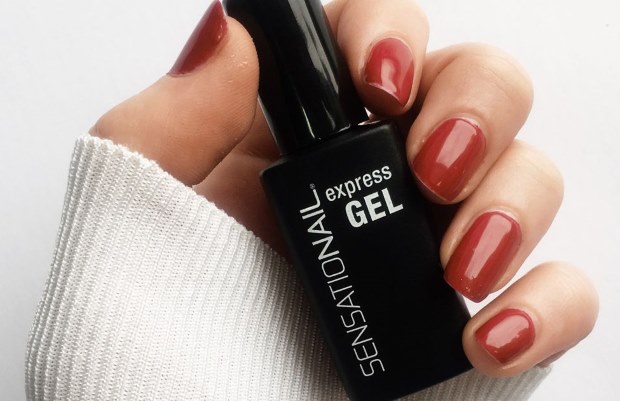
Gel polishes
When choosing a gel polish for home use, you need to pay attention to whether it is convenient to apply it, how quickly it dries under the lamp, and whether it can be easily removed.
The attached instructions should contain data on the retention of the varnish after application. A good option is a coating that can stay on the nails without changes for 3 weeks, and polymerization of a quality product should last no more than 30 seconds.
Caring products
Nail care after manicure procedures must be performed without fail. Even absolutely correct, safe technologies have a destructive effect on the structure of the nail plates and require competently performed restorative procedures after themselves.
All methods of care can be divided into 2 groups: using chemical or natural products. Natural methods include applying various fatssuch as olive, castor oil. They also use sea salt and melted paraffin wax.
It is more profitable to use restoration techniques at home than in a salon, since the restoration process takes a long time and one short procedure will not be enough to obtain the desired effect.
How to properly apply gel polish at home
Compared to conventional manicure, the technique of applying gel polish has a large number of rules and features.
The entire preparatory process is aimed at extending the preservation period of the painted marigolds by cutting the surface to achieve a tight adhesion of the paint. Based on the intention to respect the natural nail, during the preparation, liquids are used for protection.
Failure to comply with the recommendations of experts leads to an unsatisfactory result, both in appearance, duration of use, and the preservation of the natural properties of female marigolds. Before starting painting, you need to carefully study the most common errors:
- The use of low-quality products.
- Selection of lamps and varnishes with mismatching characteristics (too long drying, short period of operation of the device).
- No pre-treatment before applying gel polish. (How to apply the preparatory substances at home, you can learn from the step-by-step instructions given in the next section).
- Violation of the sequence of application of layers.
- Ignoring the last anchor layer.
- Incorrect fastening: poorly sealed ends.
4 fingers of one hand are primarily colored. The thumb remains intact to prevent the varnish from dripping off. After drying in a lamp, the algorithm is repeated for the other hand. Thumb polish is applied and dried last.
All layers of gel polish should be applied thinlyto avoid deformation and bubbles.
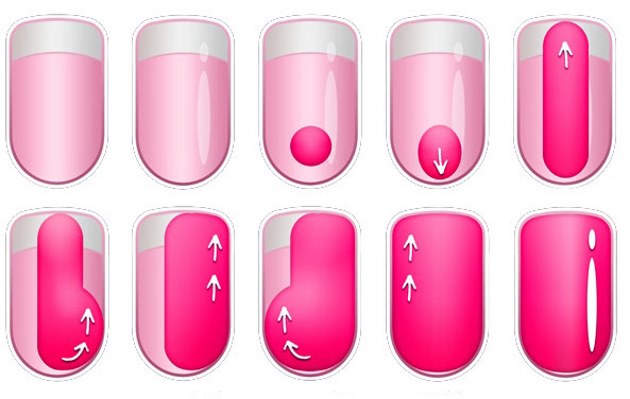
The sequence of application should be as follows: from a point just below the center of the nail, go down to the base. Then, from the same point, continue moving with a brush up to the free edge. After that, the edges are worked out from 2 sides from bottom to top. The final stage is framing a thin strip of varnish along the top.
Coating with gel polish at home in stages. Application sequence
Having prepared all the necessary accessories in advance, you can start creating a manicure with gel polish. The speed of application depends on the experience and skill of the master; on average, this operation takes from 20 minutes to 1 hour.
Step-by-step instruction:
- The first step is to prepare the nails using the usual trimming procedure. Cuticle removal occurs as much as possible "at the root".
- Then remove the shine using a buff.
- Degrease with a primer 15 minutes before staining. A longer period of time will require repeated action.
- A base coat is applied, gently spreading the liquid mass over the entire surface, without going over the edges.
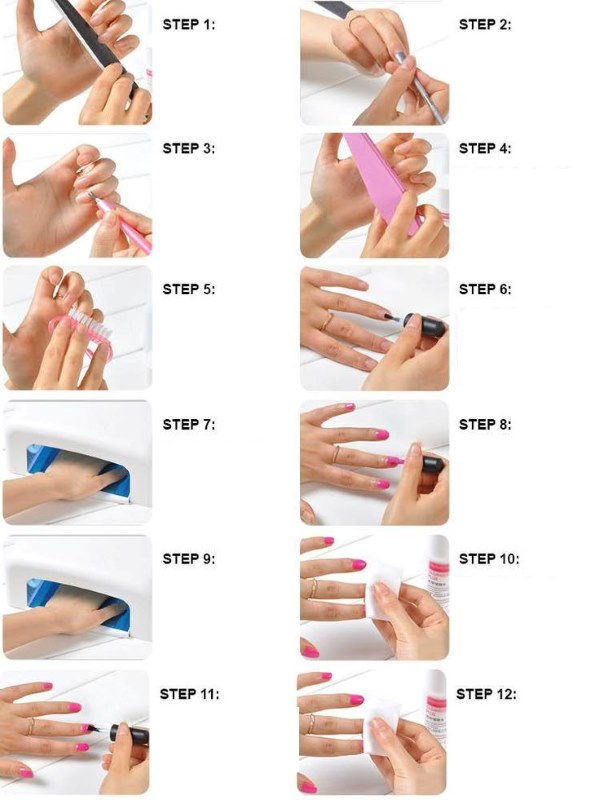
- Cover the nails with the first layer of gel polish.
- Dry under a lamp.
- Stained with a second color layer.
- Dry.
- If necessary, apply the 3rd layer and repeat the drying procedure for it.
- If desired, at this stage you can apply decor, for example, sequins.
- Secure with a thick, dense top layer.
- Remove the sticky layer with a degreaser.
- Carry out cuticle care with special means.
Can gel polish be applied without a lamp
Using a good, high-quality lamp for drying manicure is quite expensive. Therefore, some people ask the question: is it possible to do without it? Certain types of varnishes do allow this, but the result will still be different.
The formulations of varnishes that do not require irradiation have much in common with conventional types of such products. There are types of coatings that use catalysts instead of drying. Naturally drying varnishes are commercially available. To fix it, you just need to hold your fingers in cool water for 10 minutes.
The appearance of a manicure made in this way looks decent, but the duration of the effect is much shorter, about 6-8 days.
It is easy to distinguish such a cosmetic product from copies working in tandem with a heating device: there should be an indication “No light gel” on its packaging.
The chemical composition leaves the question of its safety open, because allergic reactions, dermatitis, and respiratory problems occur, especially when using cheap drugs with hazardous substances present in them.
How to apply cat eye gel polish
There are a lot of different brands and companies that produce gel polish, which gives room for imagination when creating an individual style. The stunning cat-eye effect is especially noticeable in the rays of light. When choosing colors from this palette, it is important to know: what features this gel polish has, how to apply it at home.
Iridescence, volume, shine in the form of a thin glare strip, intricate patterns obtained when exposed to light rays are similar to the ornamental stone of the same name. The cat's eye contains metal particles that can form interesting patterns when exposed to the magnet included in the kit.
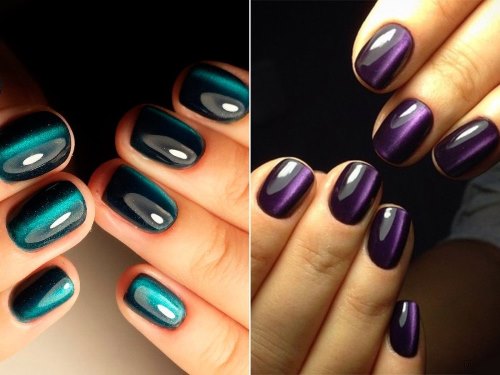
Gel polish has a dense texture, durability is up to 20 days. In addition to napkins, files with a high degree of softness, regular manicure sets and other typical items for nail design, you will need transparent varnish as a base, magnetic gel varnish and magnetic plates... The UV lamp power should be 35 W.
The preparatory stage and the application of the base and varnish comply with the rules applicable to the general technology described. Differences in methods begin from the moment the 2nd varnish coat is applied. After coating, a magnet is brought to the nails, at a distance of 3-5 mm, to attract metal particles to the surface.
At this stage, the pearlescent shine of the gel becomes noticeable and an unusual pattern begins to emerge. After 10 seconds, the varnish is dried under a lamp.
How to apply glitter to gel polish
There are many ways to improve women's manicure. One of the most popular and available methods is to decorate with sequins of different sizes.
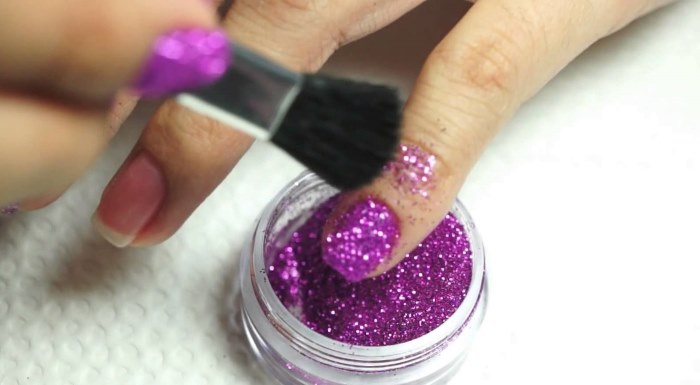
Small shiny particles are called "stardust". From the name it is clear that their use is capable of giving the colored marigolds shimmer with the help of the smallest glare.
Medium sized glitter is called colored sand. Large details reach 1 mm in size, outwardly resemble small stones. They are used to create a bright accent in the decor.
The easiest way to apply glitter is to use a ready-made varnish containing shiny particles.
The glitter powder sold separately from varnishes can be added in a variety of ways:
- First option: with a soft brush... The powdery mass is simply poured with careful movements onto the color layer, distributed over the area selected for filling. After drying, excess particles are removed.
- The second option implies mixing glitter with varnish, intended for painting with a second layer, and its subsequent application. This approach requires fixation with a covering layer.
- The third method is suitable for working with large elements. Big details are applied in the last step on a dried varnish or adhesive surface.
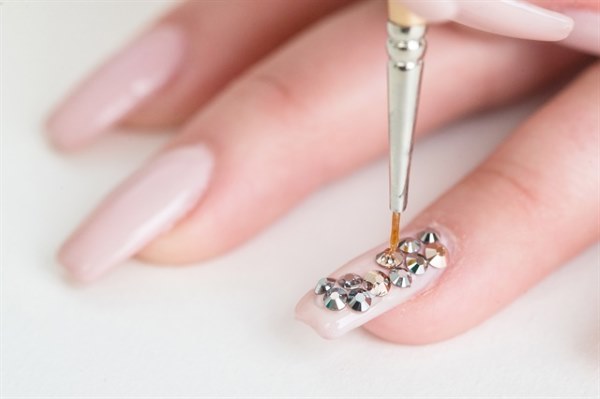
How to apply rhinestones to gel polish
Apply rhinestones to gel polish at home in the same way as large sequins: in the final stage of work on an adhesive base.
Fashion designers advise not to mix them with other decorating elements in order to avoid visual overload.
Rhinestones in manicure are needed to give bright accents, therefore it is inappropriate to frame all fingers with them, it will be enough to emphasize 1 or 2, maximum 3 nails to achieve an impressive effect.
The safety of decorative ornaments depends on adherence to technology when performing the main nail treatment and the subsequent intensity of wear.
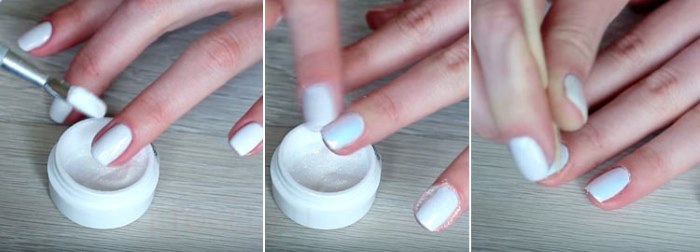
How to properly rub on gel polish
Rub-in has deservedly received recognition from fashionistas for its convenience, durability and stunning mirror effect. Powder is sold in separate jars, its consumption is very economical.
Powder is rubbed with an applicator onto a perfectly smooth surface of a painted nail, dried in a lamp. If you overdo it with the drying process, there will be no positive result.
How to cover extended nails with gel polish
The system for applying gel polish on artificially extended nails is almost identical to that developed for natural marigolds. The only difference is that there is no need to clean the surface of grease in this case.
It is also necessary to pay attention to the thickness of the artificial plate, keeping in mind that the subsequent layers make the already dense matter heavier, which leads to visual disharmony.
When planning to improve artificial nails in the future with color, you should initially work with thin plates.
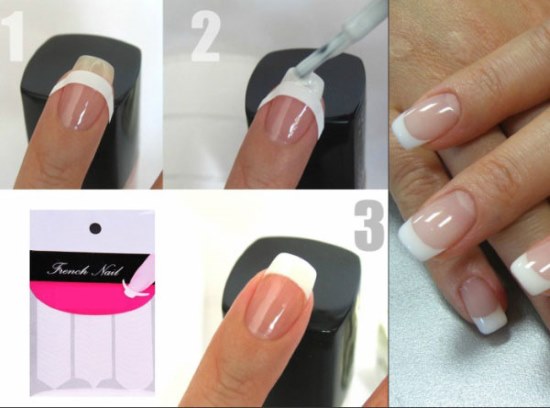
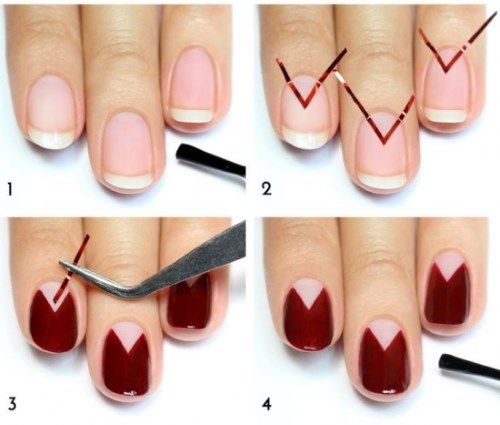
How to do French and moon manicure with gel polish. A photo
The relevance of the French and lunar style in nail design is undeniable. Although they are different from each other, a similar application principle allows them to be combined.
There are several options for how to create a lunar and French manicure using gel polish, how to apply the texture at home to get perfectly smooth semicircular edges.
The first option is to paint with a brush by hand. It is good because it allows you to bend the line in any way, without any restrictions. The disadvantage of this method: the need for a certain skill and skill.
To facilitate the drawing process, stencils of various shapes and sizes are commercially available.
It is noteworthy to stick colored foil as an artistic element in a moon manicure. It is put on a special glue.
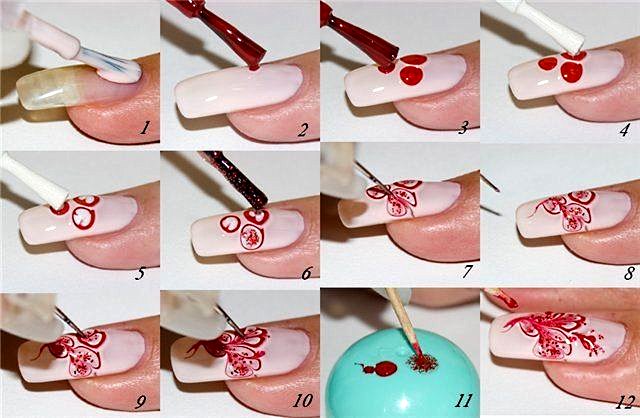
How to make drawings on nails with gel polish
There are several simple and complex techniques for decorating lacquer textures with drawings and patterns:
- Stamping... Transferring the desired pattern from a special metal plate to a plane using silicone printing.
- Patterns with a thin brush... All kinds of dots and stripes, simple for a novice master.
- Effects using dots... The tool has a ball-shaped tip.
- Scotch stencils... A homemade version of the patterns obtained by peeling off the adhesive tape from the plate, with a shade superimposed on top.
- Color mixing... Work on mixing two liquids directly during layer application.
- Needle drawing... Using a needle or toothpick, you can create a decorative style from the finest lines.
Below are some simple examples of simple drawings:
- Bright circles on a solid, dark background.
- Alternating colors in straight or wavy stripes vertically, horizontally, diagonally.
- The simplest flowers.
- Ornament.
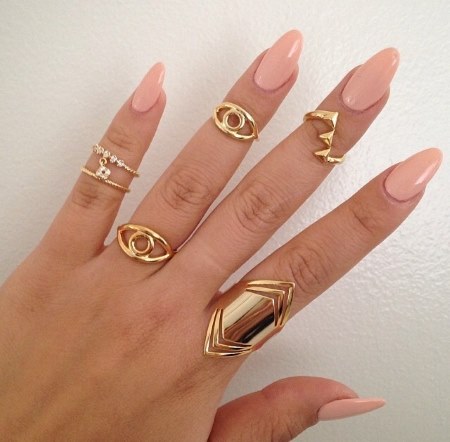
Gel polish manicure ideas: design, fashion trends. A photo
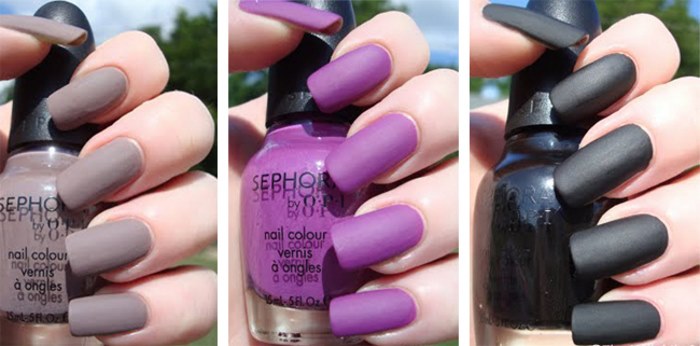
Monochrome gel polish: photo
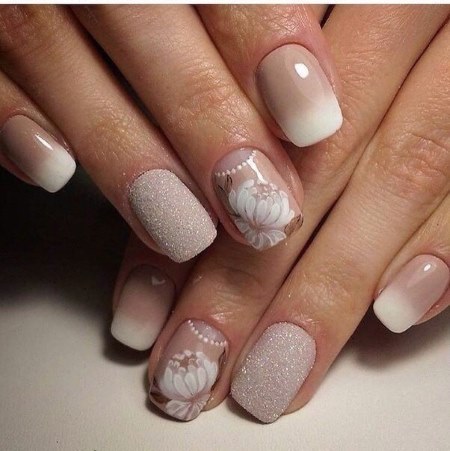
Gradient on nails with gel polish: photo

Gel polish for short nails: photo
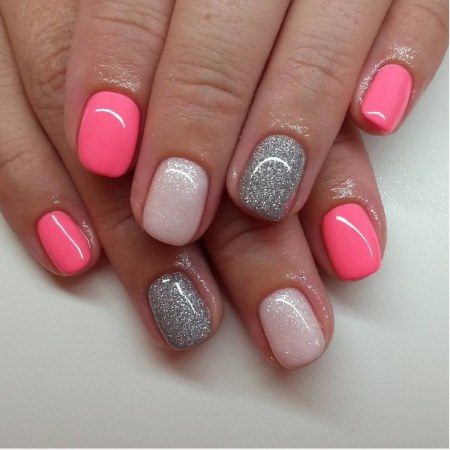
Delicate manicure with gel polish: photo
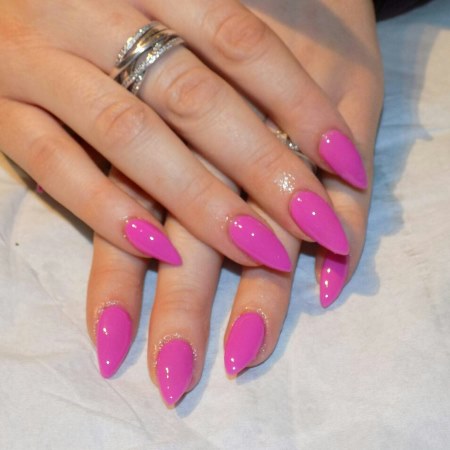
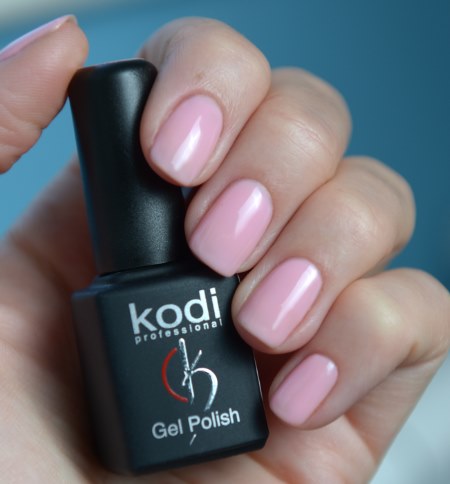
Manicure with pink gel polish: photo
Peach manicure gel polish: photo
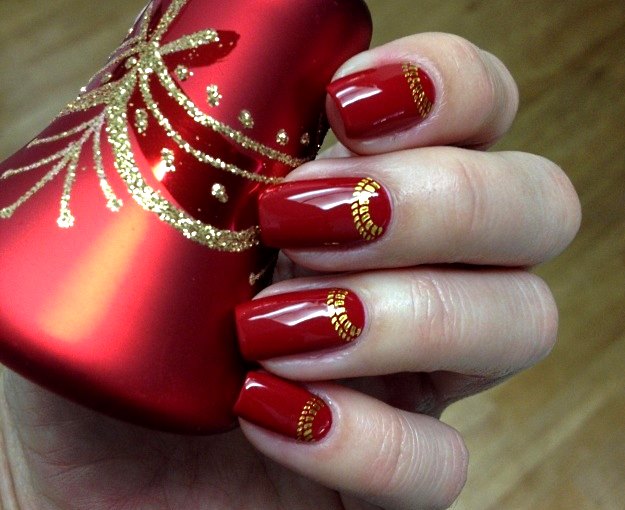
Gel polish red design: photo
Lunar manicure gel polish: photo
Set for gel polish at home
Into the initial list of items, without which a good manicure cannot be done, includes:
- Manicure set.
- Nail files.
- Primer.
- Buff.
- Base.
- Top.
- Ultraviolet lamp.
- Tint gel polish.
- Napkins.
- A means for removing the sticky layer.
You can buy all this in specialized stores or order on the Internet. The price of such a set is proportional to the quality: the better, the more expensive, ranging from 500 rubles to several thousand.
Gel Polish Cody
The line of American Kodi branded varnishes is relatively young, but has already managed to establish itself in a positive way. A wide range of shades, high durability, affordable price - this is what distinguishes the brand from others.
But this palette has one drawback: experts do not recommend wearing it for a long time without interruptionbecause it is bad for the health of the nails.
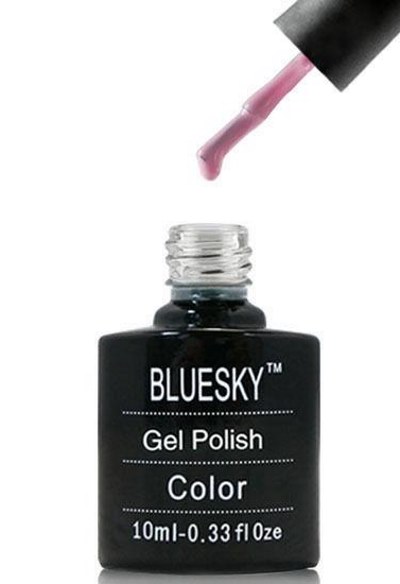
Bluesky gel polish
The Chinese brand, like its American counterpart, has conquered the fashion industry market.
Its advantages include:
- Easy to apply.
- Smooth coverage.
- Juicy color palette.
- Persistence.
- Drying from 30 s to 2 min.
- Easy to take off.
- Price.
When buying Bluesky, experts advise you to pay attention to the authenticity: Poor quality counterfeits are common.
The fake differs from the original in a bad, unpleasant smell.
How to extend the life of gel polish
Subject to the instructions, high-quality products have high durability and resistance to external factors. But this does not mean that you can handle such a manicure absolutely carelessly. There are rules that can help maintain excellent results for as long as possible:
- It is important to provide timely care for real nails.to avoid delamination and thinning.
- Any water treatment for hands is excluded within three hours after painting.
- Sudden temperature changes negatively affect.
- Interaction of the coating with household chemicals is undesirable.
- A change in hormonal levels can have an effect.
Knowing the unique possibilities that gel polish provides, how to apply it at home, armed with imagination, you can create a unique design and emphasize the individual beauty of a woman.
Gel polish - how to apply at home - video instruction:
Tips and rules for beginners for applying gel polish:
Today there are so many opportunities for self-manicure with gel polish - stencils, dots, lamps, and many others. etc., that applying such varnish at home will not be difficult.
Personally, I have been doing myself such a manicure for the second year already)