Gel polish began its triumphant march through the beauty salons of the world under the name "shellac". It appeared in America about 5 years ago and its obvious advantages over conventional varnish have provided it with the green light on its way to the heights in nail design.
Gel polish: advantages and disadvantages of manicure
Shellac is a cross between a gel and a regular varnish.who took the best from his "parents". The coating with such varnish is beautiful, looks natural, dries instantly.
 Its advantages over conventional varnish are as follows:
- it is not printed or smudged;
- durable;
- strengthens the nail plate;
- nails grow back faster;
- has no smell;
- removes irregularities of the nail plate;
- has a beautiful shine;
- has an acceptable ratio of price and quality;
- saves time and money on visiting the salon - salon procedures are required less often.
But even this seemingly ideal remedy has disadvantages:
- A high-quality coating with such a varnish requires skill and special devices, namely: it is dried using a UV or LED lamp. Such lamps are not cheap, and you will not be able to do everything neatly, as in the salon.
- Periodic "rest" for nails is recommended, about once every 3-4 months. Experts advise walking around without coating even if they use ordinary varnish.
- Shellac should be removed in a certain way and with special means. If you don't follow the rules, you can damage your nails.
- If you are allergic to the composition of the varnish, then it is recommended to abandon it.
- The whole process is quite lengthy - 1.5-2 hours.
- All homework will have to be done with rubber gloves, this varnish does not like "water procedures", especially with household chemicals.
 Beauty, as you know, requires sacrifice. Time, good equipment (lamp), adherence to technology are important here. The durability of the manicure is guaranteed. This is ideal for women who want to look well-groomed but cannot visit salons often enough.
How long does gel polish last on nails
Shellac's popularity is due to its beauty and durability. But this is not the only advantage. Such a coating makes it possible to grow your own healthy nails, because shellac protects nails from damage and an aggressive environment.
If a shellac manicure is done according to all the rules, then you can enjoy well-groomed pens for 2-3 weeks. There is no need to go to the salon every week, or even more often. There is no need to "torment" your nails with frequent changes of varnish, which is quickly erased, smeared and looks sloppy.
 Cuticle nails grow back within 2 weeks. This is not very noticeable, but it is the growth of nails that is the reason for updating the manicure. If you ignore this, then manicure with gel polish can last longer than 2-3 weeks.
The strength of such a coating largely depends on the quality of the base and top. It is recommended to buy them from trusted manufacturers. The base guarantees the wearing time and durability of the varnish on the nails.Top is responsible for shine and absence of chips. Therefore, when choosing a three-phase varnish, you should choose these components from leading companies.
Gel polish: fashionable design 2017
The most fashionable trend in 2017 nail design is naturalness. Gone are the sharp claws and deliberate squares. The oval or almond shape of the nail is in vogue, emphasizing its health and natural beauty.
With the advent of gel polishes, new trends have been added to the popular and classic designs in the nail industry, such as strip painting, glass effect, emphasis on individual fingers, and bulky knit designs. In addition, the already beloved manicure styles have received new life.
Gradient on nails with gel polish
Gradient manicure has not lost its relevance. A gradual or abrupt transition from color to color still looks impressive. In this case, the color change is done both on the nail of each finger and from finger to finger. The gradient can be horizontal or vertical.
 It is done in different ways:
- flat brush;
- fan brush;
- pigment;
- sponge;
- acrylic powder.
It is better to use the lightest varnish or the lightest of the selected colors for the transition as a base (base). The number of layers of varnish depends on the effect and the smoothness of the gradient that you want to get. If you make a gradient on your fingers, then it is recommended to choose 3, 5, 10 varnishes of the same texture, but different shades.
In addition to being beautiful and diverse, gradient manicure visually lengthens the nails.
French manicure gel polish
Favorite French manicure has become not so strictly classic. It has been updated. Now, in addition to white and pink colors, bright colors, a more fashionable "smile" form, sparkle and radiance are allowed.
The festive version of the jacket is the millennium: the nail is covered with a transparent base, and the "smile" zone is decorated with glitter.
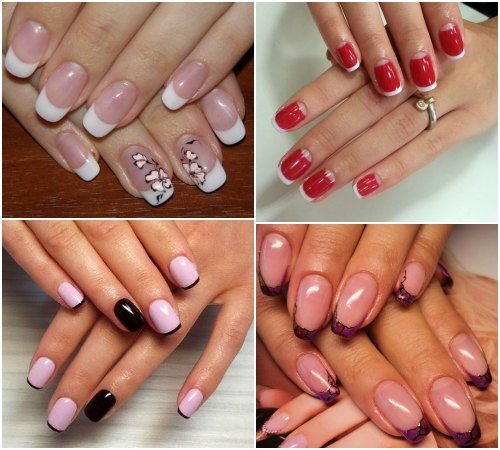 A very original direction of fan french. Here, the scope for imagination is endless - the tips of the nails are decorated with foil, broths, beads, painted with halogens or chameleon varnishes, which looks juicy and bright.
Experiment with matte and glossy finishes by combining them. Change the "smile" line. It can now be wider, V-shaped, double, triple. In a word - away from boredom, experiments are welcome!
Cat eye gel polish
Manicure with cat's eye gel polish is now fashionable. He will not leave indifferent any fashionista. Chrysoberyl stone, which has the property of irisation (iris of the eye), in nature is blue, brown, green and gray.
In the same colors, a cat's eye manicure looks most impressive on the nails. The holes are decorated with painting, sparkles, but without additional decor it looks incredible.
Irisation - the optical effect of rainbow shine is inherent in gel polishes with small particles of metal.
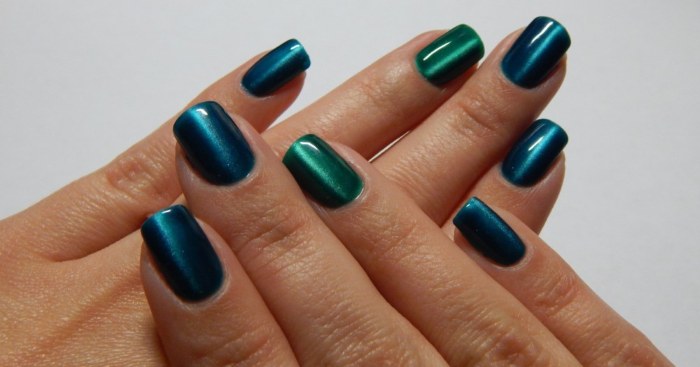 This varnish is applied to the base. Then a special magnet is applied to the nail. It acts on metal dust, forcing it to position itself in a special way, which creates a cat's eye manicure.
Marble manicure with gel polish
Marble texture or the effect of natural stones is one of the latest fashion trends in nail art. Opal, turquoise, malachite or other imitation stones are not a problem with shellac. The design looks unusual, is simple to execute, since in this technique the accuracy of the drawing is not particularly important.
To draw thin lines, take gel paint, for a glamorous version, you can add sparkles or shellac with a shimmer for glare.
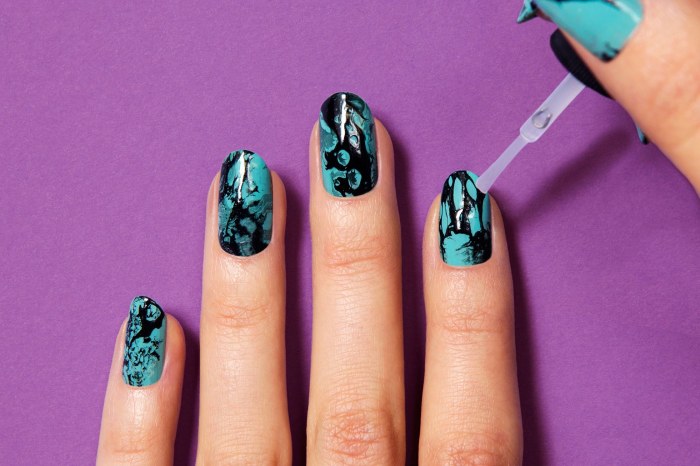 The technology of marble manicure is simple. There are two main ways of doing it: drawing with dry varnish and with liquid. The methods differ in that the "dry" pattern is applied to the dried shellac layer, and when "wet" - on the liquid one.
Taking into account the fact that a few more shades are added to the basic tone and always white, the layer turns out to be a little thicker and you need to increase the drying time.
Wet marble manicure is not difficult to do:
- Training. Remove cuticles, shape the tips of the nails.Gently walk the buff over the nail plates so that they better adhere to the varnish. Degrease the nail plates.
- Rub the base with a brush, applying it in a thin layer. Spread from the center of the nail to the edges. Dry under a lamp.
- Cover the nails with a varnish that matches the color of the stone chosen for imitation. Dry.
- Apply 3 drops of gel polish of different colors (from selected) to the foil: the darkest, lightest and white.
- Now apply the selected background color, then use a toothpick to randomly apply varnish from the foil, drawing stripes that simulate the veins of the stone. Wipe a toothpick and walk along the strips in a zigzag motion. You can dry it immediately, or you can still wait. The varnish will flow, mixing, and the pattern will be even more natural.
- Move to the next nail.
The simplicity of the procedure and the showiness of this manicure have provided him with the top in the list of favorite nail designs.
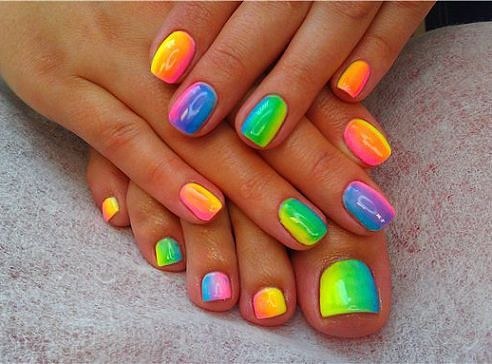
Ombre on nails with gel polish
Ombre, or the kind of smooth gradient shellac, has also undergone slight changes this season. Nowadays, ombre is in fashion, creating the effect of a sunset and it is recommended for summer. This is due to the fact that such a design is done in warm shades of orange, blue, yellow, pink.
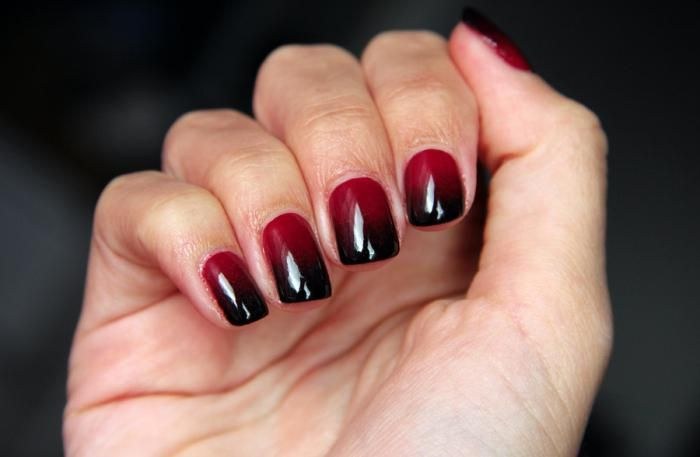 The process itself is similar to the procedure for applying a gradient manicure. A base layer is applied to the finished nails, fixed under the lamp. Next, the main color is applied, dried under a UV lamp.
With a brush, colored varnish is applied to half of the nail, and then, with a thin brush, with frequent movements, stretch it to the edge of the nail. The result is recorded under the lamp. Paint over 2 more times with a color stretch in both colors, be sure to fix the result under the lamp. At the end, a top is applied and fixed.
A similar result can be achieved using a sponge for the ombre.
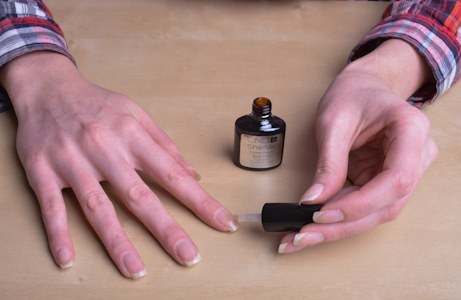
Gel polish manicure tools
For a manicure with shellac, special tools should be prepared.
 The set includes:
- a lamp for polymerization;
- disinfector - antifungal agent;
- primer (acid-free) / dehydrator - dehydrates and degreases nails;
- color gel polish - you can use one-phase, or you can use three-phase;
- top - it is glossy and matte;
- orange sticks / pusher;
- foil;
- shellac remover;
- cuticle softening oil;
- nail file;
- buff
Lamp for gel polish: what should be
Shellac does not dry without a lamp... It is a necessary tool for getting a quality manicure. Which lamp to choose and why. Typically, for manicure, they use UV lamps, LED lamps or hybrid lamps, in which both types of lamps are built.
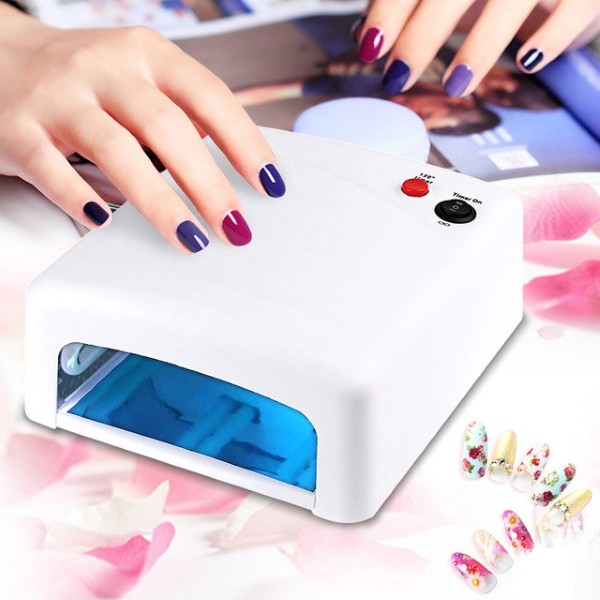 UV lamps are available in 9-54 watts. The higher the lamp power, the shorter the curing time. For home manicure, a 36-watt lamp is suitable. On the fingers of one hand drying the varnish takes about 6-9 minutes.
The disadvantage of these lamps is that the bulbs in these devices need to be changed every 4-6 months, as their ability to dry shellac decreases.
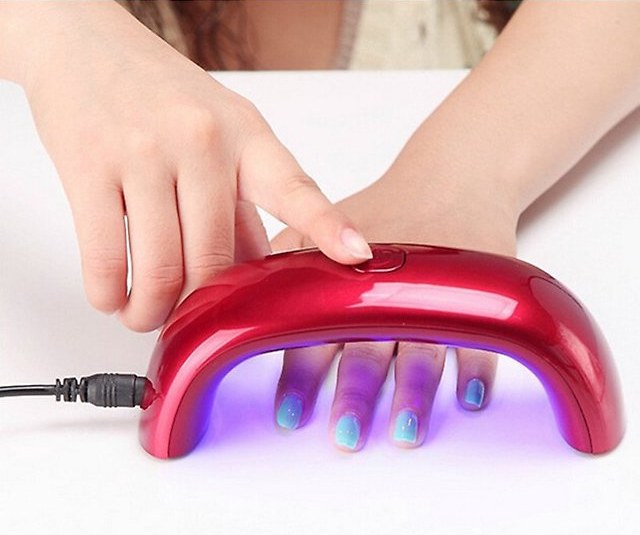 Led lamps are more expensive, but the curing time is shorter. In addition, the service life of such a lamp is very long and the bulbs in it do not need to be changed.
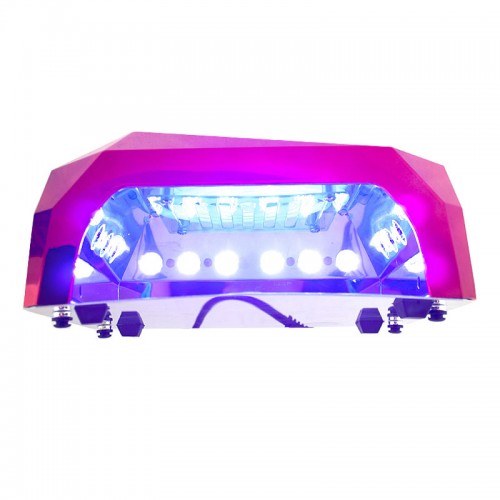 Hybrid lamps are designed to cure all types of coatings and are typically used in professional showrooms.
Manicure gel polish: brand review
What to consider when choosing a varnish:
- durability and strength of the coating without compromising color, without abrasion, cracks and chips;
- is it convenient to work with varnish (brush, consistency, easy removal, palette, harmlessness for marigolds, smell).
Gel polish Kodi (kodi)
The American brand Cody is safe for the surface of the nails; the varnish is durable, elastic, does not chip. It has good adhesion to the nail surface, which allows only gentle preparation with a buff before applying a layer. Approximate price up to 500 rubles. for 7 ml.
Minuses: liquid; difficult to remove, it is necessary to cut the top layer.
Bluesky gel polish
Budget gel polish made in China. Often used in nail salons, it gives a durable beautiful finish. The approximate price is 240 rubles. for 10 ml.
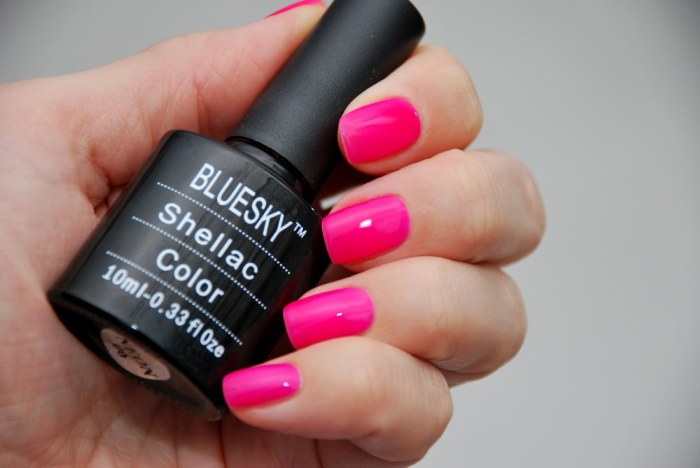 Minuses: limited palette; difficult to remove, liquid.
Luxio gel polish
Gel polishes of the Luxio line of the Canadian company Akzentz are characterized as persistent, strengthening and protecting nails due to the essential oils that are included in the composition. The palette of shades is diverse - 110 options, it is constantly expanding.
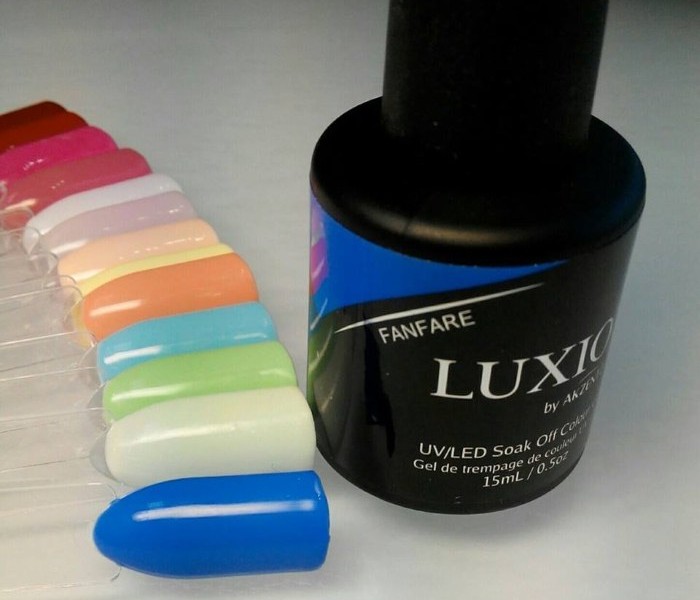 Odorless during application and drying. Easily removable at home without notching. Keeps on nails without loss of shine, chips and cracks up to 2 weeks. Approximate price from 1000 rubles. for 15 ml.
Haruyama gel polish
The Japanese firm Haruyama produces varnishes in a rich palette of colors. They have a pleasant fruity aroma, medium consistency, excellent pigmentation, and fit well.
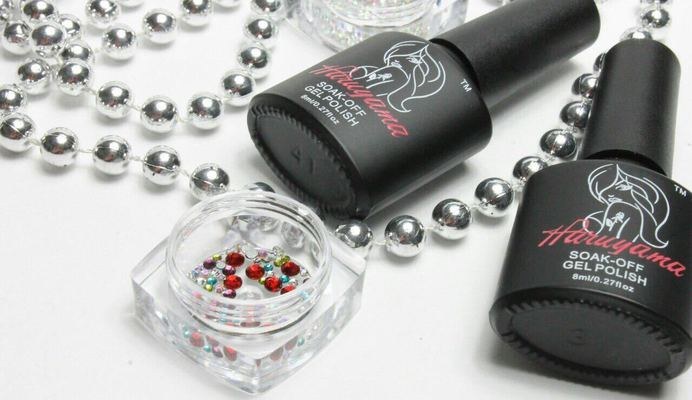 They are hypoallergenic. Approximate price from 250 rubles. for 8 ml.
TNL gel polish
The varnish of the South Korean company tnl is quite thick and viscous, the palette is constantly being updated and expanded. The bottle has a comfortable elastic brush. Lasts up to 2-3 weeks.
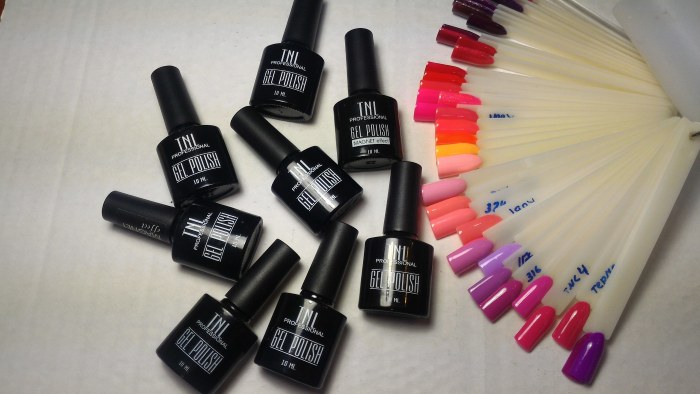 Easily removable. Price from 200 rubles. for 10 ml.
Tertio gel polish
The palette of Italian tertio gel varnishes is very rich - 100 shades. Saturation and density are good. The brush is wide, which makes it possible to immediately cover the entire surface of the plate. It goes well with the base of many popular brands.
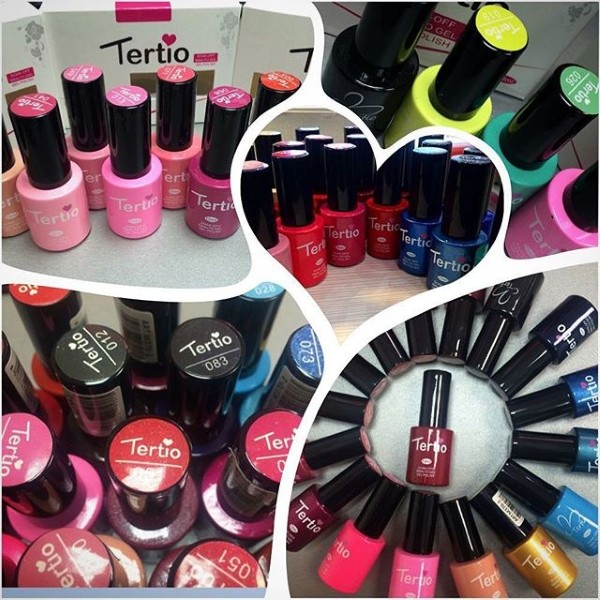 Lasts up to 3 weeks, does not break, does not chip, retains shine and color. The smell resembles pine needles. High quality varnish for little money. The approximate cost is about 300 rubles. For 10 ml.
Disadvantages: it is not easy to remove, without skill you can damage your nails.
Gel polish: how to apply at home
To make a beautiful manicure, you should prepare your nails and process the cuticles. Prepare:
- primer;
- lint-free napkins;
- top, base, colored shellac;
- a lamp for curing the coating layers;
- buff;
- liquid for removing the sticky layer.
 Applying gel polish at home:
- Grind the surface of the nails with a buff, remove the keratin layer (gloss).
- Use a lint-free cloth to wipe your nails to remove dust and grease after sanding, preparing nails for primer application. After this procedure, nails should not touch the skin or hair.
- Apply a primer or bond, leave for 1-2 minutes. It improves the adhesion of the material to the nail. Dry.
- Apply a layer of base and dry (2 min for a 36 W UV lamp). Try to make all layers as thin as possible.
- Apply the first coat of the selected colored varnish directly to the sticky layer. To paint over or "seal" the end of the nail is important for a high quality finish. Dry.
- Continue to apply colored varnish until the desired shade is obtained; be sure to dry each layer.
- Apply a finish gel or top last. It will set the finish and brighten the shine. This layer should be thicker as it anchors and protects all layers.
- Finally, remove the sticky (dispersion) layer with a lint-free cloth. For this, it is recommended to use a special liquid, not alcohol.
How to rub on gel polish
The nail industry offers a huge variety of rubs - tiny powdery glitter pigments. They give the nails a spectacular specularity and shimmer, making the manicure exquisite.
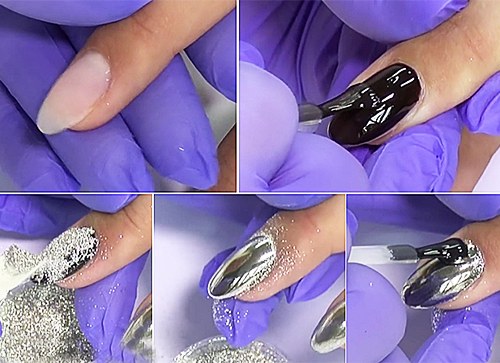
The rub is applied to the shellac before polymerization.
The procedure for applying varnish and rubbing in:
- Treat the cuticle. You cannot do an edged or "wet" manicure. Use a cuticle remover and an orange stick.
- Buff with a buff.
- Apply the base, "seal", that is, lubricate the cut of the nail with the base.
- Apply a thin layer of shellac.
- Rubbing. Apply glitter pigment to a sticky layer. The technique is performed with foam rubber, brush or finger. Rub the glitter firmly into the nail with a thick layer.
- Dry.
- Apply a glossy top to your nails.
To get a mirror manicure, rub in a top or shellac, which does not have a sticky layer.
How to apply glitter to gel polish
You can decorate a part of the nail, the entire surface with glitter, make all nails equally shiny, or select only one finger. It all depends on desire and imagination.
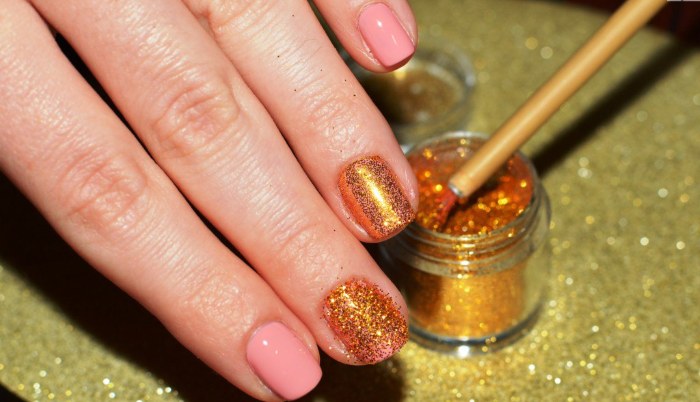 After applying the main layer of shellac and drying it, mix dry glitter with clear varnish and apply with a brush to nails. Dry. Put the fixer on top and dry again.
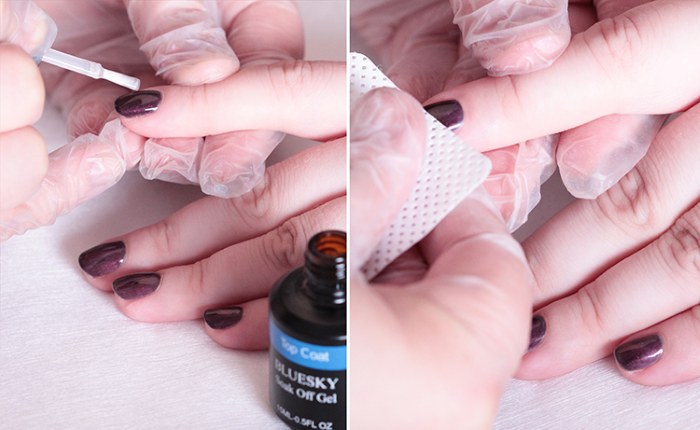
How to remove gel polish at home
You need to remove gel polish at home according to the rules. Otherwise, your nails may be damaged. Here are two ways to help you remove nail polish without damaging your nails.
Method 1:
- Lubricate the cuticles with oil to protect against the action of acetone.
- Dip your nails into a container of nail polish remover containing acetone (10 min.).
- Remove the peeling coating with an orange stick.
- Wash the hands.
- Lubricate with cream.
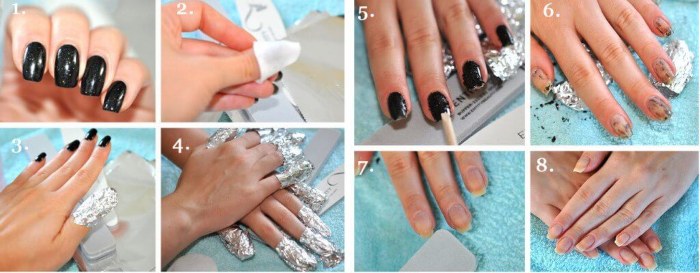
Method 2:
- Cut 5 cotton pads in half and cut 10 foil sheets 7x8 cm in size.
- Lubricate the cuticles with oil.
- Moisten the discs in acetone, cover your nails with them, wrap them tightly in foil on top. Keep up to 10 minutes.
- Use a stick or new discs soaked in acetone to remove the coating that has come off the nail.
- Wash your hands, moisturize with cream.
Following these simple rules will help keep your nails beautiful and healthy.
How to apply gel polish correctly: the secrets of professionals
Why, despite the observance and procedure for applying shellac, it chipping, cracking and losing its beauty ahead of time. Professionals reveal small secrets to help avoid these defects:
- The edge of the nail must be absolutely smooth so that when the cut is sealed, the coating does not collect in lumps. In this case, the consequences will be the chips of the coating.
- A poorly degreased nail plate will weaken the grip and cause chips. Do not replace the degreaser with alcohol or acetone.
- The primer should be mandatory and only acid-free.
- The base should be applied in a thin layer, avoiding getting under the cuticles and rollers.
- After drying the base, it is better to remove the dispersion layer.
- At home, you should first dry 4 fingers, and then your thumb (UV lamp). In this case, the coating will spread evenly.
- When applying varnish, it is better to use 3 thin coats than 2 thick ones. Thick layers can cause bubbles and swelling when drying.
- It is better to apply the top with a separate brush and dry well.
- After the end of the manicure, the dispersion layer should be removed only with a special liquid, and not with alcohol or acetone, so as not to get an unexpected chemical reaction and spoil your efforts.
- Lubricate the skin around the nail with oil and repeat this periodically so that the nails receive nutrition even under the coating.
Video about applying gel polish
Detailed instructions on how to apply gel polish to the nail plate:
Features of applying gel polish at home:
Technology and secrets of applying gel polish:
Gel polish will decorate your hands, making them well-groomed and beautiful for a long time.
Gel polish is very convenient. Especially if you have no time to do manicure yourself. The nails are always neat and beautiful. The main thing is to take a break after 3-4 months.